
Web Client
With Quark Publishing Platform Web Client, remote writers and editors can use a Web browser to perform many Quark Publishing Platform operations. Quark Publishing Platform Web Client users can log on to Quark Publishing Platform Server, create articles based on Quark Publishing Platform Job Tickets, check out and edit QuarkCopyDesk articles in a Web browser, check out other assets to edit in separate applications, and check the assets back in to Quark Publishing Platform Server.
Quark Publishing Platform Web Client users can also use the Check In Other feature to put new files in their workflow (including QuarkCopyDesk articles, QuarkXPress projects, and other files).
Quark Publishing Platform Web Client includes many of the features available in the Workspace Browser palette in Quark Client, QuarkXPress, and QuarkCopyDesk, including the following:
-
The Favorites area, the Assignments area, the My Searches area, the Saved Searches area, and the Collections area (including the ability to work with collections and collection templates)
-
The subcollections pane
-
The search interface
-
The search results pane
For more information, see User interface.
Logging on with Quark Publishing Platform Web Client
Quark Publishing Platform Web Client enables access to Quark Publishing Platform Server through a Web browser. (For a list of supported browsers, see the Quark Publishing Platform ReadMe.)
You must enable cookies in your Web browser for Quark Publishing Platform Web Client to work correctly.
To log on to Quark Publishing Platform Server using Quark Publishing Platform Web Client:
-
Launch a supported browser.
-
In the URL field, enter the computer name or IP address and port number for your Quark Publishing Platform Server followed by
/workspace/(for example:http://10.1.5.30:61400/workspace). The landing page displays.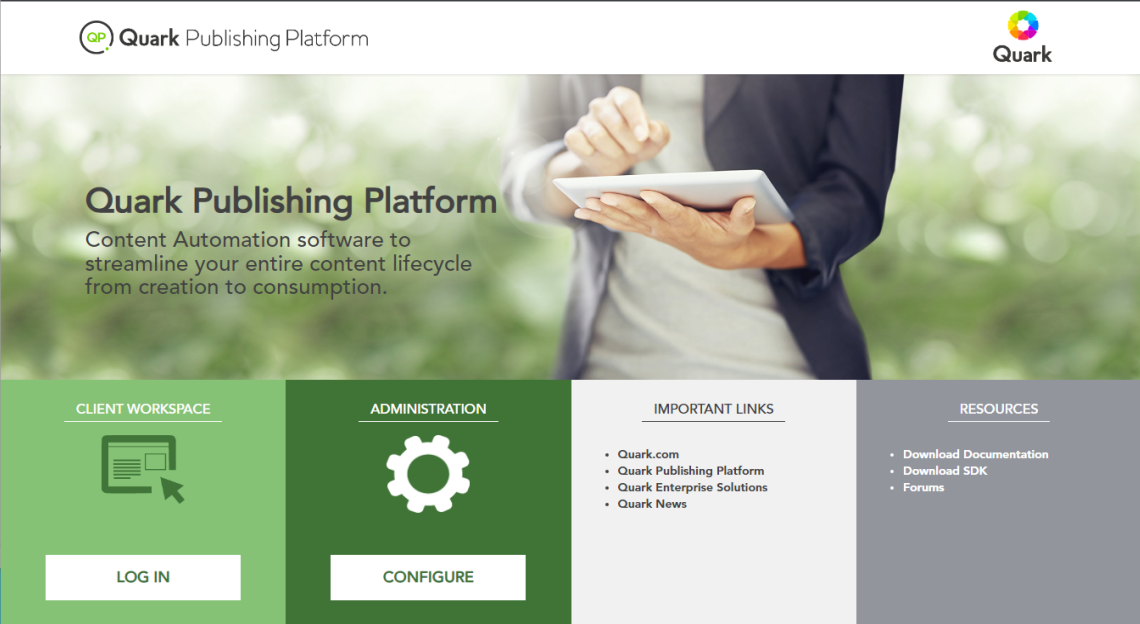
-
Click LOG IN to log on to Quark Publishing Platform Server or CONFIGURE to administer Quark Publishing Platform Server. The Log On page displays.
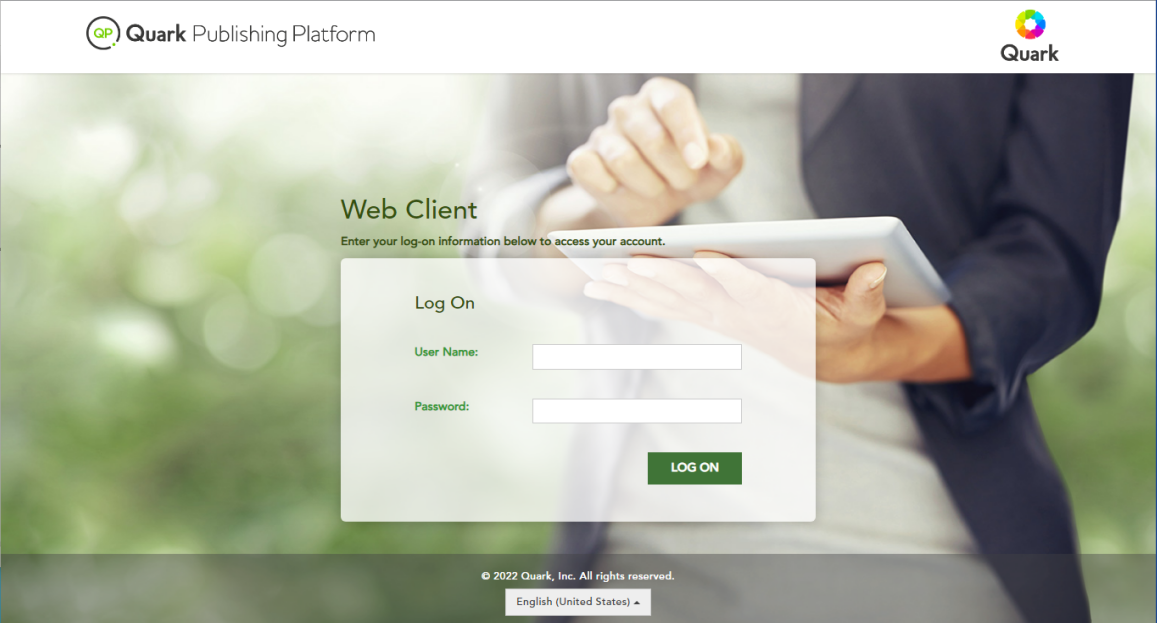
Quark Publishing Platform Web Client lets you log on to Quark Publishing Platform Server with a Web browser. -
Enter your user name in the User Name field and your password in the Password field, then click Log On.
-
If the log on process is successful, the Quark Publishing Platform Web Client screen displays your assignments.
If you close all your Quark Publishing Platform Web Client windows or if your network
connection is broken, you will be logged off within two minutes. However, administrators
can change this setting by adjusting the "session-timeout" variable in the "Web.xml"
file located in the "WEB-INF" folder (QPP Server/webapps/Workspace/WEB-INF).
Your log-on password might be case-sensitive, depending on your administrator's specifications. Also, check with your Quark Publishing Platform administrator to verify if your Quark Publishing Platform user name and password are the same as your network user name and password.
Offline mode
Platform allows you to work on assets that have been checked out when you are offline, without being connected to the Platform server.
Offline mode is only supported on Chrome browsers and requires HTTPS configuration.
Platform will automatically detect when you are not connected to the sever and allow you to go into offline mode.
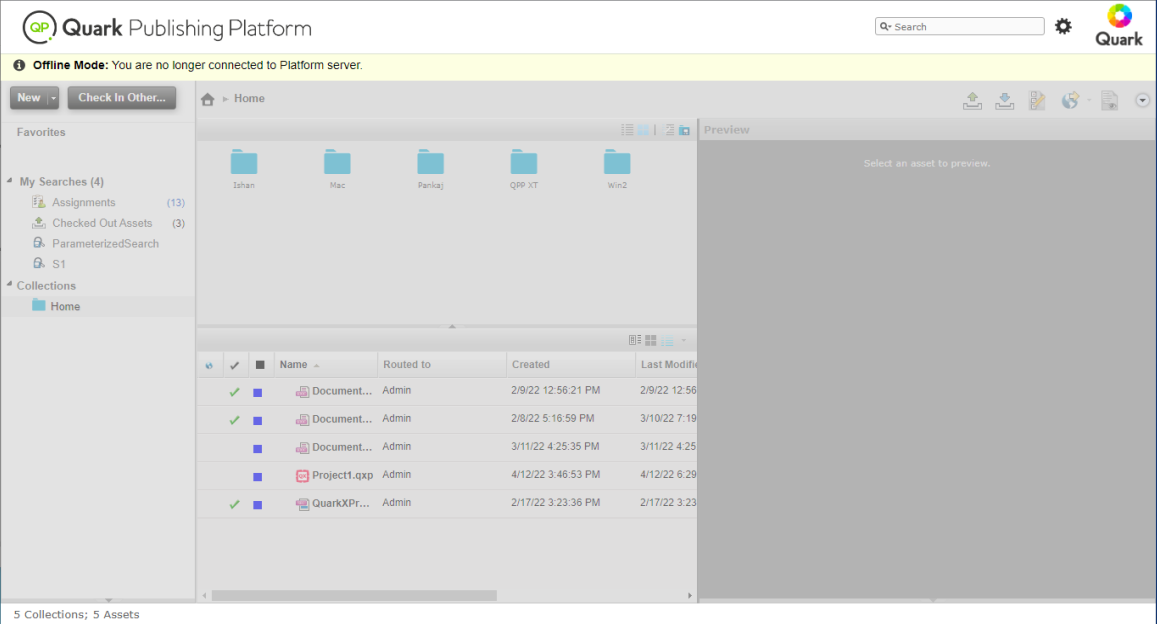
Several features of Platform are limited when you are in offline mode:
-
You will only be allowed to work on assets that had already been checked out before you went into offline mode.
-
The Checked Out Assets link will only list smart documents that are currently checked out. Other assets such as images, QuarkXPress projects, etc. will not be listed.
-
While in offline mode, any changes made to documents will not be reflected in the Preview pane.
Platform will automatically detect when the server is available and will return you back to online mode.
Changing password
You can change your Quark Publishing Platform log-on password after you log on with Quark Publishing Platform Web Client.
-
Choose Change Password from the gear menu in the top right corner of your browser window. The Change Password dialog box displays.
-
Enter your password in the Old Password field.
-
Enter your new password in the New Password field.
-
Enter your new password again in the Confirm New Password field, and click OK.
Customize search results display
To control which attribute columns display in the Search or Assignments tabs:
-
Choose Customize Current View from the view menu. The Configure Columns dialog box displays.
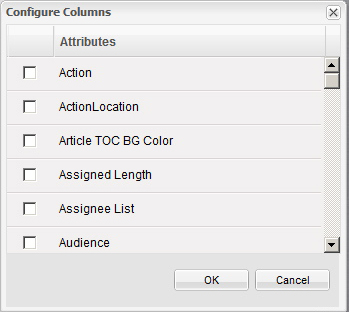
Configure Columns tab -
Check the attributes you want to display as columns in the Web Client window.
You can drag column headers to reposition columns in the search results display.
Searching in Web Client
Searching in Web Client works the same way as searching in other Quark Publishing Platform clients. For more information, see Performing a search.
A Web Client user has the ability to edit, delete, duplicate, rename and share searches. Right-click on the desired saved search, and choose an option from the drop-down context menu.
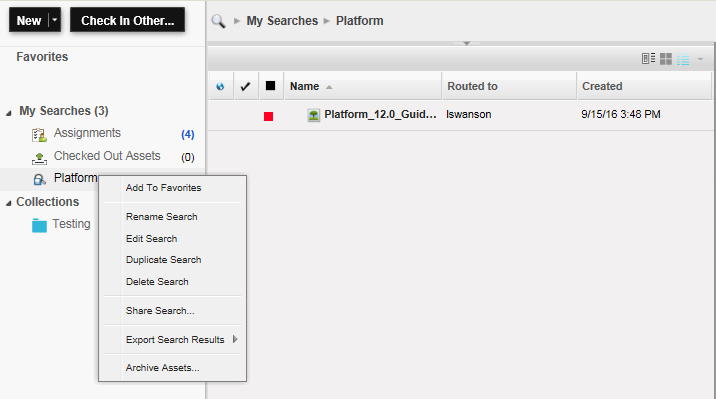
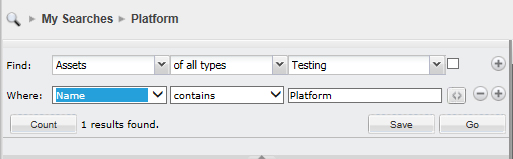
Alternatively, you can click on the arrow to open/edit a saved search.

A dialog displays allowing you to edit a saved search:
Managing favorites
The Favorites area in the Workspace navigation pane of the Workspace Browser is used to store links to often-used collections and searches for easy access.
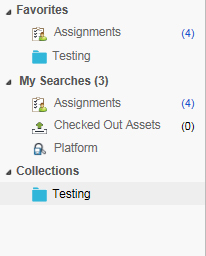
To add an asset to the Favorites area, right-click the desired asset and choose Add To Favorites from the context menu.
To delete an asset from the Favorites area, right-click the asset to be deleted and choose Remove From Favorites from the context menu.
Archiving and Restoring in Web Client
A Web Client user now has the ability to archive and restore assets. Archiving can be done from a search of collection(s) or asset(s). Archiving and restoring assets requires the "Enable Asset Archiving" privilege.
Archiving assets in Web Client
To archive assets:
-
Display the Workspace pane and select one or more assets to archive.
-
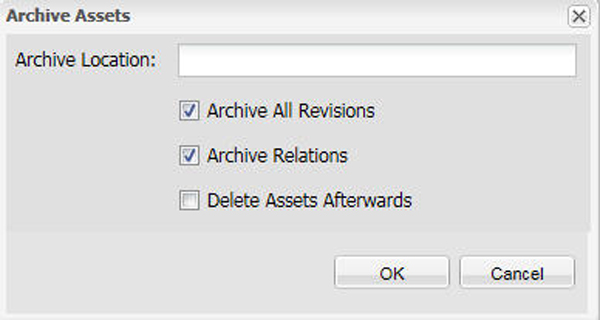
Right-click to open the context menu. Select the Archive Assets option. The Archive Assets dialog box displays:
-
Specify a folder for storing the archives. This folder should exist on the machine on which Quark Publishing platform server is running. Select the options you want to apply and click OK.
-
The selected assets are copied to the location you specify, and the attribute information for these assets is combined in a single XML file.
If Delete Assets Afterwards is checked, Quark Publishing Platform will delete the assets after the archive process. If Delete Assets Afterwards is unchecked, the original assets remain on Quark Publishing Platform Server.
Quark Publishing Platform confines an archive file and its corresponding XML file to a single folder. When you name the XML file and the folder that contains it, you can identify archive characteristics, such as the date the archive was created. Using descriptive names will help you identify the archive if you need to restore the assets later.
Restoring assets in Web Client
In versions 9 and later of Quark Publishing Platform, restoring a project also restores the corresponding versions of all assets attached to that project, and all of those assets are attached to the project. However, if you revert to a previous version of a project, any attached assets are detached.
To restore assets:
-
At the far right of the wokspace toolbar, click the
 icon to expand the drop-down menu. Choose Restore Assets from the menu. The Restore dialog box displays.
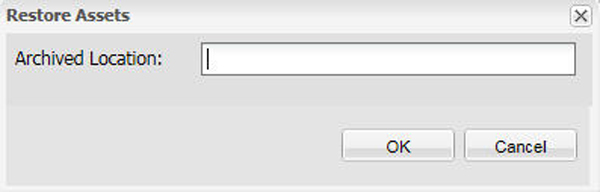
Use the Restore dialog box to locate the archive file you want to restore. -
Specify the location of the archived asset you want to restore and click OK.
Using descriptive names for the archive folder and XML file when you create the archive will help you identify assets for restoration.
If one or more of the attributes for the archived assets are no longer part of the server configuration, you can choose alternative attributes in many cases. However, when switching attributes is not possible, the restore process skips to the next archived file. You will need to re-create the missing attribute to restore these skipped assets.
If an asset with the same name and file type is already checked in to Quark Publishing Platform Server, an error occurs and identifies the asset in the log file.
Your "Restore" log files are stored in the same folder where you store archive files. If you do not have write access to the folder where you store archive files, Quark Publishing Platform Server will prompt you to specify a location.
Using display options
You have several buttons for displaying search results and collection contents in Quark Publishing Platform Web Client.
Not all views are available in all situations.
Click List View to display assets in a list format.

Click Snippet View to display assets in a thumbnail view with snippets of text.

Click List View with Relationships to display assets in a list view where you can expand them to see their relationships.

Click Project and Page to display projects in a list view where you can expand them to see their pages.

Click List View with Relationship Status to display assets in a list view where you can expand them to see their relationships, organized by type.

Click Collection View to display search results in the hierarchical structure of the collections tree.

Click Thumbnails to display small previews of assets with attachment information, check-out status, and status identified by icons below each preview.

Click Customize Current View to choose the columns you want to display.

Previewing assets with Quark Publishing Platform Web Client
Click the Preview icon  to display a large, zoomable spread preview of the selected QuarkCopyDesk article,
QuarkCopyDesk article template, QuarkXPress project, or QuarkXPress project template.
If the selected asset is a project, you can use the tabs at the top of the Preview window to view all of the Print, Interactive, and App Studio layouts in the project.
For Print, Interactive, and App Studio layouts, the Preview window displays a flatplan view of the layout.
The Preview window remembers the last location and size.
Using the Publish features
The Web Client Publish drop-down menu displays the following options:
-
Collect for Output
-
Publish as App Studio Article
-
Publish as App Studio Package
-
Publish as HTML5 Publication
-
Publish as PDF
-
Publish as Responsive HTML5
-
Publish as QuarkXPress Project
-
Publish as ePUB
-
Publish as Rich Text Format
For more information about these options, see Publishing assets.
Editing asset attributes
You can use the Web Client Edit Attributes button  to view and change an asset's attributes. To edit asset attributes with Quark Publishing
Platform Web Client:
-
Select the asset and click Edit Attributes. The Edit Attributes dialog box displays.
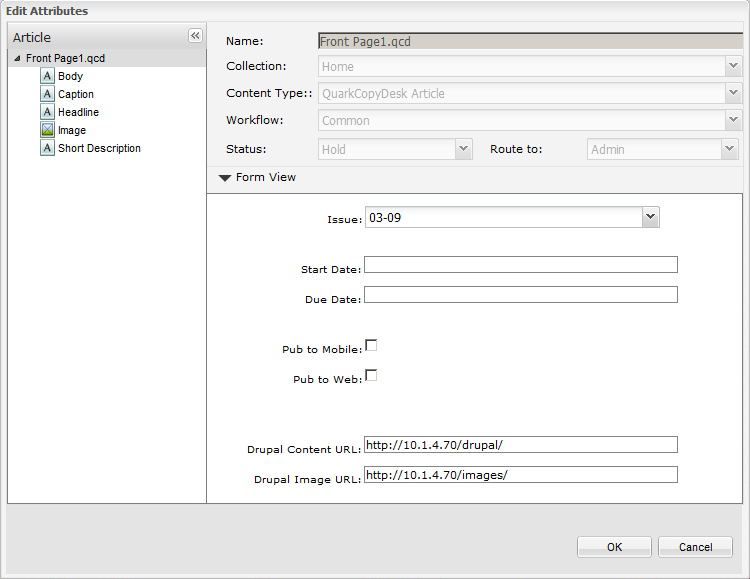
The Edit Attributes dialog box allows you to change an asset's attributes (privileges permitting). -
Expand the form view.
-
View or change attributes, then click OK. See Viewing and editing attribute information for information about the controls in the Edit Attributes dialog box.
You can re-index an asset in Quark Publishing Platform by choosing Index Again from the asset's context menu.
Viewing asset revisions
To display the View Revisions dialog box, click View Revisions  .
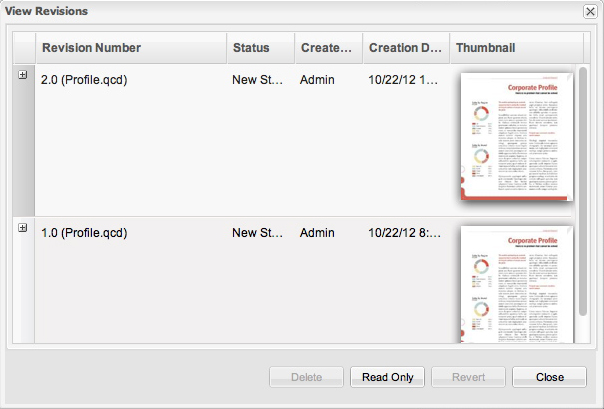
The View Revisions dialog box displays information about the revisions tracked by Quark Publishing Platform Server for the selected asset. For pictures, videos, audio assets, XML assets, and "other" files, you can open a read-only copy of a revision or revert to an earlier revision to make it become the current version. The View Revisions dialog box also shows thumbnail previews of asset revisions and allows you to delete those revisions.
Viewing relationship information
To view the relationships (including primary attachments and secondary attachments,
if any) for the selected asset, click Relationship Information or right-click the asset and select Relationship Information. The Relationship Information dialog box displays.
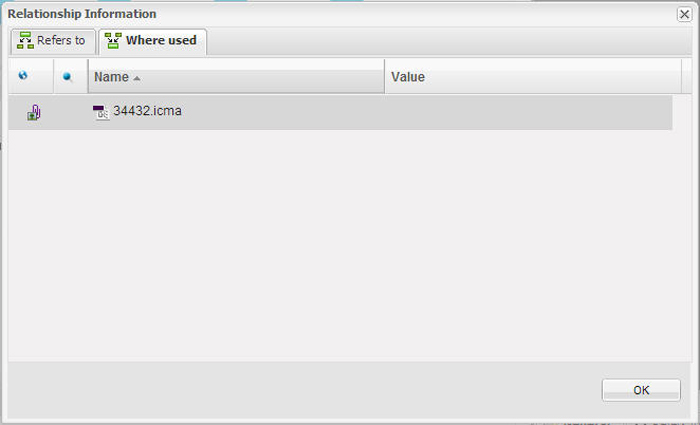
You can also select the asset to view the relationship information at the bottom of the Preview pane.
-
The Refers To tab displays all assets that the selected asset refers to (including assets that are attached to it).
If your are viewing the relationship information at the bottom of the Preview pane, you can right-click on a referenced asset and select Open Collection. This takes you to the collection of the referenced asset.
-
The Where used tab displays all assets that refer to the selected asset.
The Pinning  column is used to indicate if a reference to an asset is pinned to a specific version
of that asset. The tooltip will show the version that the reference is pinned to.
Creating articles in Quark Publishing Platform Web Client
When you create a new QuarkCopyDesk article in Quark Publishing Platform Web Client, you can base that article on collection default settings or on a template that has been checked into Quark Publishing Platform.
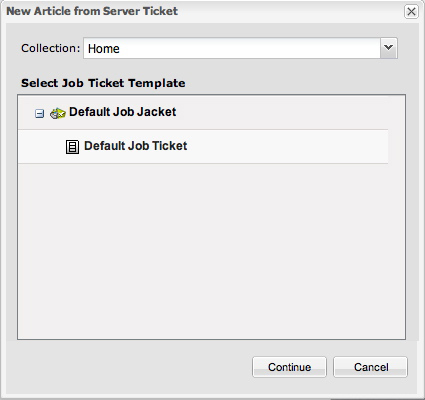
If you click New > Article From Server Ticket, the New Article From Server Ticket dialog box lets you choose a collection. The default Job Jackets file and Job Ticket for the collection display in bold and are selected by default, but you can use any Job Jackets file and Job Ticket that is available in the dialog box if you have the necessary privileges. The new article has dimensions that are based on the Job Ticket's default Layout Specification (if any) and uses the style sheets and other resources defined in the Job Ticket.
If you click New > Article From Server Template, the New Article from Server Template dialog box lets you choose from among all available article templates. You can also select a saved search for templates or create a new search for article templates checked in to Quark Publishing Platform Server.
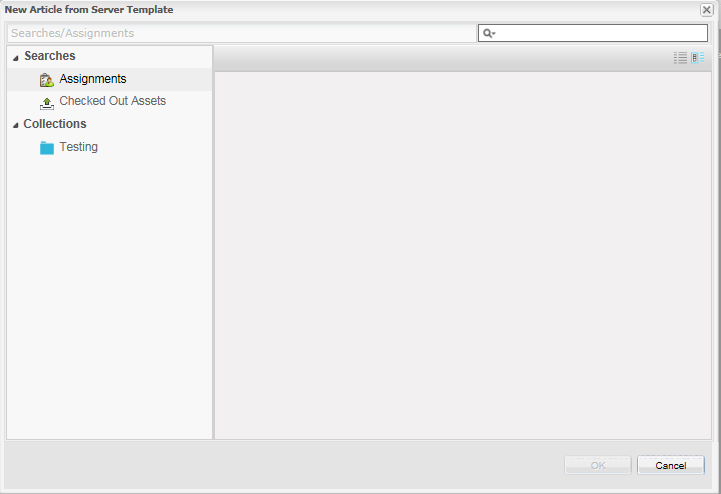
Choose the template you want to use and click OK.
Creating projects from templates in Quark Publishing Platform Web Client
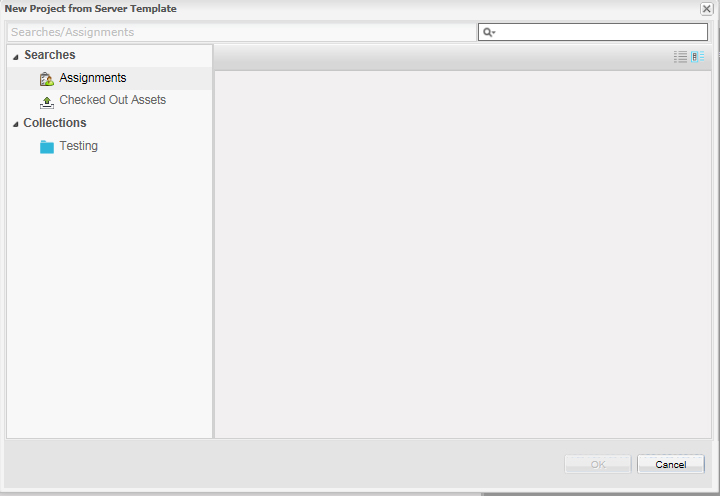
To create a new QuarkXPress project from a project template in Quark Publishing Platform Web Client, choose New > Project from Server Template in the Quark Publishing Platform toolbar to display the New Project from Server Template dialog box, then select a template and click OK. If the template contains multiple layouts, you can choose which one you want to work on.
You can edit only Print and App Studio layouts.
You can edit article templates in Quark Publishing Platform Web Client the same way you edit articles. Just check the template out, make your changes, and then check it back in.
Creating smart documents in Quark Publishing Platform
From Quark Publishing Platform, you can choose to create a Smart Document from a server template, a smart document, or a smart section.
To create a new Quark Author Web Edition smart document from a server template in Quark Publishing Platform Web Client, choose New > Smart Document from Server Template in the Quark Publishing Platform toolbar, and select either Smart Section or Smart Document from the sub-menu. Then select a template and click OK.
To create either a smart section or a smart document without using a template, choose New > Smart Section or New > Smart Document.
The smart document opens in Quark Author Web Edition. For more information, see the Quark Author Web Edition documentation.
Editing articles in Quark Publishing Platform Web Client
To edit an article in Web Client, you must first check it out. Select the article
and click Check Out  . The article opens for editing in WYSIWYG view.
If an article assignment includes a revision comment, the revision comment displays when you check out the article.
To navigate to a different page, click the page preview in the Preview pane on the left.
To show or hide the page picture (if any), click Show/Hide Page Picture.
To change the view percentage, use the zoom control at the bottom right.
To show or hide the Article Components and Style Sheets palettes, use the buttons at upper right.

You can also edit article templates in Quark Publishing Platform Web Client.
Be sure to enable pop-ups for your Web browser. You can temporarily enable pop-ups, or you can always enable pop-ups from Quark Publishing Platform Server. If you do not enable pop-ups, you will not be able to paste text into articles while editing in Quark Publishing Platform Web Client.
Editing text components
To edit a text component in Web Client, check out the article and then click the text component. Alternatively, you can double-click the name of the text component in the Article Components palette. A text-editing dialog box displays.
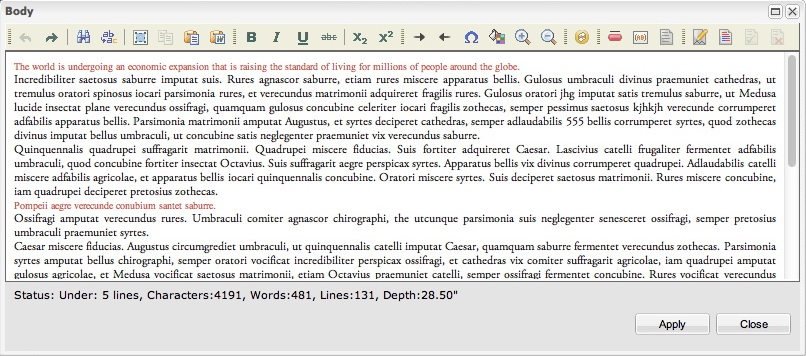
In the page preview, bullets and numbers display normally. In the text-editing dialog box, however, a generic bullet or number displays in place of a formatted bullet or number. Also, bullets and numbering do not display in the text-editing dialog box unless they have been applied to a paragraph using a paragraph style sheet.
If the tools do not display, expand the toolbar at the top of the text-editing dialog box. The tools are as follows:
-
Click Undo
 to reverse a change.
-
Click Redo
 to reverse an undo.
-
Click Find
 to display the Find dialog box. Enter text in the Find what field. Check Match case to find only instances of Find what text that matches the case you enter. Check Match whole word to avoid finding Find what text included within larger words (such as "the" in "other").
-
Click Replace
 to display the Replace dialog box. This dialog box includes the Find what field, the Replace with field, the Match case and Match whole word check boxes, and the Replace and Replace All buttons.
-
Click Select All
 to select all the text in the text-editing pane.
-
Click Copy
 to copy selected text to the Clipboard. Depending on your browser security settings,
you might have to respond to a message before you can copy text to your Clipboard.
-
Click Paste
 to display the Paste dialog box. Use Command/Ctrl+V to paste the text from your Clipboard into the field.
-
Click Paste from Word
 to display the Paste from Word dialog box, which provides controls to prevent formatting inconsistency when you
paste text copied from a Microsoft® Word document. Ignore Font Face definitions is automatically checked to prevent adding fonts when you paste text copied from
Microsoft Word. Remove Styles definitions is automatically checked to prevent the addition of Microsoft Word styles to the
style sheets defined in your Quark Publishing Platform workflow. You can edit the
pasted text in the dialog box before you click OK.
-
Click the appropriate icon to apply bold, italic, underline, strikethrough, subscript, and superscript formatting to text.
-
Click Insert Special Character
 to display the Select Special Character dialog box and enter a special character at the text insertion point. Click the character
to insert it.
-
Click Background Color
 to display the Select Color dialog box and specify a color for the text-editing pane background. For example,
if you are editing text that is white on a black background in the QuarkXPress project
to which it is attached, you can choose a dark background color so you can see the
white text. See Adjusting background color for editing for more information.
-
Click Rubi
 and Group Character
 to apply Rubi notation and create a group of characters. See Working with Rubi and Working with Group Characters for more information.
-
Click Note
 to add a note. See Using notes in articles for more information.
-
Click Tracking
 to track changes to text.
-
Click Highlighting
 to highlight changes to text.
-
Click Accept Change
 to accept changes to text.
-
Click Reject Change
 to reject changes to text.
To import text from a text file on your computer, Control+click/right click in the text and choose Import Text from the context menu. You can import text with formatting or as plain text.
If the Style Sheets palette is not displayed, click Show/Hide Stylesheet Palette  at top right of the Quark Publishing Platform Web Client window. Use the Style Sheets pane to apply paragraph and character style sheets to text.
If the Conditional Styles palette is not displayed, click Show/Hide Conditional Styles Palette  . You can use the Conditional Styles palette to apply conditional styles to text, but you cannot create, edit, or delete
conditional styles. You can insert a conditional style marker
 into text using the Insert Special Character button .
If the Bullet, Numbering, and Outline Styles palette is not displayed, click Show/Hide Bullet, Numbering, and Outline Styles Palette  . You can use the Bullet, Numbering, and Outline Styles palette to apply bullets, numbering, and outline indents to text, but you cannot
view the bullets, numbering, and indents in the text-editing dialog box. Also, you
cannot add, edit, or delete bullet, numbering, and outline styles. To view the results
of applying bullet, numbering, and outline styles in the layout, click Apply in the text-editing dialog box.
Editing picture components
To edit a JPEG, TIFF, or EPS picture component in Web Client, check out the article and then click the picture component or double-click the picture component in the Article Components palette. A picture-editing dialog box displays.
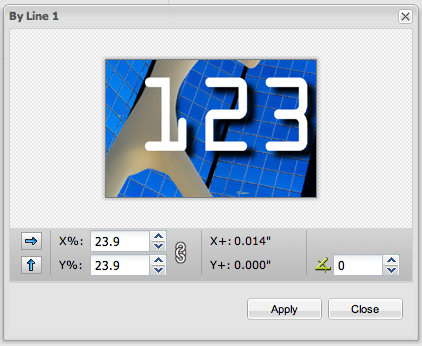
Use the arrow buttons to flip the picture horizontally or vertically.
Use the X% and Y% fields to scale the picture. The chain icon controls whether the picture scales proportionally or not.
Click and drag to move the picture in the box. The X+ and Y+ fields display the picture's origin relative to the upper-left corner of the box.
Use the field on the right to rotate the picture.
When you click Apply, the spread preview updates to display any changes you've made.
You can also manipulate pictures by Control-clicking/right-clicking their components in the page preview and choosing an option from the context menu:
-
To replace a picture with a different picture, Control+click/right-click the picture's preview and choose Replace from Server.
-
To import a picture from the local hard disk, Control+click/right-click the picture component and choose Import Picture.
-
To scale a picture to fit its picture component, Control+click/right-click the picture component and choose Scale Picture to Box.
-
To remove a picture from its picture component, Control+click/right-click the picture component and choose Clear Picture.
You cannot edit assets that have been attached to a picture component with the App Studio palette. For more information, see A Guide to App Studio.
Managing components
When you check out or create an article in Quark Publishing Platform Web Client, you can add and remove components, and you can display the Component Properties dialog box to confirm the Content Type and view or edit the Component Name and Component Type. You must belong to a user role with the appropriate privileges.
-
Check out an article.
-
To display the Article Components palette, click the Show/Hide Component Palette button
 .
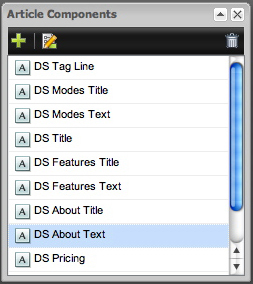
Article Components palette -
To add a component, click New
 .
The New Component dialog box displays. Enter a name in the Component Name field, choose Text or Picture from the Content Type drop-down menu, choose a component type from the Component Type drop-down menu, and then click OK.
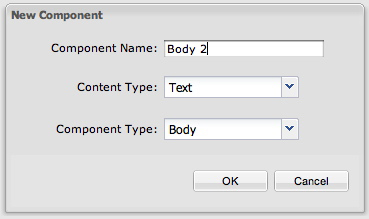
New Component dialog box -
To delete a component, select it in the Component palette, then click Delete
 .
-
To view or change a component's properties, select it in the Component palette, then click Properties
 .
Finding and replacing text in articles
To find and replace text with Quark Publishing Platform Web Client:
-
Click the box containing the text you want to edit. The text-editing dialog box displays.
-
If the tools do not display, expand the toolbar at the top of the text-editing dialog box.
-
Click Find
.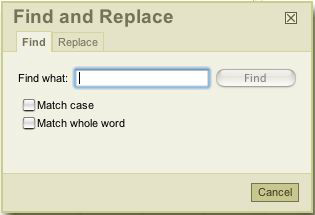
Find tab of the Find and Replace dialog box -
To locate text in an article, click the Find tab.
-
To replace text in the article, click the Replace tab.
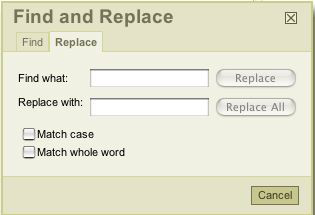
Replace tab of the Find and Replace dialog box
Adjusting background color for editing
If a QuarkCopyDesk article contains white text, the white text will not display on a white background in the Quark Publishing Platform Web Client text-editing dialog box. You can change the background color of the text-editing dialog box, but the background color you specify is only for editing. It does not apply to the QuarkCopyDesk article.
To change the background color:
-
Click the box containing the text you want to edit. The text-editing dialog box displays.
-
If the tools do not display, expand the toolbar at the top of the text-editing dialog box.
-
Click the Background Color button
. The Select Color dialog box displays. -
Select a color, and click OK. The background color of the text-editing dialog box updates.
Changing text size for editing
If a QuarkCopyDesk article contains extremely large or small type, you can use the Zoom In and Zoom Out controls in the text-editing pane toolbar to adjust the size of display in the text-editing pane without changing the copyfit information.
The Zoom control in the WYSIWYG pane does not affect the font size in the text-editing pane.
To change the size of text display:
-
Select an article in the list and click Check Out.
-
Click the text component you want to edit, or double-click its name in the Article Components palette. A text-editing dialog box displays.
-
To reduce the size of the text display, click Zoom Out
 in the toolbar.
-
To increase the size of the text display, click Zoom In
 in the toolbar.
Working with Rubi
Rubi text clarifies the meaning or pronunciation of base text. Base text can run vertically or horizontally, and rubi text usually follows the direction of the base text. There are two types of rubi text: mono rubi and group rubi. Mono rubi is rubi text that is associated with a single character of the base text. Group rubi is rubi text that is associated with more than one character of the base text. To specify rubi for one or more characters:
-
Select one or more characters for which you want to apply rubi.
-
Click Rubi
. The Rubi dialog box displays.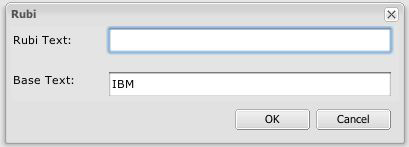
Use the Rubi dialog box to specify rubi for the selected base text. -
Enter text in the Rubi Text field that clarifies the base text .
The selected base text displays in the Base Text field. If you enter new text in this field, the new text becomes the new base text.
-
Click OK. A Rubi icon displays in place of the base text in the text-editing pane.
-
Click Apply to update the display of base text and Rubi text in the WYSIWYG view pane.
After you apply Rubi, you cannot view or edit the base text or Rubi text in the text-editing pane. To edit the base text or Rubi text, click the Rubi icon and change values in the Rubi Text and Base Text fields.
You cannot apply Rubi to grouped characters.
If you click the Rubi button without selecting text, you can enter values in the Rubi Text and Base Text fields.
Working with Grouped Characters
Use the Group Character control to create a group of horizontal characters, such as Roman characters, within a vertical line of text. Grouped characters always display horizontally and do not break at the end of a line. To group selected characters:
-
Select one or more characters.
-
Click Group Character
. The Group Characters dialog box displays.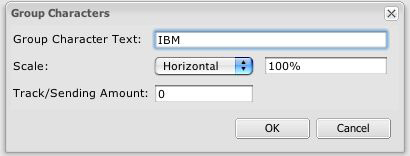
Specify scaling and character spacing in the Group Characters dialog box. -
Choose Vertical or Horizontal from the Scale drop-down menu and enter a value between 25 and 400 percent in the field to the right of the Scale drop-down menu.
-
If you want to change the character spacing for the grouped characters, enter a value in the Track/Sending Amount field.
The range for tracking values is between –500 and 500. The range for sending values is between 0.353mm and 50.8mm, but if you specify a value beyond the range and your measurement unit preference is not millimeters, the range displayed in the alert indicates your measurement unit preference.
-
Click OK.
Group characters in horizontal stories do not display scaling or character spacing, but the characters remain as a group if text reflows.
After you create grouped characters, the Group Character icon replaces the text in the text-editing pane. To edit the text, click the Group Character icon and change the text in the Group Character Text field.
If you click the Group Character button without selecting text, you can enter base text in the Group Character Text field.
Using notes in articles
If you have the privileges, you can create, edit, and delete notes in articles with Quark Publishing Platform Web Client.
-
To create a note, place the text insertion point where you want to enter the note and click the Note icon. Enter text in the note window and click OK.
-
To convert text into a note, select the text and click the Note icon. When you click OK to close the note window, the text is replaced with a note icon.
-
To open a note, click the Note icon in the text editing window. The note window displays with the note author's name and the date and time the note was created.
-
To close a note, click the close box in the note window.
-
To delete a note, place the text insertion bar to the right of the note icon and press Delete/Backspace.
If you select a range of text that contains a Note icon and start entering characters, the text (including the Note icon) is replaced by the characters you enter, and the note is removed.
Editing projects in Quark Publishing Platform Web Client
To edit a project in Web Client, you must first check it out. Select the project and
click Check Out  . The project opens for editing. If the project contains multiple Print, Interactive,
and/or App Studio layouts, you can choose which one you want to work on.
You can edit both attached and in-line articles within projects in Quark Publishing Platform Web Client. To edit an attached article while editing a project, check out the attached article using the Check Out button in the Article Components palette.
For more information on editing content in Quark Publishing Platform Web Client, see Editing articles in Quark Publishing Platform Web Client.
You can edit only Print and App Studio layouts.
You cannot edit articles that a layout artist has added interactivity to with the App Studio palette.
Editing smart documents in Quark Publishing Platform
To open a smart document for editing using Web Client, you must first check it out.
Select the smart document and click Check Out . The smart document opens for editing in Quark Author Web Edition. For more information,
see the Quark Author Web Edition documentation.
Callouts in Quark Publishing Platform Web Client
If you use Web Client to open an article or project with a component that includes a callout anchor, the callout is visible only in the page picture. Its content cannot be edited in Web Client. You can delete or reposition callout anchors, but you cannot create, cut, copy, or paste them, and you cannot apply callout styles to them. Also, you cannot associate a callout with a callout anchor, and you cannot release a callout anchor from a callout.
Checking in Other files
You can use the Check In Other feature in Quark Publishing Platform Web Client to check in assets.
-
Click Check In Other.
-
On the Windows platform, a drop-down menu displays the options: Check In File and Check In Folder (Check In Folder option is in QPP client Only). Click Check In File.
-
The Check In Other dialog box displays.
-
Click Choose File/Browse. A dialog box displays for you to select an article, project, picture, or other asset.
-
Select a file and click Choose/Open. If you are using a Web browser that supports HTML 5, you can select multiple files.
-
Click OK to display the Check in dialog box. The Check in dialog box displays. If Quark Publishing Platform server recognizes the file type, the appropriate content type is selected automatically. If Quark Publishing Platform does not recognize the file type, the content type is listed as Asset.
-
Specify a collection, workflow, and other asset attributes in the Check in dialog box.
-
Click OK to check in the asset.
You can also add assets to Quark Publishing Platform by dragging them from the file system to the Collections tree or the Search Results pane.
Editing Other Files
You can use Quark Publishing Platform Web Client to check out any type of asset . You can then use a third-party application to edit the asset. When you're finished, you can check it back in with Quark Publishing Platform Web Client.
If you use Internet Explorer on Windows to check out an asset, you can choose a location for storing the checked-out file. If you use Safari on Mac OS or Mozilla Firefox on either platform, the checked-out file is stored in the location specified for downloaded files.
If you use Quark Publishing Platform Web Client to check in an asset that has been edited with a third-party application, you must browse to select the file during the check-in process.
Deleting, duplicating and getting a local copy of an asset
You can delete, duplicate and get a local copy of an asset using Quark Publishing Platform Web Client. Your preference settings determine how the process for checked-out and attached assets works.
Deleting an asset
To specify how Quark Publishing Platform Web Client responds when you attempt to delete checked-out assets and assets referenced by other assets, use the Checked-out Assets and Referenced Assets drop-down menus in the Asset Deletion Options area of the respective Preferences dialog box. The controls are identical for both options. Choose Delete Asset Without Warning to delete checked-out or referenced assets without displaying a warning. Choose Never Allow Deletion to prevent the deletion of checked-out or referenced assets. Choose Ask Before Deleting to display an alert so you can decide each time you delete a checked-out or referenced asset.
To delete an asset:
-
Select the asset and right-click to bring up the context menu.
-
Click Delete Asset from the menu.
-
A dialog box displays for you to confirm the deletion. Click Ok to delete the asset, or Cancel to cancel the delete.
If the selected assets are checked out or attached, the delete process continues according to your preference settings.
You can select multiple assets and delete them all at the same time.
Duplicating an asset
To duplicate an asset:
-
Select the asset and right-click to bring up the context menu.
-
Click Duplicate Asset from the menu.
The asset is duplicated with Copy appended to the asset name. The original asset's references are applied to the duplicated asset.
You can select multiple assets and duplicate them all at the same time.
Getting an asset
To get a local copy of an asset:
-
Select the asset and right-click to bring up the context menu.
-
Click Get from the menu.
A local copy of the asset will be downloaded to your system.
You can select multiple assets and get them all at the same time. If you get multiple assets, a zip file of all the selected assets will be downloaded to your system.
Using the Web Client Preview pane
The Preview pane on the right side of the screen works like the Preview pane in the Workspace Browser window, except the tabs at the bottom of the Web Client version of this pane do not display as much information as they do in other Quark Publishing Platform clients. For more information, see Preview Pane.
Setting Quark Publishing Platform Web Client preferences
You can specify preferences for preview and style sheet displays and default horizontal and vertical measurement units. To specify preferences:
-
Click Preferences. The Preferences dialog box displays.
-
Click the General tab.
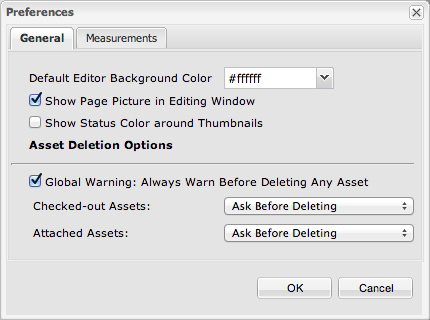
Use the General tab in the Preferences dialog box to specify display preferences in the Quark Publishing Platform Web Client window. -
To specify a default background color for text editing, enter a hexadecimal description of that color in the Default Editor Background Color control or choose a color from the drop-down menu.
-
To show QuarkCopyDesk article page pictures by default, check Show Page Picture in Editing Window.
-
To display status colors as a border around asset previews, check Show Status Color around Thumbnails.
-
To display a warning when you delete a Quark Publishing Platform asset in Quark Publishing Platform Web Client, check Global Warning: Always Warn Before Deleting Any Asset.
-
To specify how Quark Publishing Platform Web Client responds when you attempt to delete checked-out assets and assets attached to QuarkXPress projects, use the Checked-out Assets and Attached Assets drop-down menus in the Asset Deletion Options area. The controls are identical for both options.
-
To specify measurement units, click the Measurements tab.
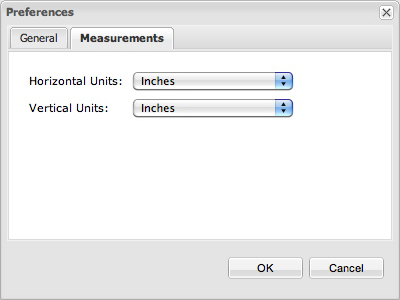
Use the Measurements tab in the Preferences dialog box to specify measurement units to display in the Quark Publishing Platform Web Client window. -
Choose one of the following options from the Horizontal Units drop-down menu: Inches, Inches Decimal, Picas, Points, Millimeters, Centimeters, Ciceros, Agates, or Q.
-
Choose one of the following options from the Vertical Units drop-down menu: Inches, Inches Decimal, Picas, Points, Millimeters, Centimeters, Ciceros, Agates, or Q.
-
Click OK.