
User interface
Users can access their Quark Publishing Platform workflow through the Quark Publishing Platform Client application, Quark Publishing Platform Web Client, and (using XTensions® software) QuarkCopyDesk and QuarkXPress. This chapter provides an overview of the Quark Publishing Platform user interface on both Mac OS and Windows. To learn how to perform application-specific tasks, see the other chapters in this document.
Roles, views, and content structure overview
Before you can use Quark Publishing Platform, you must log on to the server. By default, the Platform includes an existing user named "Admin" with a case-sensitive password of "Admin." Administrators use this name and password to log on for the first time, and Quark recommends enhancing administrative security by changing the password the first time you log on.
For all users, the name and password used to log on are associated with a particular role. This role determines which privileges you have and which functions are available to you. Consequently, your view of the Quark Publishing Platform user interface may be different from someone else's.
See Privileges to learn about specific privileges for a role.
Workspace Browser window
The Workspace Browser window displays when you log on to Quark Publishing Platform from any Quark Publishing Platform client application.
Use the Workspace navigation pane to work with files in Quark Publishing Platform.

You can control what displays in the main area on the right by clicking items in the Workspace navigation pane on the left.
-
Quick Search: Use the Quick Search field to search for Quark Publishing Platform assets according to asset name, text within an asset, or a combination of asset name and text content.
-
Favorites: Drag frequently used collections and searches to this area, and they will be available in every Quark Publishing Platform client you use. (In Quark Publishing Platform Web Client, you can Option+click/right-click an asset and use the context menu to add it to or remove it from the Favorites area.)
-
Assignments: Displays all assets that are routed to you.
-
Checked Out Assets: Displays all assets that are currently checked out by a logged on user.
-
Attachments (QuarkXPress only): Displays all assets that are attached to the active layout.
-
Depth (QuarkXPress only): Displays articles with text components that can fit in the selected text box (within a certain range). For more information, see QXP preferences: Workspace > Workspace Browser.
-
My Searches: Displays all of your searches. Click a search to see its results in the search results pane. To duplicate, delete or reload a search, Option+click/right-click it and choose Duplicate Search, Delete Search or Reload Search. You can also Option+click/right-click a search and choose Manage Searches in order to edit, share, duplicate, rename and delete searches.
-
Shared Searches: Displays all of the shared searches that you have access to. Click a search to see its results on the search results pane.
-
Unsaved Searches: Displays all unsaved searches that you have created. To delete an unsaved search, Option+click/right-click it and choose Delete Search.
-
Collections: Displays, in tree format, all of the collections that the active user has access to. You can add an asset to a collection by dragging the asset onto the collection from elsewhere in the collections hierarchy, from the search results area, or from the file system.
The options for Quark Publishing Platform Web Client are slightly different. For more information, see Web Client.
Workspace toolbar
The Workspace toolbar provides the commands listed in this section. The overflow menu on the right side of the toolbar includes many other commands.
On Windows, the controls in the Workspace toolbar are presented using the Windows ribbon interface. This provides additional features, including the Quick Access Toolbar feature.
|
Button |
Description |
|
|
Use the Assign drop-down menu to display the assignment options: Text File, Graphic, QuarkCopyDesk Article, QuarkCopyDesk Article Template, QuarkXPress Project, and QuarkXPress Project Template. QuarkCopyDesk Article displays a submenu with options to create an assignment based on an existing article or based on default specifications from your Quark Publishing Platform Server. |
|
|
Click this button to open and display the asset selected in the Workspace Browser window. The button accommodates different conditions. If you select a checked-in asset, this button checks the asset out. If you select an asset that you have checked-out, this button opens it. If you select an asset that you have open, this button brings that asset's window to the front.When you check out a file, Quark Publishing Platform automatically copies the asset to your computer, stores it in a folder that you have designated for storing checked-out assets (or, if this is your first checkout, prompts you to designate the folder), and opens the asset. |
|
|
Click Cancel Checkout to cancel an asset checkout without updating Quark Publishing Platform Server with a revision. However, if you made any changes, an alert notifies you that your changes might be lost. If you saved a revision of the asset on Quark Publishing Platform Server, the revision becomes the current version. You can also cancel the checkout of assets that you have currently checked out in other applications. |
|
|
Click Read Only to display an asset with read-only access. You can view the asset's contents, but you cannot change the asset. |
|
Get |
Click Get to move a copy of the selected asset to your computer. If you have the privilege to check in new files, you can rename the asset and check it in. |
|
|
Click Get Collection to move a copy of the selected collection to your computer. |
|
|
Click Check In to check in a checked-out asset selected in the search results pane. |
|
|
(MAC OS client) Click Check In Other to display the Check In Other File dialog box. This dialog box lets you navigate to one or more assets stored locally or on a network. You can specify an asset's attributes before checking in the asset. This dialog also lets you choose folders on the disk to be checked in along with its content and any sub folders and their contents. (Windows client ) Use the Check In Other drop-down menu to display the options: Check In File and Check In Folder. Click Check In File to display the Check In Other File dialog box. This dialog box lets you navigate to one or more assets stored locally or on a network. You can specify an asset's attributes before checking in the asset. Click Check In Folder to check in a folder and all of its subfolders. |
|
|
Click Save Revision to display the Save Revision dialog box and update Quark Publishing Platform Server with the most current content from the selected asset. |
|
|
Click Publish to publish the selected asset in one of the following formats:
|
|
|
When you click Refresh, Quark Publishing Platform performs the active search again and refreshes the search results pane. |
|
|
Click Edit Attributes to display the Edit Attributes dialog box for the asset selected in the window. Attributes are known as metadata in other systems, and they were called "headers" in earlier versions of Quark Publishing Platform. If you have the privilege and an attribute is available, you can change the attribute value in this dialog box and then click Update. |
|
|
Use the Displays drop-down menu to control how assets display in the search results pane. For more information, see View display options. For users who have the "Enable Enhanced Search Displays in Workspace Browser" privilege, this menu also includes Project, Project and Page, Collections, and Relationships options for asset searches. Also, the dialog box that displays when you choose Custom includes Group By and Attachment tabs. |
|
|
Click New Search to create a search with new search criteria. |
|
|
Use the Saved Searches drop-down menu to execute saved searches. The Saved Searches list also includes shared searches from other users. Choose Manage to display the Manage Saved Searches dialog box, which lets you add, edit, share, duplicate, and delete search operations. |
|
|
Click Preview to display a large preview of the selected image, QuarkCopyDesk article, or QuarkXPress project. The Preview window also displays navigation controls for previewing different pages of the asset. The Preview window remembers the last location and size. By default, Quark Publishing Platform asset previews include the first five pages of a PDF and the first 20 pages of a QuarkXPress project or QuarkCopyDesk article. Quark Publishing Platform administrators can adjust the number of pages in a preview by editing configuration files. See A Guide to Quark Publishing Platform System Administration for details. |
|
|
Click Selection Information to display the Selection Information dialog box. This dialog box contains information about the selected asset or assets, such as whether you can check out the assets or delete components. |
|
|
Click Relationship Information to view the primary attachments, secondary attachments (if any), and revision number for the asset selected in the window. For files, the Relationship Information dialog box also displays Layout Name, Page Name, Page Index &, and Component Name. For QuarkCopyDersk files, it displays Component Name. For XML files, it displays XPath. |
|
|
Click View Revisions to display the Revisions dialog box. This dialog box contains information about the revisions tracked by Quark Publishing Platform Server for the selected asset. You can print a revision, open a read-only copy of a revision, delete a revision, or revert to an earlier version to designate a revision as the current version. |
|
|
Click Index Again to receive updated previews from QuarkXPress Server for articles and projects. |
|
|
Click Delete to remove the selected asset from Quark Publishing Platform Server. |
|
|
Click Asset Information to display the More Info window, which lists all the attributes and values for the selected asset. |
|
|
Click View Slideshow to display a slideshow of the selected assets. |
|
|
Click Duplicate Item to create a copy of the selected asset on Quark Publishing Platform Server. |
|
|
You can export the results of a search as an HTML file, an XML file, a tab-delimited file, or a comma-delimited file. |
|
|
Click Archive to display the Archive dialog box to choose the archive location for the selected asset. For more information, see "Archiving assets" and "Restoring assets". |
|
|
Click Restore to display the Restore dialog box to restore one or more archived assets. For more information, see "Archiving assets" and "Restoring assets". |
|
|
Click Print to print the search results. |
|
|
(Windows only) Click Print Preview to display a preview of printed output. |
|
|
On Mac OS, click Customize to display the Workspace toolbar icon controls. Clicking Customize has the same effect as control-clicking the Workspace toolbar and choosing Customize Toolbar. |
 Assign
 Check Out
 Cancel Checkout
 Read Only

 Get Collection
 Check In
 Check In Other
 Save Revision
 Publish
 Refresh
 Edit Attributes
 Displays
 New Search
 Saved Searches
 Preview
 Selection Information
 Relationship Information
 View Revisions
 Index Again
 Delete
 Asset Information
 View Slideshow
 Duplicate
 Export Search Results
 Archive
 Restore
 Print
 Print Preview
 Customize
Compact View (Mac OS only)
Click Compact View to reduce the size of the Workspace Browser window and include fewer controls. Many of the other controls automatically move to the overflow menu, and the window identifies the name of the active application. For example, if you choose Compact View and then switch to TextEdit, the Quark Publishing Platform Client window displays the name of the active application and provides buttons for checking in assets, checking out assets, viewing revisions of assets, and searching for other assets.
Customizing the Workspace toolbar
You can customize your display on Mac OS by control-clicking the Workspace toolbar and choosing Customize Toolbar. A window displays that allows you to add an icon by dragging it to the toolbar or remove an icon by dragging it from the toolbar. You can add the Customize icon to more quickly access this window. You can also add spacing and dotted-line separators to the Workspace toolbar.
On Mac OS, use the Show drop-down menu at the bottom of the window to display controls (such as the Check In button) with text and icons, text only, or icons only. You can also control the size of the icons.
On Windows, you can add a command to the Quick Access Toolbar by right-clicking the command.
If you decrease the size of the Workspace Browser window, increase the size of icons, and display icons and text, the Workspace toolbar automatically generates an overflow menu that displays on the right side of the palette to include the controls that don't fit on the toolbar.
View display options
View display options let you control how assets display in the workspace. These options are available from the View menu (Mac OS only) and from the icons above the workspace area in the Workspace Browser window.
Name view
The Name submenu includes the following options.
Choose List View to display assets in a list format.
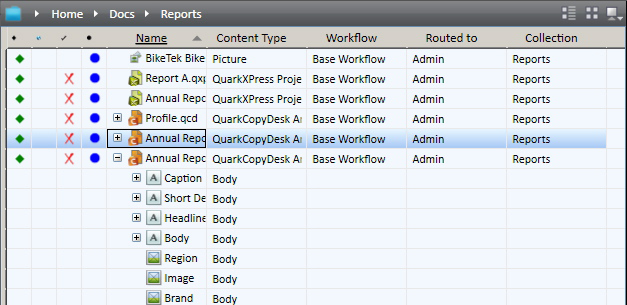
In list views, you can show and hide all columns except the Name column.
-
To sort (or reverse sort) the search results according to a column, click the column title.
-
To show or hide a column, Control+click/right-click the column title and choose the attribute.
-
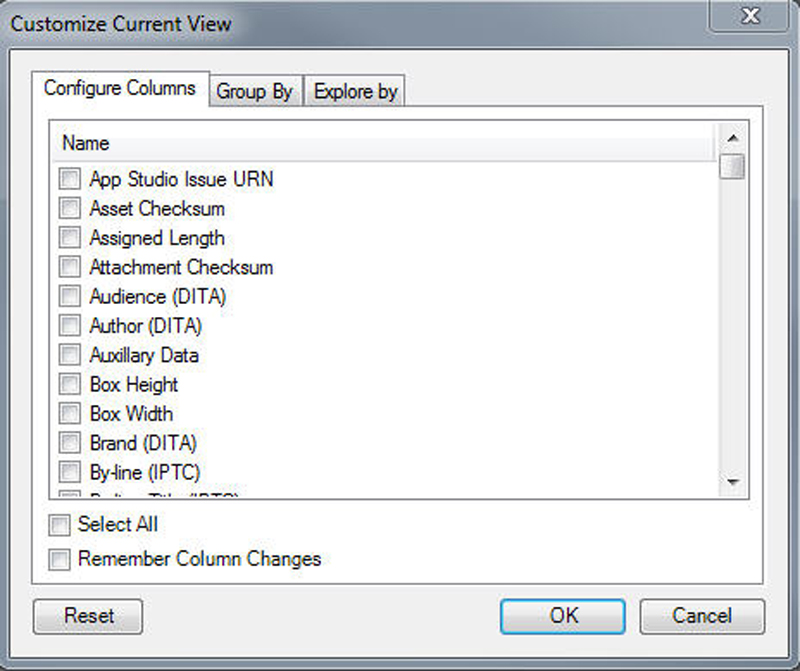
To show or hide multiple attributes, Control+click/right-click the column title and choose Customize Current View. The Configure Columns tab includes all the attribute fields for you to show or hide.
You can add the Thumbnails column to display thumbnail asset previews.
-
To reposition a column, click and drag the column title.
-
To resize a column, click and drag the column edge.
Quark Publishing Platform assets that match your search criteria but are not attached to projects are listed below Unattached. Quark Publishing Platform assets that match your search criteria but are attached to projects that have never been checked in to the Platform Server are listed below Attached to other projects. Attached assets can display below multiple projects if they are attached to multiple projects.
Choose Relationship View to display the relationships between assets. This lets you determine which assets are used by other assets.
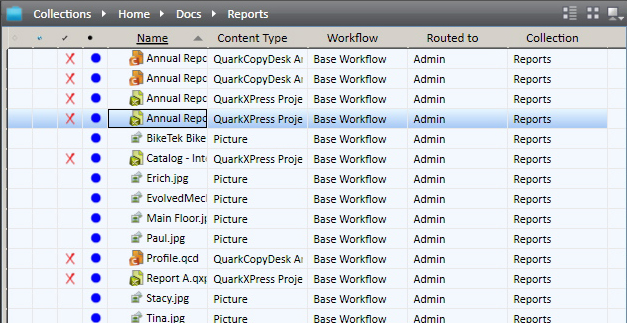
Choose Thumbnails to display small previews of assets. You can display the color of an asset's status in the border of the thumbnail preview by checking the Show Status Color around Thumbnails preference (Quark Publishing Platform Client > Preferences > Workspace). The status color border displays when you choose Thumbnails, Filmstrip, or Detailed Thumbnails View from the Displays > Name submenu.
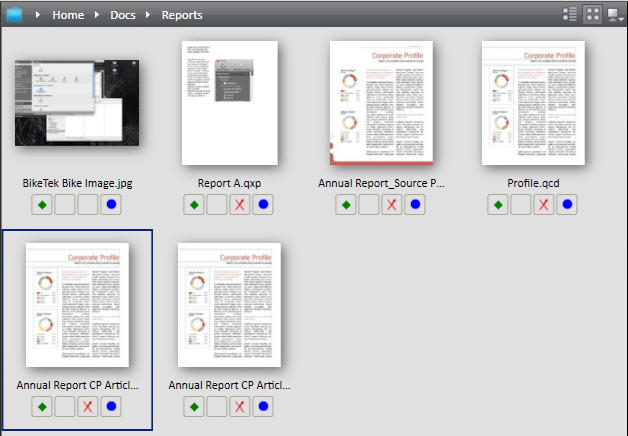
Choose Filmstrip to display a large preview of the selected asset with all other assets below it.
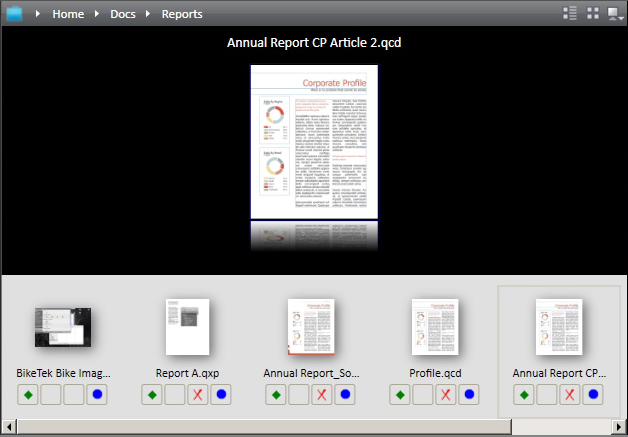
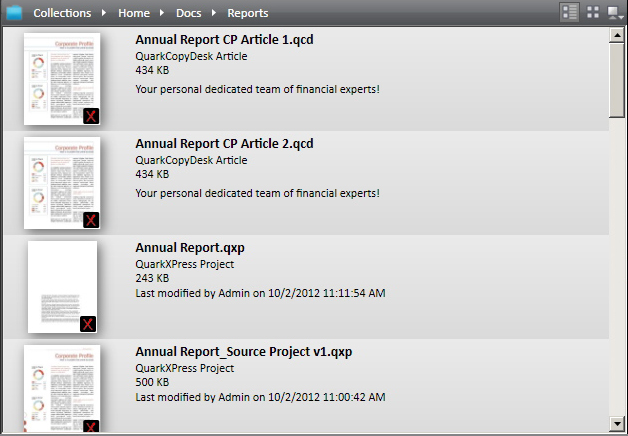
Choose Snippet View to display a thumbnail preview for each asset, with a thumbnail preview and other asset information to the right of the preview.
Project view
Project view displays search results in a hierarchical structure with QuarkXPress projects at the top. Articles and pictures attached to each project are listed below their respective projects.
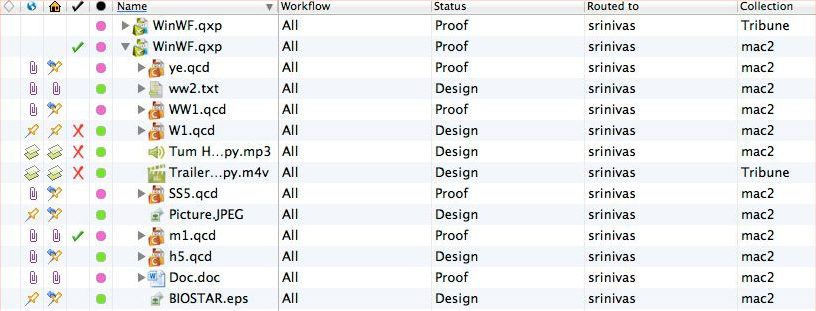
Project and Page view
Project and Page view displays search results in a hierarchical structure with QuarkXPress projects at the top. Each page is listed below its respective layout. Articles and pictures in the layout are listed below their respective pages.
If one item attached to a layout matches the search, the project and all the other attachments of the project also display.
An article or picture can display below more than one page if it is attached to multiple pages in a project.
This view is not available when you are browsing collections. To see the assets attached to a project, use List View with Attachments.
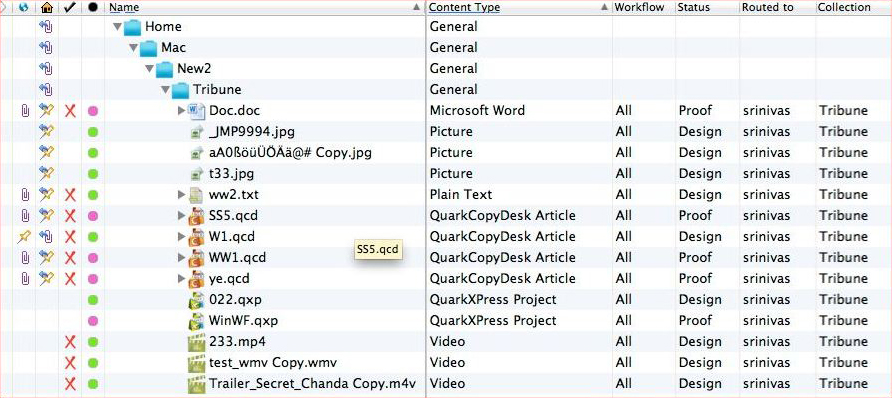
Collections view
Collections displays search results in the hierarchical structure of the collections tree.
This view is not available when you are browsing collections.
Custom view
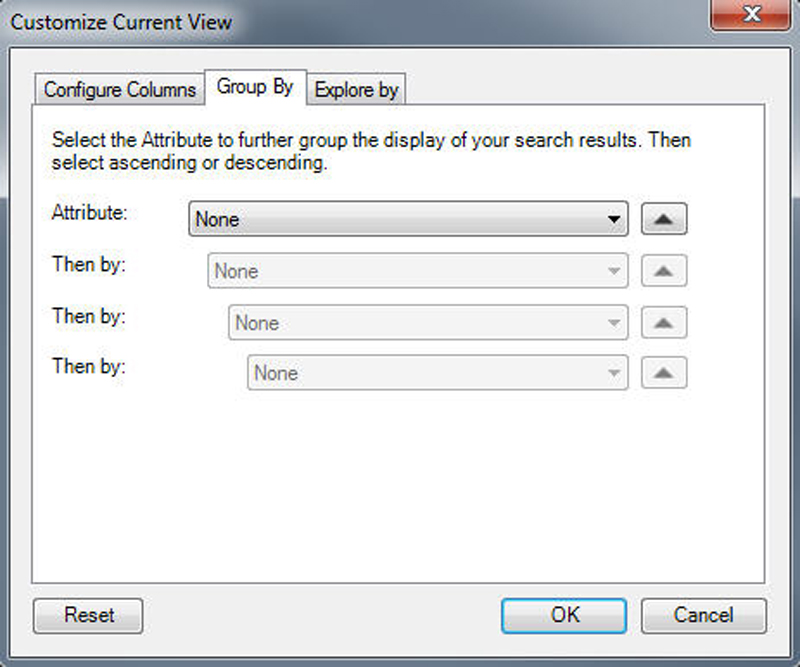
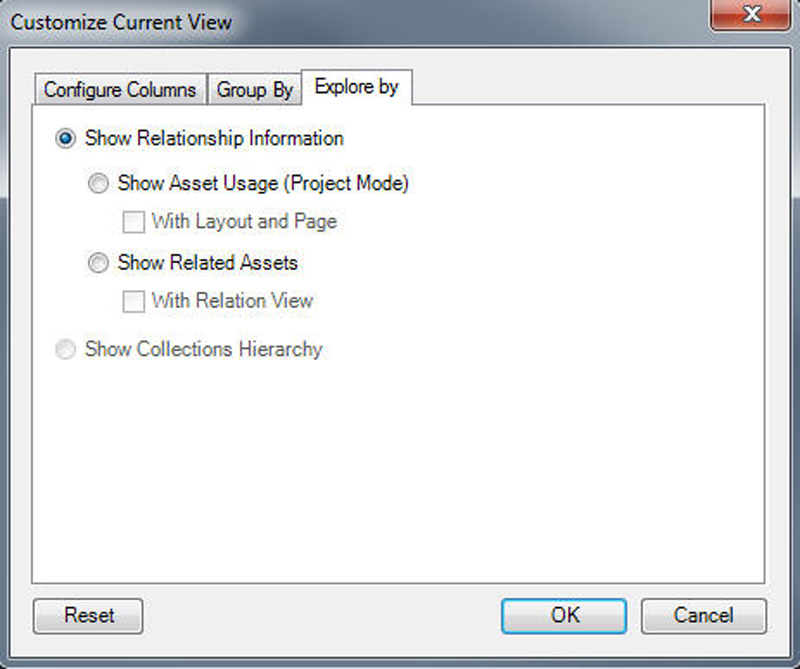
Custom view displays search results in a hierarchical structure based on four levels of attributes you specify. Choosing Custom displays a window with three tabs: Configure Columns, Group By, and Explore By.
List View with Relationships
List View with Relationships displays assets in a list view where you can expand projects to see their relationships, and expand articles to see their components.
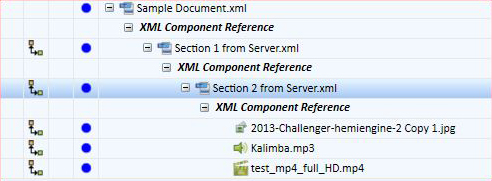
List View with Relationship Status
List View with Relationship Status displays assets in a list view where you can expand projects to see their relationships and view their statuses.
Icon columns
In Quark Publishing Platform Client and QuarkCopyDesk, the Workspace Browser window displays four icon columns that provide information about each asset. The Workspace Browser window in QuarkXPress displays a fifth icon column called Local Attachment. These icons display in columns on the left side of the Search Results list in all extended views and List View, as well as under each asset's icon in Thumbnails View and Filmstrip View. In order from left to right, the icons are as follows:
-
Clear Diamonds: A diamond indicates each asset's status, relative to the last search performed in the Workspace Browser window. A green diamond
 indicates the asset has been added to the list since the current search was executed.
A white diamond
 indicates that an asset's attributes have been updated since the current search was
executed, but the asset still meets the search criteria. A gray diamond
 and gray shade to the line indicate that another user changed the asset's attributes
and the attributes no longer match the search criteria. However, if you made the same
change to the asset's attributes, the asset would simply be removed from the Workspace Browser window. If you click the Clear Diamonds icon at the top of the column, all diamonds are removed, the Workspace Browser window is updated, and the assets no longer matching the search are removed from
the display.
Press Option/Alt while clicking the Clear Diamonds icon at the top of the column to lock or unlock the Clear Diamonds column. When the Clear Diamonds column is locked
 , asset attribute changes do not display in the Clear Diamonds column.
Clicking the diamond next to an asset name removes the diamond for that asset, but the rest of the Clear Diamonds column in the Workspace Browser window does not change.
-
Global Attachment: A symbol indicates whether each asset is attached to a QuarkXPress project as a primary or secondary attachment. Select an attachment in the Workspace Browser window and click Attachment Information to determine attachment status. You can also position your mouse over the Global Attachment icon for the asset to display a tooltip (for example, "Indirect Picture Attachment" and "Secondary Global Attachment").
-
Local Attachment (QuarkXPress only): A symbol indicates any local attachments for the active project (that is, "local" project). Select an attachment in the Workspace Browser window and click Attachment Information to determine attachment status. You can also position your mouse over the Local Attachment icon to display a tooltip (for example, "Unattached Secondary Attachment" and "Secondary Local Attachment").
-
Checked Out: A symbol indicates whether assets are checked out. If an asset is checked out by the logged-on user, a green checkmark displays. If an asset is checked out by another user, a red checkmark displays. If the logged-on user cannot check out the asset, a red X displays.
-
Status: A color-coded circle indicates the Quark Publishing Platform status for the selected asset. Your Quark Publishing Platform administrator defines these statuses and associates a color with each status. A tooltip for each color-coded circle displays the status name.
Preview pane
The Preview pane on the right side of the Workspace window displays additional information about the selected asset.
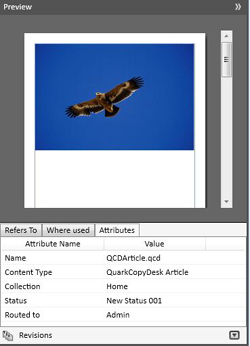
The Preview pane displays a preview of the selected asset.
-
If the asset is a project or article, the Preview pane displays a spread preview of all pages.
-
If the asset is a project, the Preview pane can display a preview of every layout in the project.
-
If the project has multiple Print, Interactive, and/or App Studio layouts, a tab displays at the top for each layout.
The Preview pane supports multiple previews based on the publishing channel, and contains a drop down menu allowing you to choose multiple ways to preview the files.
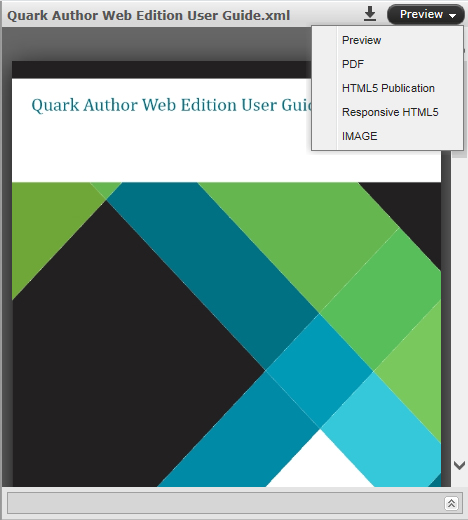
You cannot preview projects that contain Web layouts in the Preview area.
Beneath this area are the following tabs:
-
Refers To: Displays all assets that the selected asset refers to (including assets that are attached to it). You can right-click on a referenced asset and select Open Collection. This takes you to the collection of the referenced asset..
-
Where used: Displays all assets that refer to the selected asset..
-
Attributes: Displays all of the asset's attributes. Right-click on any attribute to display the Configure Attributes dialog box.
-
The Revisions area displays the number of asset revisions. Click Revisions to display the View Revisions dialog box. This dialog box allows you to see the full list of revisions, view a read-only copy of a revision, revert to a previous revision, or print the asset revision list.
Context menus are provided for references in the Refers To and Where used tabs.
If articles or projects do not display in the Preview Pane, select the assets and click Index Again in the Workspace toolbar to receive updated asset previews from QuarkXPress Server.
Menus (Quark Publishing Platform Client)
The commands in the Quark Publishing Platform Client application window's menus vary depending on the active application, the user's role, and the pane selected on the left side of the window.
Only the Mac OS version of the Quark Publishing Platform Client application has menus. On Windows, use the ribbon interface.
Quark Publishing Platform Client menu (Mac OS only)
The Quark Publishing Platform Client menu includes the following commands:
-
About Quark Publishing Platform Client: Displays information about Quark Publishing Platform Client, including the version number.
-
Preferences: Enables you to specify default settings and customize the way Quark Publishing Platform Client performs on your workstation.
-
Log On/Log Off: The Log On command displays the Log On dialog box. The Log Off command logs off the user but does not exit the application.
-
Quit Quark Publishing Platform Client: Exits the application.
If you click the close icon in the upper-left corner of the Quark Publishing Platform Client window on Mac OS, the window closes. Click the Quark Publishing Platform Client icon in the Dock to open a new window.
This menu also contains some commands supplied by Mac OS.
File menu
The File menu provides commands for printing the Quark Publishing Platform Client window on Mac OS and Windows, as well as the Quit and Log Off commands on Windows.
-
New Window: Displays a new Workspace Browser window.
-
Page Setup: Lets you configure the printed version of the active window.
-
Print: Prints the active window.
-
Close: Closes the active Workspace Browser window.
-
Export Search Results: Lets you export the search results displayed in the search results pane as an HTML file, an XML file, a tab-delimited file, or a comma-delimited file.
Edit menu
The Edit menu includes the following commands:
-
Undo <Last Operation>: Reverses the last operation performed on content.
-
Redo <Last Operation>: Reverses the last Undo command performed on content.
-
Cut: Removes the selected content and stores it on the Clipboard.
-
Copy: Copies the selected content and stores it on the Clipboard.
-
Paste: Pastes the Clipboard content at the text insertion point.
-
Select None: Deselects all the contents of the active document, Workspace window, or field.
-
Select All: Selects all the contents of the active document, Workspace window, or field.
-
Rename: Lets you rename the selected item.
-
Add: Adds a new instance of the selected item.
-
Edit: Lets you edit the selected item.
-
Duplicate: Makes a copy of the selected item.
-
Program Language: Lets you change the language of the Quark Publishing Platform interface.
-
Delete Selection: Removes the selected content or item.
-
Special Characters: Displays the Character Palette with the character options for available fonts.
View menu
The View menu includes the following commands:
-
Displays submenu: Use this submenu to control how assets display. For more information, see View display options.
-
Compact: Use this command to change the Workspace display from Expanded View to Compact View.
-
Navigation Pane: Use this command to show or hide the navigation pane on the left.
Actions menu
The Actions menu includes the following commands: for assigning assets, checking assets in and out, opening copies of assets, opening read-only versions of assets, viewing asset information, viewing asset revisions, editing asset attributes, and checking in assets in third-party file formats that cannot be opened with File > Open in QuarkXPress or QuarkCopyDesk.
-
Assign: Use the Assign drop-down menu to display six assignment options: Text File, Graphic, QuarkCopyDesk Article, QuarkCopyDesk Article Template, QuarkXPress Project, and QuarkXPress Project Template. QuarkCopyDesk Article displays a submenu with options to create an assignment based on an existing article or based on default specifications from your Quark Publishing Platform Server.
-
Check In: Click Check In to check in a checked-out asset selected in the Workspace Browser window.
-
Check In Other: Click Check In Other to display the Check In Other File dialog box. This dialog box lets you navigate to one or more assets stored locally or on a network. You can specify an asset's attributes before checking in the asset.
-
Check Out: Click Check Out to open and display the asset selected in the Workspace Browser window.
-
Read Only: Click Read Only to display an asset with read-only access. You can view the asset's contents, but you cannot change the asset.
-
Get: Click Get to move a copy of the selected asset to your computer. If you have the privilege to check in new files, you can rename the asset and check it in.
-
Publish > Publish as ePUB: Click Publish as ePUB to create an ePUB document fom a layout's Reflow view.
-
Publish > Publish as Collect for Output: Click Publish as Collect for Ouput to deliver the selected asset, along with all references (images, audio, videos, reference XML), to the configured delivery channel or to a particular location.
-
Publish > Publish as App Studio Package: Click Publish as App Studio Package to publish the selected asset as an App Studio Package.
-
Publish > Publish as App Studio Article: Click Publish as App Studio Article to create an HTML5 App Studio article from a layout and upload it to the App Studio Publishing Portal. Note that you must supply App Studio Publishing Portal credentials in QuarkXPress Server in order to be able to upload App Studio articles to the Portal; for more information, see A Guide to QuarkXPress Server.
-
Publish > Publish as PDF: Click Publish as PDF to create a PDF version of an asset.
-
Publish > Publish as HTML5 Publication: Click Publish as HTML5 Publication to publish the selected asset as HTML5 output with interactive graphics.
-
Publish > Publish as Responsive HTML5: Click Publish as Responsive HTML5 to create a responsive HTML5 version of an asset.
-
Publish > Publish as QuarkXPress Project: Click Publish as QuarkXPress Project to create a QuarkXPress project from a layout.
-
Publish > Publish as RTF: Click Publish as RTF to create an RTF file from a layout.
-
Cancel Checkout: Click Cancel Checkout to cancel an asset checkout without updating Quark Publishing Platform Server with a revision. However, if you made any changes, an alert notifies you that your changes might be lost. If you saved a revision of the asset on Quark Publishing Platform Server, the revision becomes the current version. You can also cancel the checkout of assets that you have currently checked out in other applications.
-
Edit Attributes: Click Edit Attributes to display the Edit Attributes dialog box for the asset selected in the window. Attributes are known as metadata in other systems, and they were called "headers" in earlier versions of Quark Publishing Platform. If you have the privilege and an attribute is available, you can change the attribute value in this dialog box and then click Update.
-
View Revisions: Click View Revisions to display the Revisions dialog box. This dialog box contains information about the revisions tracked by Quark Publishing Platform Server for the selected asset. You can print a revision, open a read-only copy of a revision, or revert to an earlier version to designate a revision as the current version.
-
Asset Information: Click Asset Information to display the More Info window, which lists all the attributes and values for the selected asset.
-
Edit Collection Template: Click Edit Collection Template to edit collection templates.
-
Restore: Click Restore to display the Restore dialog box to restore one or more archived assets.
-
Archive: Click Archive to display the Archive dialog box to choose the archive location for the selected asset.
Go To menu
When the Workspace pane is selected, you can choose Go To > Assignments to display all assets routed to you.
If you have administrator privileges, you can use the Go To menu to navigate to the various administration panes.
Search menu
The Search menu includes the following commands:
-
New Search: Creates a search.
-
Saved Searches submenu: Choose a search from the Saved Searches submenu to perform a search with predefined criteria. Choose Manage to display the Manage Saved Searches dialog box. This dialog box lets you view and modify saved searches, as well as view and share searches.
-
Shared Searches: Choose a search from the Shared Searches submenu to use searches that have been shared with you. The name of the user who shared the search displays in parentheses.
Window menu (Mac OS)
The Window menu includes the following commands:
-
Minimize: Stores the active window in the dock.
-
Zoom: Displays the active window on your entire monitor.
-
Bring All to Front: Brings all active Quark Publishing Platform Client windows to the front.
-
The area at the bottom of the Window menu identifies the active window with a checkmark and lists all other open windows.
Help menu
The Help menu displays the Quark Publishing Platform Help file.
Menus (QCD)
See A Guide to QuarkCopyDesk for a detailed explanation of QuarkCopyDesk menu commands. The information below applies only to QuarkCopyDesk in a Quark Publishing Platform environment.
When you Control+click/right-click in the layout or on an item, the Platform submenu makes it easy to get to the commands that are appropriate in the current setting.
QuarkCopyDesk menu (Mac OS only)
The QuarkCopyDesk menu is a part of QuarkCopyDesk for Mac OS. This menu includes the following Quark Publishing Platform related commands:
-
Preferences > Quark Publishing Platform: Enables you to specify default settings and customize the way QuarkCopyDesk works on your computer. Use the Quark Publishing Platform area to specify Quark Publishing Platform specific parameters. See Setting Quark Publishing Platform preferences: QCD for more information.
File menu
The File menu displays when you install the Quark Publishing Platform XTensions software module in the "XTensions" folder in your QuarkCopyDesk application folder. This menu includes the following commands:
-
Open from Server: Displays the Check Out dialog box. This dialog box allows you to search for and check out a QuarkCopyDesk article or template (or open a read-only version of a QuarkCopyDesk article).
-
Save to Server and Close: Updates the Quark Publishing Platform Server with your most current changes, checks in and then closes the article.
-
Save Revision to Server: Updates the Quark Publishing Platform Server with your most current changes while leaving the article checked out and open for more editing.
-
Discard Changes: Discards the checkout, closes the article and makes it available for others to check out. An alert displays, allowing you to save or discard any changes made since your checkout. If you saved a revision on Quark Publishing Platform Server, it becomes the current version when you cancel a checkout.
-
Revert to Saved: Reverts the checked out article to the last saved version, discarding any changes made since opening the article.
-
Revert to Server Copy: Reverts the checked out article to the version on the Platform server, discarding any changes made since opening the article.
-
Revert to Specific Revision: Allows you to revert the checked out article to the a specific version saved on the server, discarding any changes made since opening the article.
Platform menu
The Platform menu displays when you install the Quark Publishing Platform XTensions software module in the "XTensions" folder in your QuarkCopyDesk application folder. This menu includes the following commands:
-
Attach Picture: Displays a dialog box that makes it easy for you to attach a picture to the selected checked-out picture component or direct attachment. By default, all pictures routed to you display, but you can also browse and search for other pictures.
-
Replace Picture: Displays a dialog box that makes it easy for you to replace the picture in the selected checked-out picture component or direct attachment with a new picture. By default, all pictures routed to you display, but you can also browse and search for other pictures.
-
Edit Article Attributes: Displays the Edit Article Attributes dialog box. This dialog box allows you to view and change attribute information for the active QuarkCopyDesk article.
-
View Revisions > Article: If you have an article checked out and displayed on screen, this command displays the Revisions dialog box. This dialog box allows you to display a read-only version of the article, revert the article to an earlier revision, and print the contents of the Revisions dialog box.
-
View Revisions > For All Articles: If you have the privilege and no checked-out articles are displayed on screen, this command displays the Revisions dialog box. This dialog box allows you to view article names, display read-only versions of articles, revert an article to an earlier revision, and print the contents of the Revisions dialog box.
-
Workspace Browser: Displays or hides the Workspace Browser window.
-
Log On/Log Off: Logs the user on to or off of a Quark Publishing Platform Server.
Menus (QXP)
See A Guide to QuarkXPress for a detailed explanation of QuarkXPress menu commands. The information below applies only to QuarkXPress in a Quark Publishing Platform environment
When you Control+click/right-click in the layout or on an item, the Platform submenu makes it easy to get to the commands that are appropriate in the current setting.
QuarkXPress menu (Mac OS only)
The QuarkXPress menu is a part of QuarkXPress for Mac OS. This menu includes the following Quark Publishing Platform related commands:
-
Preferences > Quark Publishing Platform: Enables you to specify default settings and customize the way Quark Publishing Platform-related tasks are performed within QuarkXPress on your computer. Use the Quark Publishing Platform area to specify Quark Publishing Platform specific parameters.
File menu
If Quark Publishing Platform XTensions software is installed in the "XTensions" folder in your QuarkXPress application folder, the File menu displays in QuarkXPress. This menu includes the following commands:
-
Open from Server: Displays the Check Out dialog box. This dialog box allows you to search for and check out a QuarkXPress project or template (or open a read-only version of a QuarkXPress project or template).
-
Save to Server and Close: Updates the Quark Publishing Platform Server with your most current changes, checks in and then closes the project or template.
-
Save Revision to Server: Updates the Quark Publishing Platform Server with your most current changes while leaving the project or template checked out and open for more editing.
-
Discard Changes: Discards the checkout, closes the project or template and makes it available for others to check out. An alert displays, allowing you to save or discard any changes made since your checkout. If you saved a revision on Quark Publishing Platform Server, it becomes the current version when you cancel a checkout.
-
Revert to Saved: Reverts the checked out project or template to the last saved version, discarding any changes made since opening the project or template.
-
Revert to Server Copy: Reverts the checked out project or template to the version on the Platform server, discarding any changes made since opening the project or template.
-
Revert to Specific Revision: Allows you to revert the checked out project or template to the a specific version saved on the server, discarding any changes made since opening the project or template.
Platform menu
If Quark Publishing Platform XTensions software is installed in the "XTensions" folder in your QuarkXPress application folder, the Platform menu displays in QuarkXPress. This menu includes the following commands:
-
Check Out > Project: Displays the Check Out dialog box. This dialog box allows you to search for and check out a QuarkXPress project or template (or open a read-only version of a QuarkXPress project or template).
-
Check Out > Article: Lets you check out the article selected in the layout.
-
Check Out > Picture: Lets you check out the picture attached to the selected picture box.
-
Check Out > Library: Lets you check out a library.
-
Check In > Project: Displays the Check In Project dialog box. This dialog box allows you to check in the active QuarkXPress project.
If you also have one or more attached articles checked out when you choose Check In Project, all articles are checked in along with the project.
You can check in a QuarkXPress template by choosing Project Template from the Content Type drop-down menu in the Check In dialog box.
-
Check In > Project With Pictures: Displays the Check In dialog box with attached and imported pictures displayed in a list on the left. This dialog box allows you to check in the active QuarkXPress project and its pictures.
-
Check In > All Local Pictures: Lets you check in all pictures that have been locally imported into the active layout. The pictures are not attached to the layout.
-
Check In > Article: Lets you check in the article selected in the layout.
-
Check In > Picture: Lets you check in the picture attached to the selected picture box.
-
Check In > Library: Lets you check in the frontmost library.
-
Cancel Checkout > Project, Cancel Checkout > Article, Cancel Checkout > Picture, Cancel Checkout > Library: Removes the asset from your computer and makes it available for others to check out.
-
Save Revision > Project, Save Revision > Article: Updates Quark Publishing Platform Server with your most current changes while leaving the project or article open for more editing.
-
Save Revision > Picture: Saves a revision of the picture attached to the selected picture box.
-
Save Revision > Library: Saves a revision of the frontmost library (if it has been checked out from Quark Publishing Platform).
-
Assign as Article: Assigns the selected text and/or picture boxes as an article.
-
Assign as Picture: Assigns the picture in the selected box as a direct attachment.
-
Attach Picture: Displays a dialog box that makes it easy for you to attach a picture to the selected picture box or checked-out picture component. By default, all pictures routed to you display, but you can also browse and search for other pictures.
-
Replace Picture: Displays a dialog box that makes it easy for you to replace the picture in the selected checked-out picture component or direct attachment with a new picture. By default, all pictures routed to you display, but you can also browse and search for other pictures.
-
Detach: Detaches any articles or pictures assigned to the selected boxes.
-
Add Component: To add a new component to an article in the active layout, select one or more boxes and choose this option. If the layout contains more than one article, the Select Article dialog box lets you choose which article you want to add to.
-
Edit Attributes > Project, Edit Attributes > Article, Edit Attributes > Picture: Displays the Edit <Project/Article/Picture> Attributes dialog box. This dialog box allows you to view and change attribute information for the active QuarkXPress project, QuarkCopyDesk article, or picture.
-
View Revisions > Project, View Revisions > Article: If you have the privilege, this command displays the Revisions dialog box. This dialog box allows you to view project names or article information, display read-only versions of projects or the active article, revert a project or article to an earlier revision, and print the contents of the Revisions dialog box.
-
View Revisions > Picture: If you have the privilege, this command displays the Revisions dialog box for the picture attached to the active picture box.
-
View Revisions > For All Projects: If you have the privilege and no checked-out projects are displayed on screen, this command displays the Revisions dialog box. This dialog box allows you to view project names, display read-only versions of projects, revert a project to an earlier revision, and print the contents of the Revisions dialog box.
-
Update > Update All: Updates all content and geometry in the active project.
-
Update > Content: Updates all the content in the active box or boxes to include the current content of attached assets stored on Quark Publishing Platform Server.
-
Update > All Content: Updates all the content in the active QuarkXPress project to include the current content of attached assets stored on Quark Publishing Platform Server.
-
Update > Geometry: Updates Quark Publishing Platform Server to include the current page geometry of the active box or boxes. This enables a QuarkCopyDesk user who is working on an article attached to the active box or boxes to have exact copyfit information for the assignment.
-
Update > All Geometry: Updates Quark Publishing Platform Server to include the current page geometry of the active QuarkXPress project.
-
Workspace Browser: Displays and hides the Workspace Browser window.
-
Log On/Log Off: Logs the user on to or off of Quark Publishing Platform.
Utilities menu
If Quark Publishing Platform XTensions software is installed in the "XTensions" folder in your QuarkXPress application folder, the Utilities menu includes the following command.
-
Redline: Displays the Redline palette. For more information, see Redlining.
Window menu
If Quark Publishing Platform XTensions software is installed in the "XTensions" folder in your QuarkXPress application folder, the Window menu includes the following command.
-
Article: Displays the Articles palette.
-
Project Attachments: Displays the Project Attachments palette, which lists the assets attached to the active layout.
Menus (Platform adapter for Microsoft Word, Excel, Visio, and PowerPoint)
The Quark Publishing Platform Adapter for Microsoft Office provides the ability to work with Platform from Microsoft Office applications natively. For details on the functionality that the Platform Adapter adds to Microsoft Office products, see A Guide to Office Adapters for Quark Publishing Platform.