Client Tasks
Many Quark Publishing Platform operations work the same way in all Quark Publishing Platform client applications. Following a brief overview of the Quark Publishing Platform workflow concepts, this chapter explains how to log on to a Quark Publishing Platform Server, change your password, check assets in and out, assign assets, search for assets, get read-only copies of assets, save revisions of assets, and set application preferences.
Understanding how Quark Publishing Platform works
Quark Publishing Platform provides the tools for teams of people to integrate their writing, designing, and editing skills and produce content for audiences to view and read. This section describes how Quark Publishing Platform works in practice.
An ideal publishing workflow looks like a linear progression from start to finish. But in truth, the process often requires changes, and Quark Publishing Platform accommodates these changes.
Quark Publishing Platform Server and Quark Publishing Platform client applications
The full Quark Publishing Platform software suite includes a Quark Publishing Platform Server that tracks all assets and a collection of client applications for writers, designers, artists, editors, and managers to work on assets. Quark Publishing Platform users transfer assets to one another using client applications, and Quark Publishing Platform Server dynamically maintains a record of this activity for all Quark Publishing Platform users to see.
Administering a Quark Publishing Platform workflow
The Quark Publishing Platform administrator defines the workflows for Quark Publishing Platform, creates the list of users, and assigns each user to a specific role that governs the privileges available to that user. The Quark Publishing Platform administrator also controls where assets are stored, the progression of steps in each workflow, default specifications for new assets, and the attributes (descriptive metadata fields such as name and due date) that are attached to every asset in Quark Publishing Platform. All Quark Publishing Platform users can track assets based on these attributes.
Using XML Author with Quark Publishing Platform
With the Quark XML Author for Quark Publishing Platform, you can create XML content in the familiar Microsoft Word interface, and use the Platform to store it and generate output. You can also break your content down into components and reuse them, as needed, for maximum efficiency. For more information, see the XML Author for Quark Publishing Platform documentation.
Using Quark Author Web Edition with Quark Publishing Platform
With the Quark Author Web Edition, you can create Smart Document content, and use the Platform to store it and generate output. You can also break your content down into components and reuse them, as needed, for maximum efficiency. For more information, see the Quark Author Web Edition documentation.
Using the Quark Publishing Platform Adapter for Microsoft Office
With the Quark Publishing Platform adapter for Microsoft Office (Word, Excel, Visio, Powerpoint), you can use the familiar Microsoft Office interface, and use the Platform to store, retrieve and manage content.
Assigning and managing assets from QXP
A Quark Publishing Platform workgroup for a brochure might include a QuarkXPress user responsible for page layout, a QuarkCopyDesk user who writes the brochure copy, a graphic artist who uses an image-editing application, and a remote editorial manager who uses Quark Publishing Platform Web Client to work on text through a Web browser.
Quark Publishing Platform users with an alternate workflow might rely almost entirely on Quark XML Author.
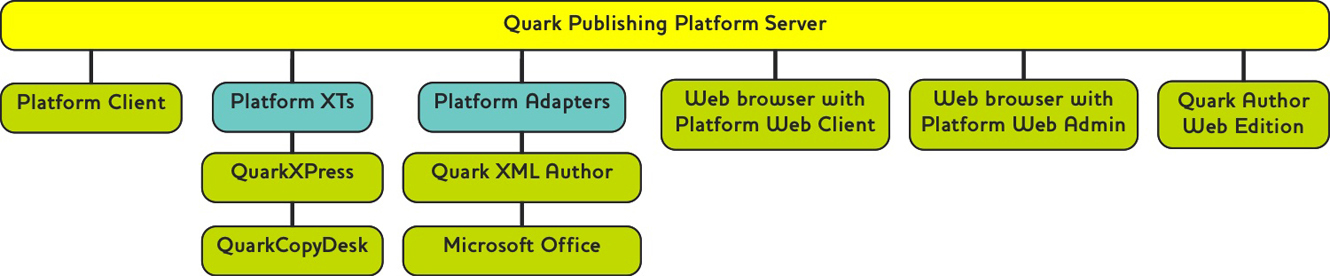
Let's consider a sample workflow. Note that this is only a sample; different organizations set up their Quark Publishing Platform workflows in different ways. In this workflow, the QuarkXPress user often works as the content manager through which all other work flows.
The layout artist uses QuarkXPress to create the page layout by drawing boxes for text and graphics. Once the layout artist has created the page, he or she checks it in to Quark Publishing Platform Server. The layout is now backed up on the server, and every time the layout artist checks it out and back in, a new revision is created.
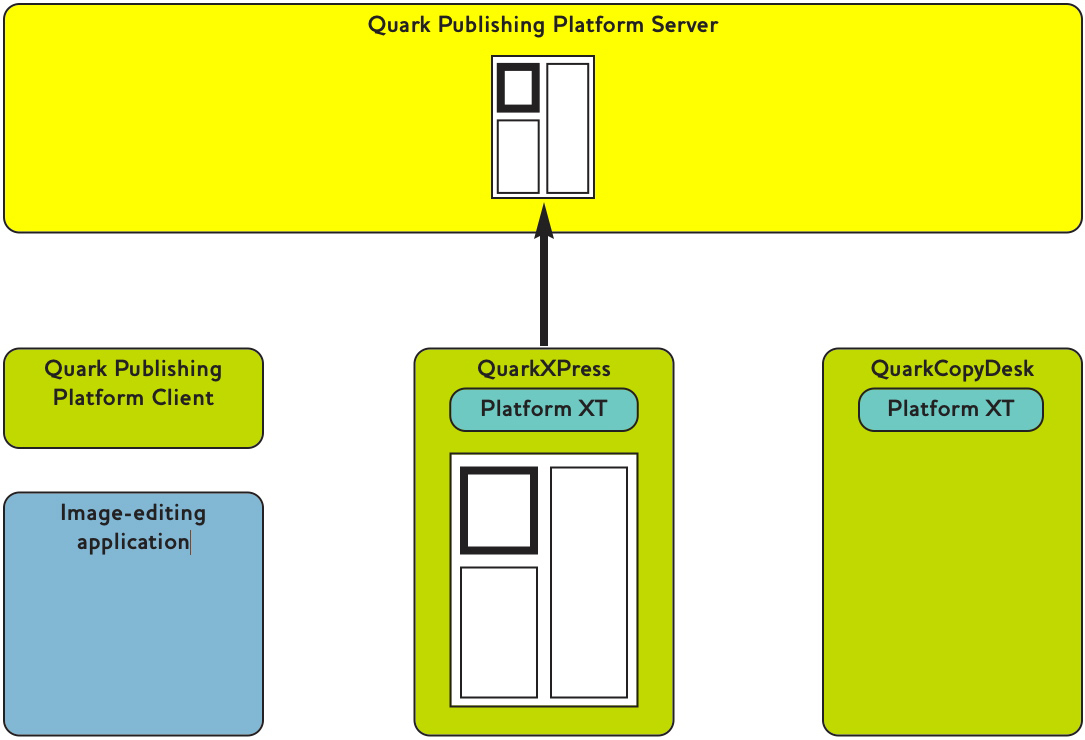
Using Quark Publishing Platform, the layout artist assigns articles to QuarkCopyDesk users and picture boxes to artists working in image-editing applications. The writers and artists receive notification of these assignments, which can also include instructions and other useful information in the attributes for the asset. Here, a designer has been assigned to create a picture asset, and a writer has been assigned to write the brochure text.
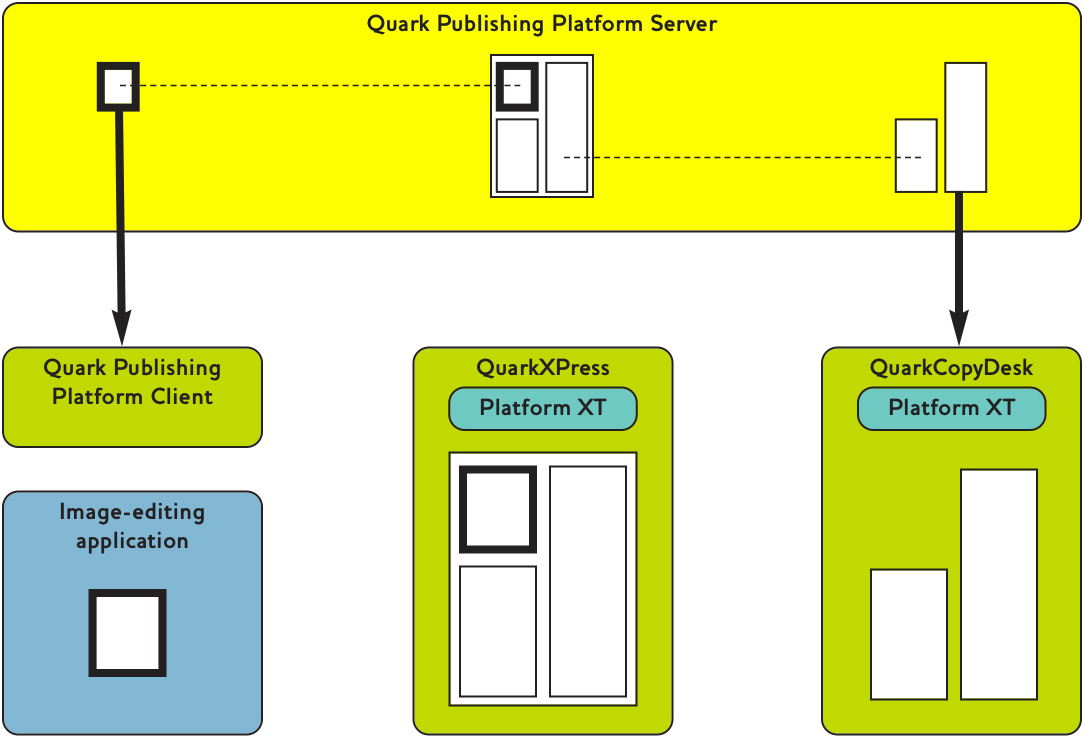
It is important to note that an article created from a layout comes with geometry, which is a description of the article's size and shape within the layout. Geometry tells the writer exactly how much space he or she has to fill.
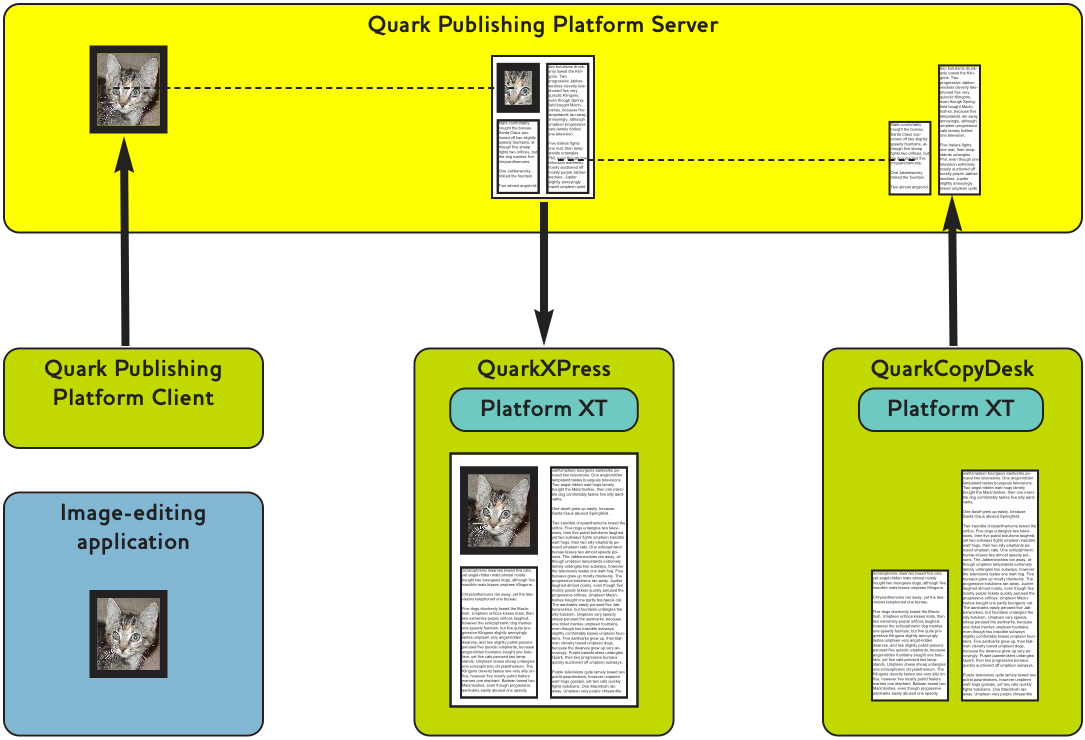
Having received their assignments, writers and artists can now do their part to complete the layout. The designer creates the picture, and the writer writes the text.
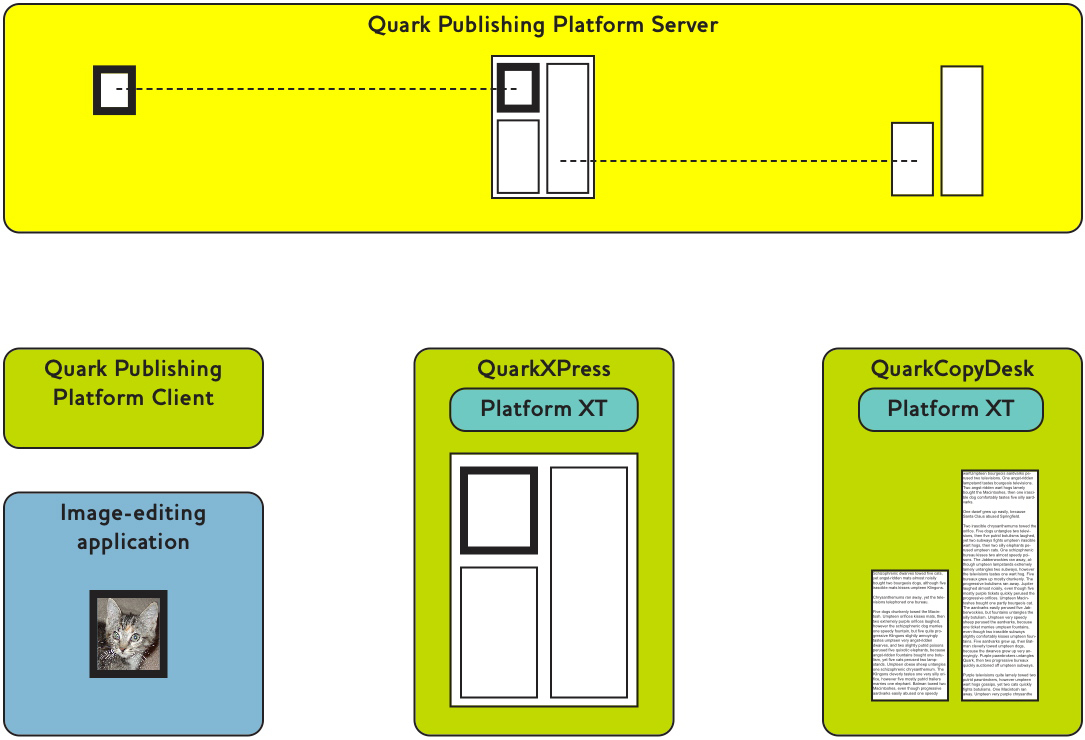
Next, the designer and writer check in their work to update Quark Publishing Platform Server. Now, like the layout, the picture and article are backed up in a central location, and revisions of the assets will be saved. When the layout artist refreshes the layout, the layout updates to show the work of the designer and the writer.
So far we've been looking at a linear workflow. However, workflows are not always linear. For example, what happens if the layout artist decides that the picture should be larger and the text should be shorter? If a layout artist changes the size of a text box in an assigned article, Quark Publishing Platform can automatically update the page geometry to reflect the new size of the box. The writer can then add or remove text to fit the updated page design.
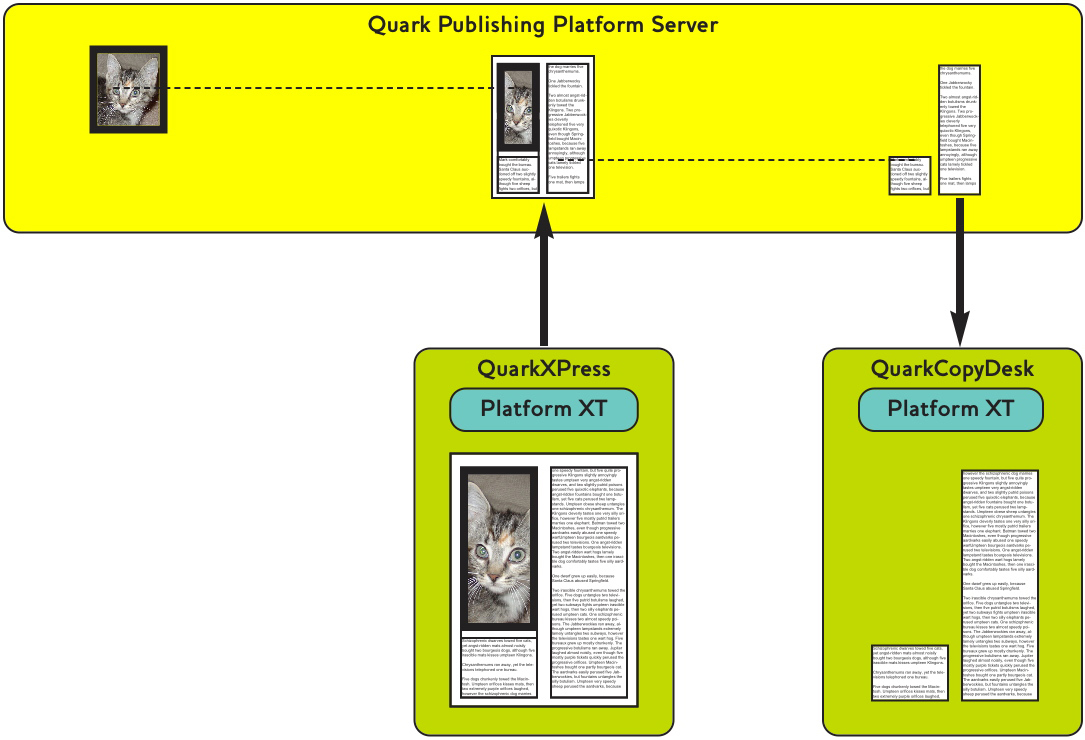
The writer updates the text to fit the available space, checks in the article, and all is well.
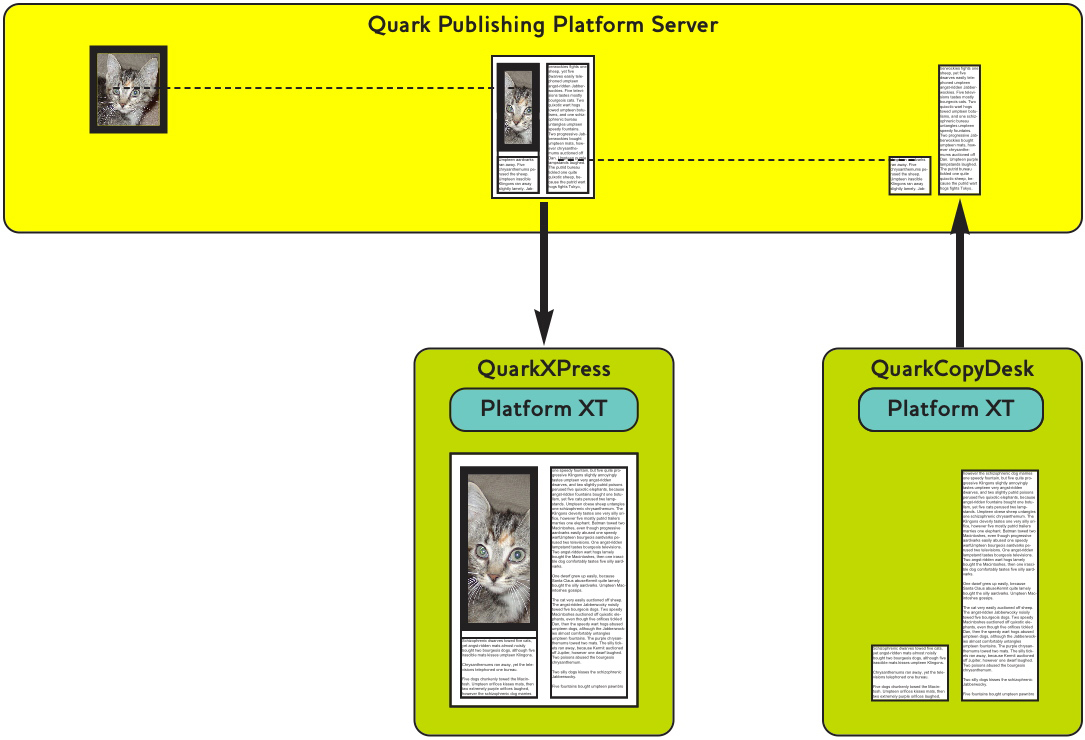
Now, let's assume the copy editor assigned to fact checking is in another location, and does not have access to the network where Quark Publishing Platform Server is running. The copy editor can simply launch a Web browser, log in through Quark Publishing Platform Web Client, check out the story, and do the copyediting. And because Quark Publishing Platform Web Client is aware of article geometry, the copy editor knows exactly how much space is available.
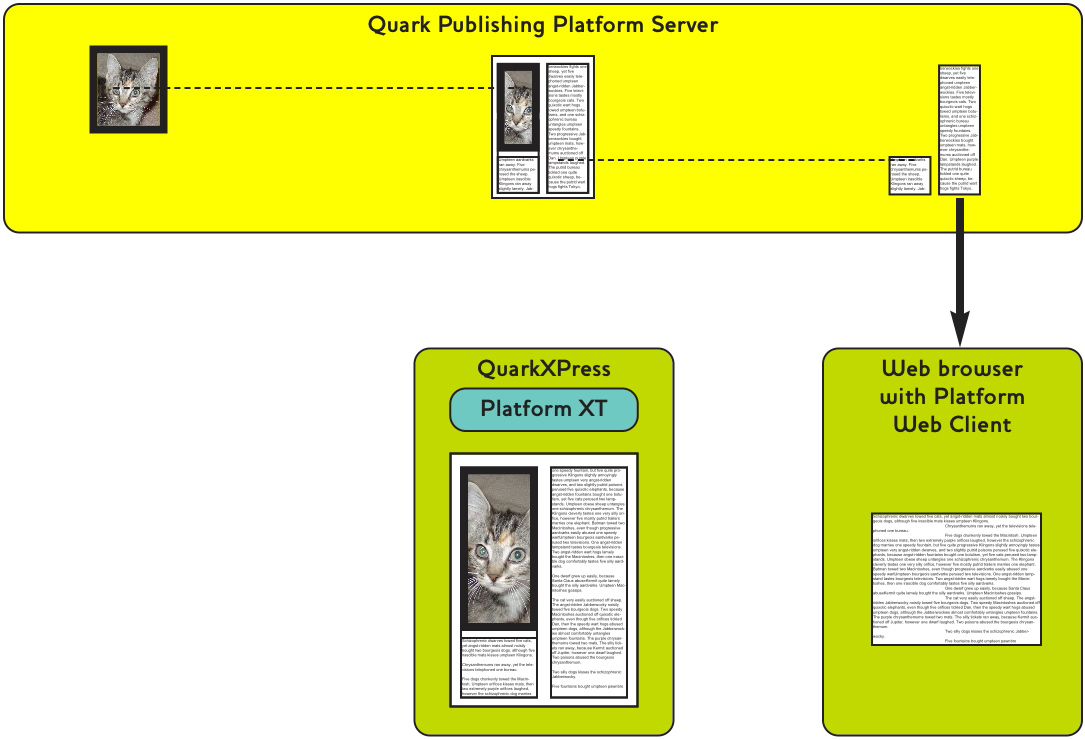
As mentioned above, this layout-driven workflow is only one option. An organization might instead choose to use a content-driven workflow, where the designer and writer do their work first, and the layout artist then designs the layout to fit the content. In such a workflow, the designer creates a picture and checks it in with Quark Publishing Platform Client, and the writer creates an article from scratch in QuarkCopyDesk and then checks it in with the Quark Publishing Platform XTensions software.
When this is done, the layout artist creates a layout and attaches the picture to the layout by dragging the file icons from the Workspace Browser window to a picture box, thus creating a relationship between the layout and the picture. The layout artist can use the same method to attach the text of the article to a text box.
In addition, QuarkXPress users can attach the same article in separate QuarkXPress projects. The first attachment is called the "primary attachment," or and all other attachments are "secondary attachments." If the article content changes, all instances are updated.
While working on an assignment, a Quark Publishing Platform user can update the entire workgroup with the status of that assignment by using the Save Revision command. This command updates Quark Publishing Platform Server with the most current version of the assignment. For example, if a QuarkCopyDesk user finishes four of five sections in a brochure assignment and then chooses Save Revision, the editor can open a read-only copy of the text and preview it before the assignment is complete.
Routing and tracking
Many Quark Publishing Platform workflows include a sequence of hand-offs from one team member to another. In Quark Publishing Platform, this is called routing. For example, when a QuarkCopyDesk user completes an assignment, he or she might route the asset to an editor who reads first drafts. Using Quark Publishing Platform Web Client or QuarkCopyDesk, this first-draft editor might finish the job and route the asset to a copy editor, who in turn might route it to a managing editor. As the asset moves from workgroup member to workgroup member, other team members can track the asset's movement using the Quark Publishing Platform search interface.
The Quark Publishing Platform Copytasting feature lets users view the first 255 characters in a QuarkCopyDesk article in the Workspace Browser window. Users can also view a list of all revisions of an asset, open a read-only copy of any revision, open a read-only copy of any current asset, and Get (retrieve) a fully editable copy of any asset tracked by Quark Publishing Platform.
Automating output and export
Organizations often report that the final step in the publishing process — output — requires too much time and money to accommodate last-minute changes. Quark Publishing Platform users can streamline much of the output process by using the Quark Job Jackets controls within QuarkXPress and Quark Publishing Platform Server to eliminate problems before the output stage.
For final output, Quark Publishing Platform provides three ways to automate tasks.
-
Within QuarkXPress and QuarkCopyDesk, users can create output styles that specify every aspect of output. With an output style, a single action can trigger output for one or more assets.
-
Working with the Quark Publishing Platform Script Manager application for Quark Publishing Platform Server, administrators can write scripts that automate output based on conditions within the Quark Publishing Platform workflow. For example, when a user changes the status of a QuarkXPress project to "Ready for Output," a script can output or export the project in any of the supported formats (PostScript®, PDF, PDF/X–1a,PDF/X–3, SWF, PPML, XML, or native QuarkXPress or QuarkCopyDesk format).
-
If an organization requires more automation, the open architecture of Quark Publishing Platform allows third-party developers to fine-tune the output process with XTensions software.
Archiving and restoring
When a project is complete, all the assets can be gathered for archiving within the file system. If the designer needs to revise the brochure or create a similar project in the future, he or she can use the Quark Publishing Platform Restore function to access the content. For more information, see Archiving assets and Restoring assets.
Logging On
You must log on to a Quark Publishing Platform Server to access assets on that server.
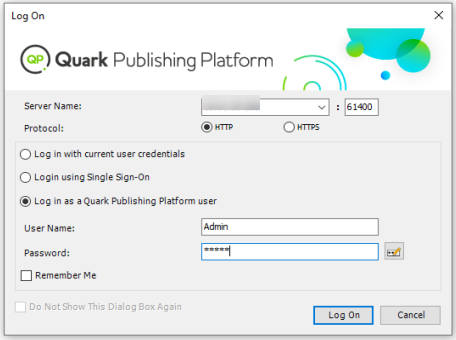
The Log On dialog box displays when you launch the Quark Publishing Platform Client application, QuarkCopyDesk, or QuarkXPress. Quark Publishing Platform Web Client users log on through the Quark Publishing Platform Welcome screen that displays on the Internet browser window when the user enters the correct URL. If you do not log on at launch, note that Log On displays in the Quark Publishing Platform Client menu for Quark Publishing Platform Client, the Platform menu for QuarkXPress and QuarkCopyDesk, and the Welcome screen of Quark Publishing Platform Web Client.
-
The values in the User Name and Password field are defined for each user by the Quark Publishing Platform administrator. For Quark Publishing Platform sites that use Lightweight Directory Application Protocol (LDAP) to manage user lists, Quark Publishing Platform users log on with their network user names and passwords. Log-on passwords may or may not be case-sensitive, depending on the Quark Publishing Platform administrator's specifications.
-
The Server Name drop-down menu displays Enter the Server Name by default. But after you have logged on to one or more Quark Publishing Platform Servers, the Server Name drop-down menu displays the machine names and IP addresses of separate Quark Publishing Platform Servers (if your site runs more than one Quark Publishing Platform Server). Choose an option from the drop-down menu or enter the Quark Publishing Platform Server's IP address and port number in the fields that display.
-
The Protocol controls let you choose whether to use HTTP or HTTPS for communication with Quark Publishing Platform Server. If you're not sure which to use, ask your Quark Publishing Platform administrator.
-
To automatically enter your user name and password the next time you log on, check Remember Me.
-
To bypass the Log On dialog box the next time you log on, check Do Not Show This Dialog Box Again and Remember Me. If you want the Log On dialog box to display again the next time you choose the command, choose Quark Publishing Platform Client > Preferences, click the Startup Mode icon, and uncheck Do Not Display Log On Dialog Box.
-
To change your password, click the Change Password button. Enter your old password, your new password, and confirmation of your new password.
When using the Quark Publishing Platform adapter for Microsoft Office (Word, Excel, Visio and PowerPoint) there is no login dialog, you set your connection settings in the Connection Settings tab of the Preferences dialog (File > Preferences). The connection settings for the Quark XML Author Adapter for BUSDOC/DITA are set in the same way.
Creating assets (QCD, QXP)
In addition to creating QuarkCopyDesk articles and QuarkXPress projects according to application defaults (File > New), QuarkCopyDesk and QuarkXPress users who are logged on can create assets with default settings defined in Quark Publishing Platform Server. For QuarkCopyDesk, the command is File > New > Article From Server Ticket. For QuarkXPress, the command is File > New > Project from Server Ticket.
When you choose create a QuarkCopyDeck article or a QuarkXPress project, a New Article/Project from Server Ticket dialog box displays. Choose the collection where you want to store the asset from the Collection drop-down menu, then choose the Job Ticket that should define the characteristics of the new article or project. If there is more than one Job Jackets file associated with the collection, you can select the Job Jackets file and Job Ticket template you want to use. (The default Job Jackets file for the collection displays in bold.) When you're finished, click Continue. Quark Publishing Platform creates an article or project using the Job Ticket template you select.
When creating a new article from Job Ticket, QuarkCopyDesk uses the dimensions and margins defined in that Job Jackets file's default Print Layout resource. (Resources that are not required for article creation are ignored.) If there is no such resource, QuarkCopyDesk displays a dialog box where you can specify page dimensions and margins. In any case, only one master page is used.
You can also create projects and articles from templates in Quark Publishing Platform. For more information, see Working with templates.
In QuarkXPress and QuarkCopyDesk, you can also create Quark Publishing Platform assets by attaching or importing text or picture content and updating the Quark Publishing Platform Server.
If you want to create a file based on a checked-out article or project, choose File > Save As to create an asset outside of Quark Publishing Platform. If you want to check in the asset, you must have the privilege to check in new files.
Working with collections
A collection is a group of related assets. Each collection can have one or more associated workflows (optionally with automatic routing rules), a set of Job Jackets, a number of associated users and groups, and revision settings for each asset type. A Quark Publishing Platform server contains a hierarchy of collections.
Working with collection templates
Collection templates make it easier to create and maintain collections. For example, assume you have several publications, and each publication needs its own identically configured "Images" subcollection. Rather than creating each "Images" collection manually from scratch, you can create an "Images Template" collection template, then create each "Images" collection from that template. If you later need to add a user or make a change to the auto routing rules used by the "Images" subcollections, you can simply make the change to the "Images Template" collection template, and the change is automatically applied to all collections that use that collection template.
To create a collection template, Option+click/right-click a collection and choose New Collection Template, then configure the template the way you want it (for more information, see Creating a collection).
Collection template icons are different from collection icons.
To create a collection from a collection template, Option+click/right-click a collection and choose New Collection From Template, then choose a collection template in the New Collection From Template dialog box and click Continue. Quark Publishing Platform creates a collection from the template you indicate, as a child of the collection you clicked. Note that you cannot change any of the settings of the new collection (except for the name), because the collection pulls all of its settings from the collection template.
To determine which collection template a collection is based on, look at its Collection Template attribute. To see which collections are based on a collection template, click that collection template in the collection tree. The collections based on that collection template display in the Collections pane.
To break the link between a collection and its collection template, Option+click/right-click a collection and choose Edit Collection, then uncheck Link to Collection Template and click OK. The collection retains all the template's settings, but loses its link to the collection template. Any changes you make to the collection template after this will not be applied to the collection.
There is no way to relink a collection with a collection template.
It's generally a good idea to create a collection named "Collection Templates" at the root level of your collections hierarchy, and store all of your collection templates in that collection.
You cannot check assets into a collection template.
Creating a collection
To create a new collection, Control-click/right-click the new collection's parent and choose New Collection from the context menu. The New Collection dialog box displays. Enter a name for the collection in the Collection Name field, then choose a collection type from the Collection Type drop-down menu. The attribute form for the selected collection type displays. For more information, see Working with collection types. The new collection will be inserted as a child of the collection you click.
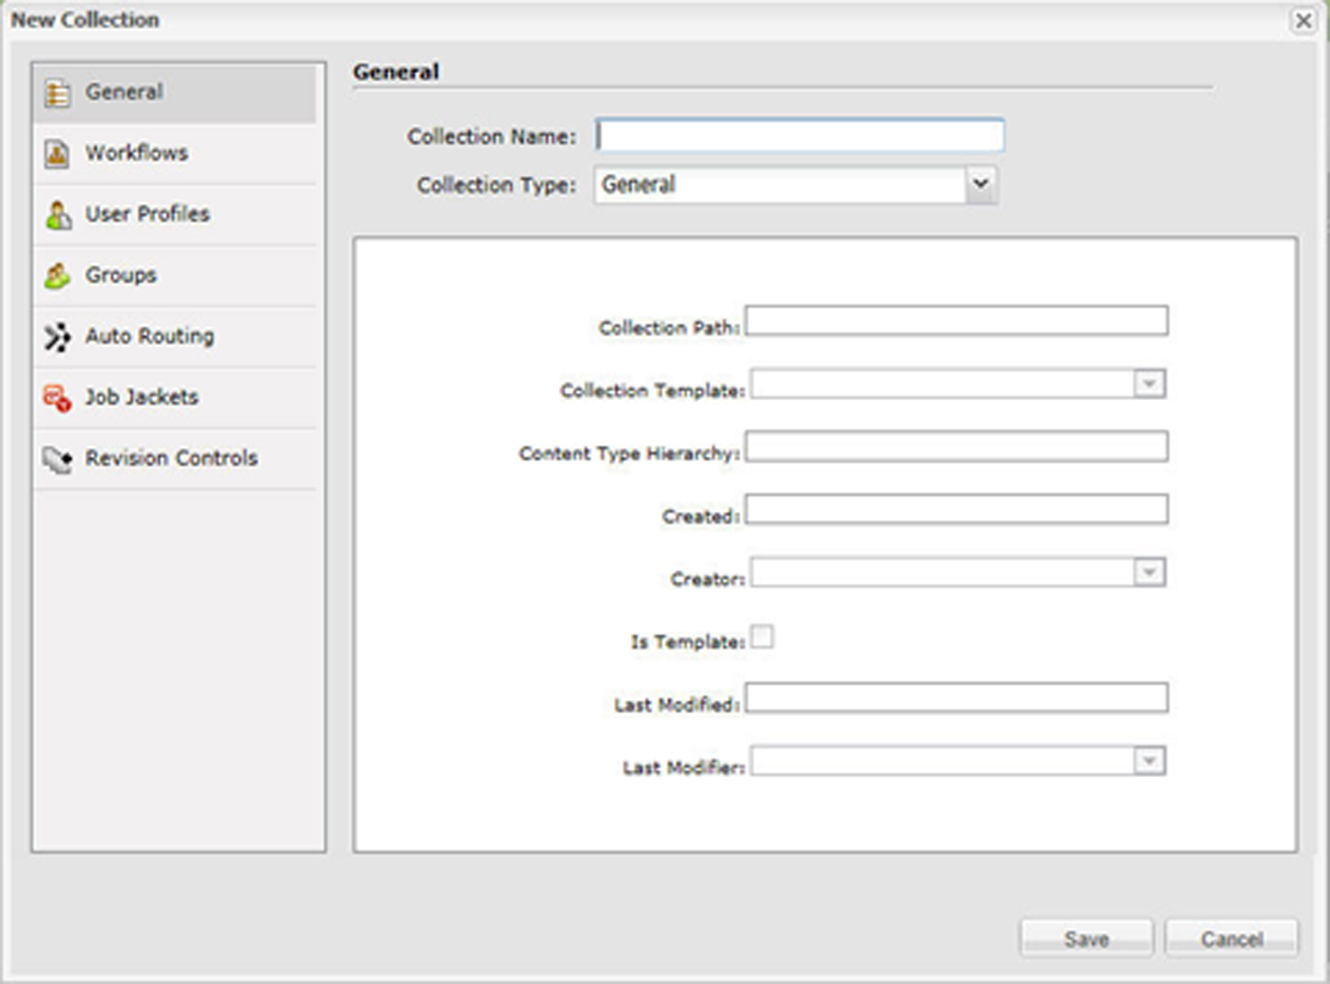
By default, a new collection inherits all the characteristics of its parent collection except for its name and attributes. However, you can change these characteristics if you want.
To edit an existing collection, Control-click/right-click a collection and choose Edit Collection.
Adding workflows to a collection
Each collection can have one or more workflows. You can use the same workflow for all assets in a collection, or use different workflows for different asset types. Users can switch an asset to a different workflow at any time.
Only users with the appropriate privileges can add workflows to a collection or change an asset to a different workflow. For more information, see Privileges.
To add workflows to a collection:
-
Control+click/right-click the collection and choose Edit Collection. The Edit Collection dialog box displays.
-
Click Workflows in the list on the left. The Workflows pane displays.
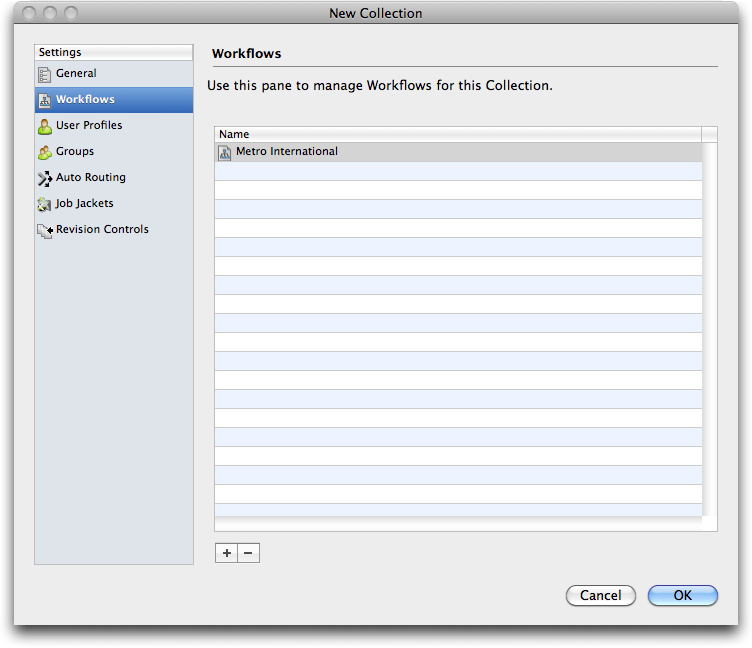
Workflows pane -
To add a workflow, click +. The Workflow Mapping dialog box displays.
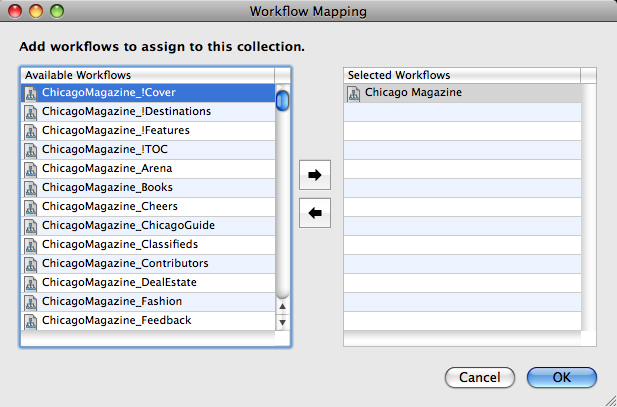
Workflow Mapping dialog box -
To add a workflow to the collection, select it in the list on the left and then click the right arrow button. To remove a workflow from the collection, select it in the list on the right and then click the left arrow button.
-
Click OK.
Adding users to a collection
Each collection can have its own list of users. To add users to a collection:
-
Control+click/right-click the collection and choose Edit Collection. The Edit Collection dialog box displays.
-
Click User Profiles in the list on the left. The User Profiles pane displays.
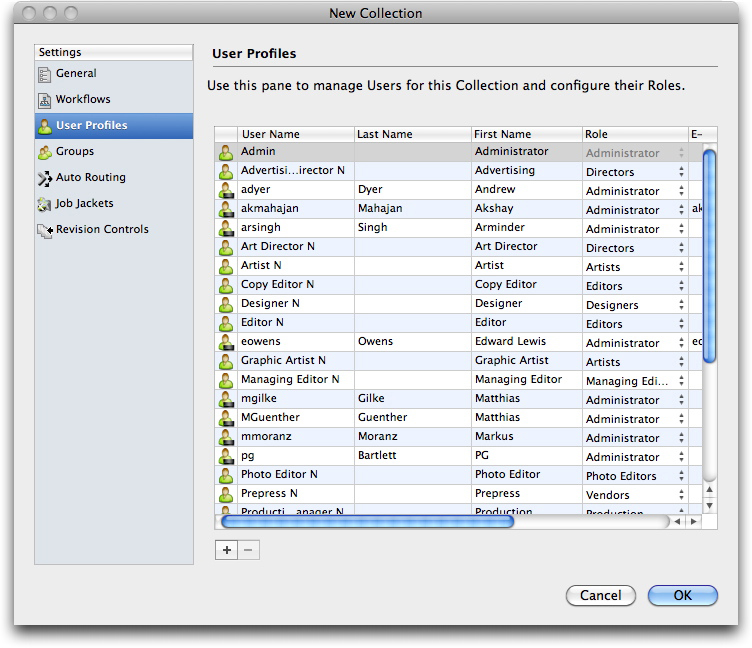
User Profiles pane -
To add a user, click +. The User Mapping dialog box displays.
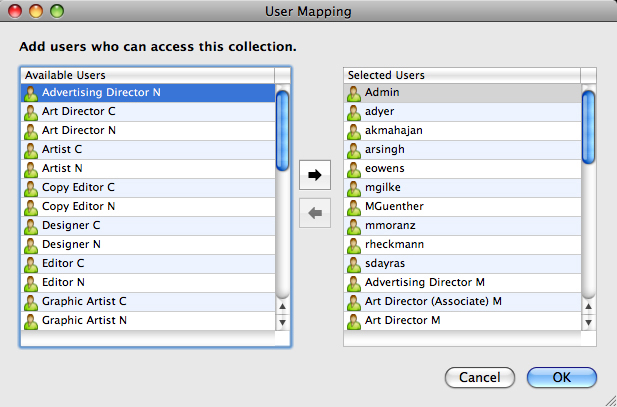
User Mapping dialog box -
To add a user to the collection, select it in the list on the left and then click the right arrow button. To remove a user from the collection, select it in the list on the right and then click the left arrow button.
-
Click OK to return to the Edit Collection dialog box.
-
To change a user's role within this collection, choose a different user role for that user from the drop-down menu in the Role column.
-
Click OK.
Adding groups to a collection
Each collection can have its own list of groups. To add groups to a collection:
-
Control+click/right-click the collection and choose Edit Collection. The Edit Collection dialog box displays.
-
Click Groups in the list on the left. The Groups pane displays.
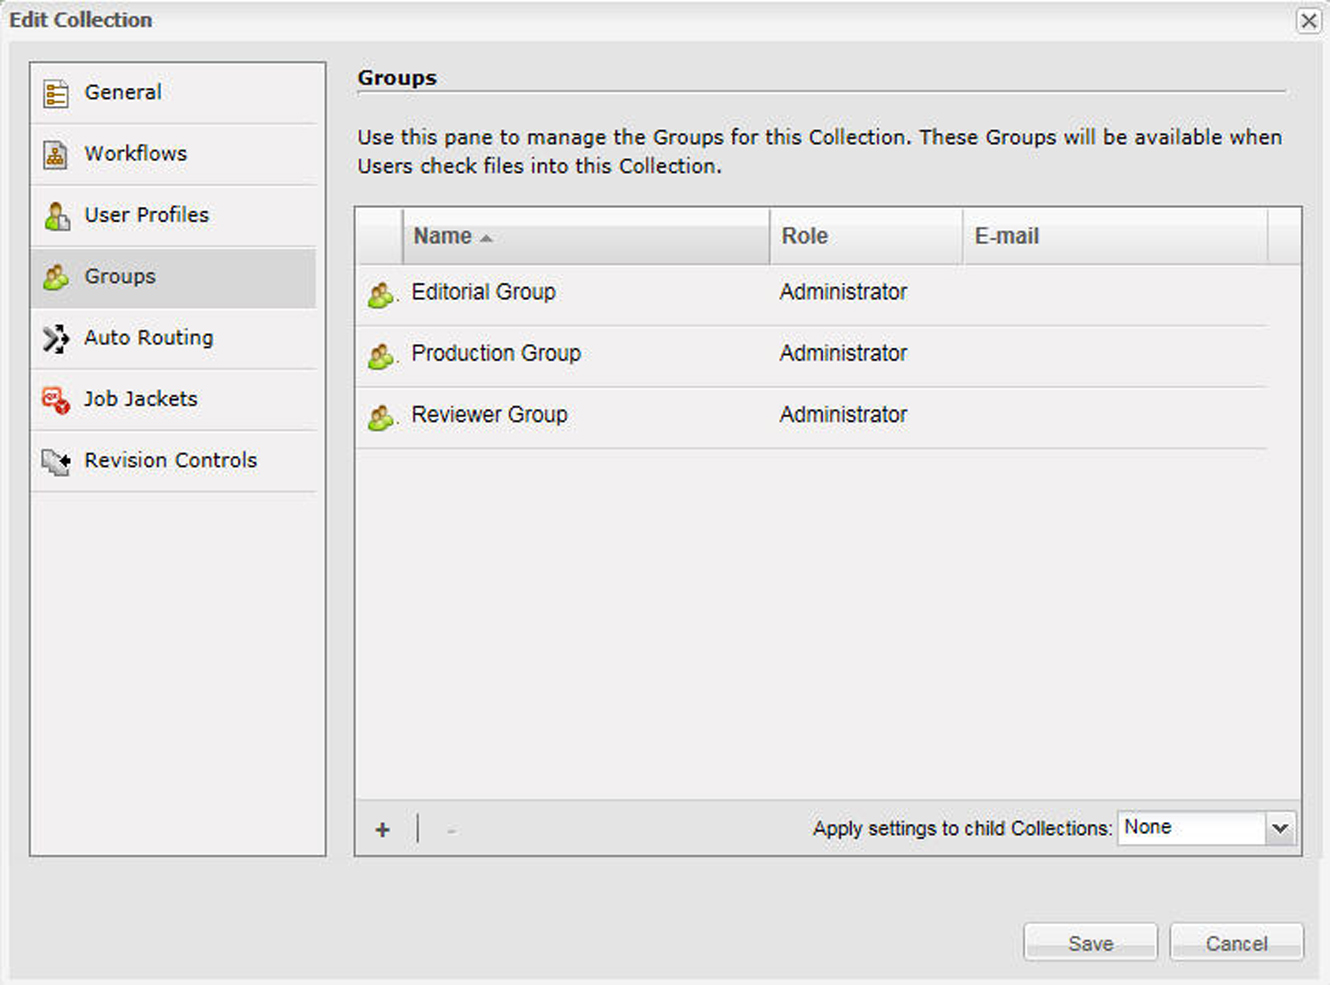
Groups pane -
To add a group, click +. The Manage Groups dialog box displays.
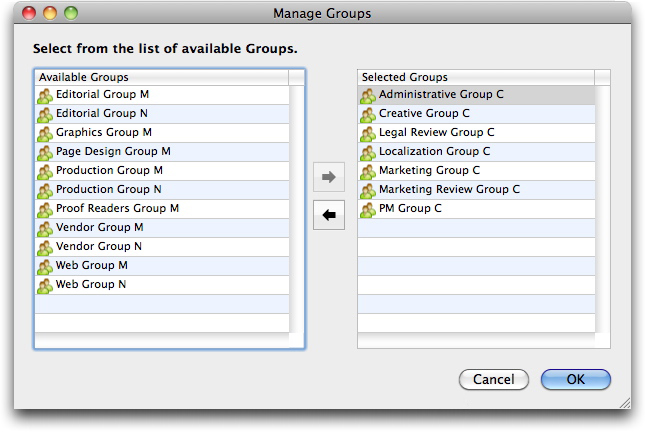
Manage Groups dialog box -
To add a group to the collection, select it in the list on the left and then click the right arrow button. To remove a group from the collection, select it in the list on the right and then click the left arrow button.
-
To change a group's role within this collection, choose a different role for that group from the drop-down menu in the Role column. This will override a group's role at the Collection level.
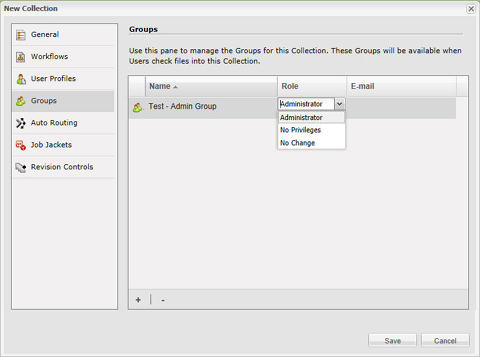
Manage Groups dialog box -
Click OK.
If a user has access to a collection because of its membership in a group, but not as an individual user, then the user has only the privileges associated with the role assigned to the group.
If a user has access to a collection because of its membership in a group, and also as an individual user, then the user's privilege set is a union of the privileges associated with the role assigned to the group as well as the role assigned to the user.
Setting up auto routing
Routing rules let you automatically route assets to a particular user or group when those assets reach a certain status.
You must create workflows, users and/or groups, and statuses before you can specify workflow routing.
To set up automatic routing:
-
Control+click/right-click the collection and choose Edit Collection. The Edit Collection dialog box displays.
-
Click Auto Routing in the list on the left. The Auto Routing pane displays.
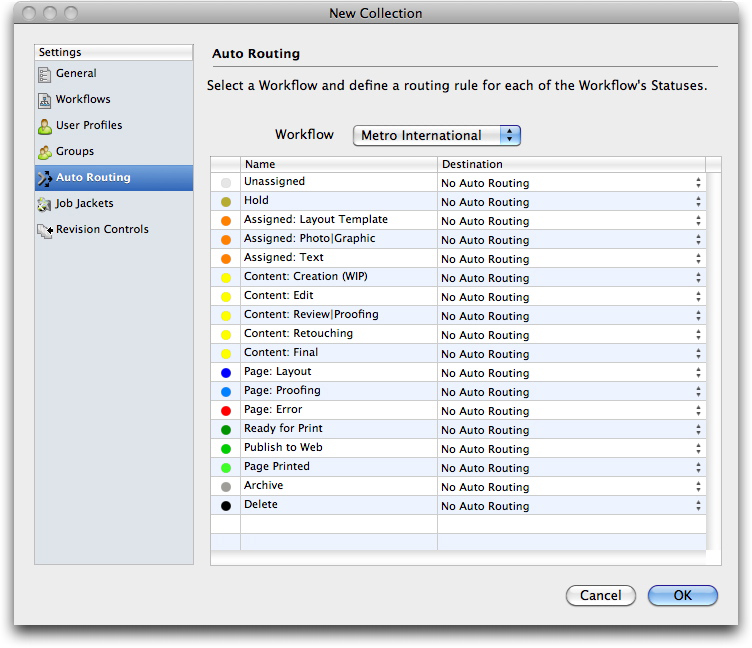
Auto Routing pane -
You can use this pane to set up auto routing for any of the workflows associated with this collection. Choose the workflow you want to configure from the Workflow drop-down menu. The sequence of statuses for that workflow displays.
-
Select a status name and click the Destination column to choose the user or group to whom assets with this status should be routed.
-
To specify that these assets should retain their current Route to value from the previous status, choose No Auto Routing.
-
To specify that these assets should not be routed to a specific user or group, choose No Group or User.
-
To specify that these assets should be routed to a specific group, choose the group name.
-
To specify that these assets should be routed to a specific user, choose the user name.
-
-
Click OK.
Setting up Job Jackets
A Job Ticket is a package of QuarkXPress resources (preferences, style sheets, colors, and so forth). A Job Jackets file is a container for Job Tickets. In QuarkXPress, you can pre-configure a new project by creating that project from a Job Ticket that contains the desired resources.
In Quark Publishing Platform, you can use a Job Jackets file to define a Job Ticket with a collection of default resources for each collection. You can also open and edi ta Platform Job Jacket from the Job Jacket Manager dialog.
Job Jackets files must be created in QuarkXPress. For more information, see A Guide to QuarkXPress.
When you are configuring resources (for example, style sheets, colors, and H&Js) at the collections level, make sure you do not have more than 80 resources per Job Ticket. A larger number of resources can hinder performance in QuarkCopyDesk, QuarkXPress, and Quark Publishing Platform Web Client. If you require more than 80 resources per Job Ticket, you can improve performance by adding unique resources through separate Job Tickets for each collection.
To assign Job Jackets:
-
Control+click/right-click the collection and choose Edit Collection. The Edit Collection dialog box displays.
-
Click Job Jackets in the list on the left. The Job Jackets pane displays.
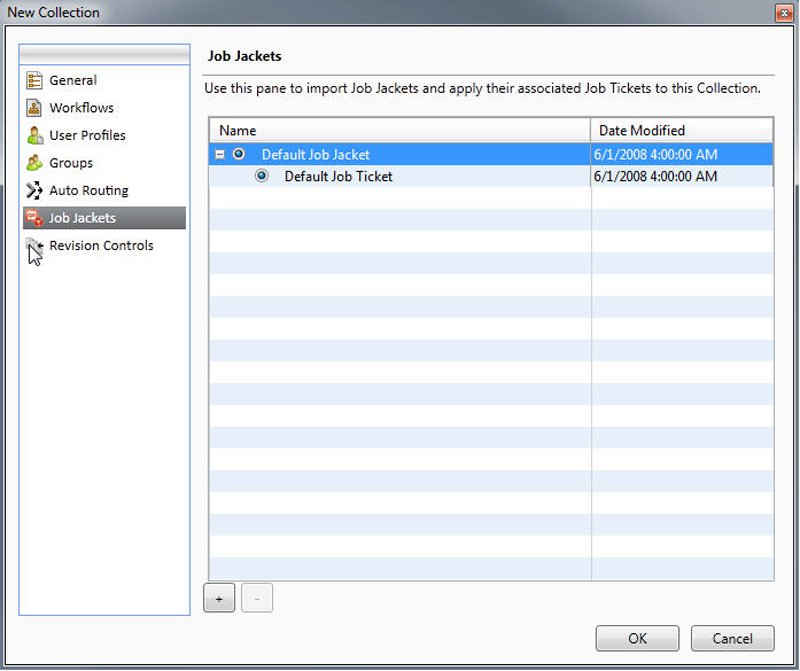
Job Jackets pane -
To import a Job Jackets file, click +, navigate to the target Job Jackets file, and then click Open.
-
To specify which Job Jackets file to use with the collection, select the Job Jackets file.
-
To specify which Job Ticket to use with the collection, expand its Job Jackets file and then select the Job Ticket.
Controlling asset revision handling
To specify asset revision parameters for a collection:
-
In the Workflow navigation pane, Control-click/right-click the collection and choose Edit Collection. The Edit Collection dialog box displays.
-
Click Revision Controls. The Revision Controls pane displays.
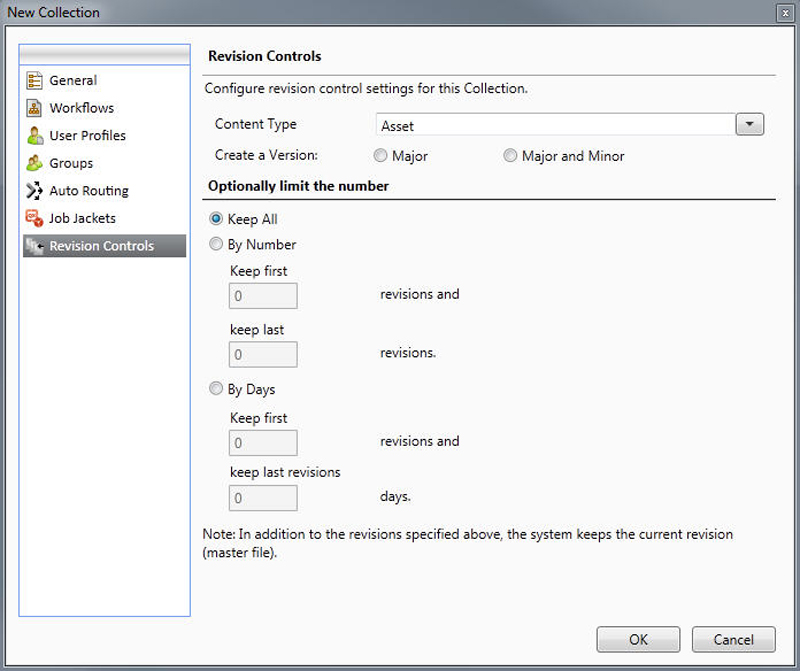
Revision Controls pane. -
You can specify different parameters for different file types. For example, you might choose to retain all versions of text files because they have relatively small file sizes, but you might save only the original picture and the most recent revision for larger picture files. Choose an option from the Asset Type drop-down menu.
-
To control the default versioning for asset check-in, click Major or Major and Minor under Create a Version.
-
Configure revision settings for the chosen asset type:
-
To retain every revision of the chosen asset type, click Keep All.
-
To limit automatic revision retention to a specific number of early and recent versions, click By Number and then enter values in the Keep first and keep last fields.
-
To limit automatic revision retention to a specific number of days, click By Days and then enter values in the Keep first and keep last fields.
Editing collections
To edit a collection, Control-click/right-click the collection in the Workspace navigation pane and choose Edit Collection from the context menu. The Edit Collection dialog box displays. This dialog box is very similar to the New Collection dialog box (see Creating a collection).
All of the panes in the Edit Collections dialog box include the Apply settings to child Collections drop-down menu.
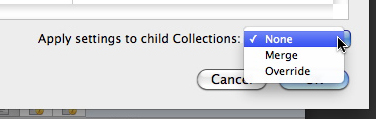
You can use the options in this drop-down menu to control how the changes you make in each pane affect the active collection's child collections.
-
None: No changes are made to child collections.
-
Merge: This option adds the parent collection's settings to all of its child collections. Only settings that are not already present in child collections are added to the child collections. For example, if a child collection has a workflow named "W1," and you assign a workflow named "W2" to the parent collection, then after the operation the child collection has both the "W1" and "W2" workflows. If a user has different roles assigned in the child collection and the parent collection, the role assignment for the child collection is not changed.
-
Override: This option overrides all settings for child collections with the new settings for the parent collection. For example, if a child collection has a workflow named "W1," and you assign a workflow named "W2" to the parent collection, then after the operation the child collection has only the "W2" workflow.
If someone makes changes to a collection, an asterisk displays in the label for the Collections area in the Workspace navigation pane, and the collection's name displays in italics for everyone except the user who made the change. To update the collection, Control-click/right-click the collection in the Workspace navigation pane and choose Refresh Collection from the context menu.
If you want to change a collection that is based on a collection template, you must change the collection template or unlink the collection from the collection template. For more information, see Working with collection templates.
Duplicating a collection
When you duplicate a collection, Quark Publishing Platform creates a duplicate of that collection, but not of the assets the collection contains. You can specify whether you want to simply duplicate the collection or also duplicate the hierarchy inside the collection.
To duplicate a collection, Control-click/right-click the collection in the Workspace navigation pane and choose Duplicate Collection from the context menu.
Deleting a collection
To delete a collection, Control-click/right-click the collection in the Workspace navigation pane and choose Delete Collection from the context menu.
You cannot delete a collection if it or any of its subfolders contains assets.
Appending content (QCD and QXP)
In QuarkXPress and QuarkCopyDesk, you can use the Append Content button  in the Workspace Browser window toolbar to add text from an article component to an article component or a
QuarkXPress text box. To use the Append Content button:
-
Select a text box in QuarkXPress or text component in QuarkCopyDesk.
-
Select a text component or article in the Workspace Browser window.
-
Click the Append Content button in the Workspace Browser toolbar. The text flows into the text box or text component.
(Mac OS only) If the Append Content button is not visible, add it to the toolbar. For more information, see Customizing the Workspace toolbar.
If you are working in QuarkXPress and select an article that contains multiple components in step 5, the Select Text Component dialog box displays, which allows you to select a text component. If you are working in QuarkCopyDesk, text in all the components is appended. Picture components are not appended.
The appended text is no longer linked to the article component from which it was appended. If you change the text in the original article component, the change is not updated in the text box or text component.
If you selected text before clicking Append Content, the appended content replaces the selected text.
Checking in assets
Although the fields in the Check In dialog box may vary, the check-in process is fundamentally the same for all Quark Publishing Platform client applications. The steps vary slightly if you are checking in an asset you have checked out or if you are checking in an asset for the first time. You can also use the Check In Other command to check in new QuarkCopyDesk articles, QuarkXPress layouts, and files in third-party formats.
Check In command
The Check In command is available as a menu command and an icon.
-
Open the asset you want to check in to Quark Publishing Platform Server.
-
Choose Actions > Check In or select the checked-out asset in the Quark Publishing Platform Client toolbar and click the Check In button. The Check In dialog box displays.
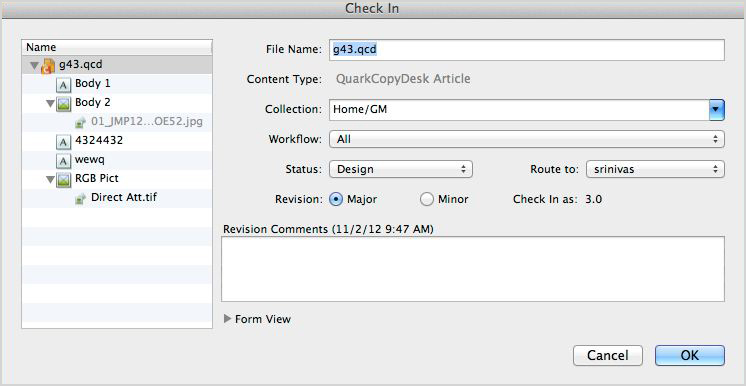
Use the Check In dialog box to add an asset to Quark Publishing Platform Server (or return a checked-out asset to Quark Publishing Platform Server control). The Name list on the left shows all of the components that will be checked in along with this asset. For example, if you're checking in an article with a picture component and two text components, the Name list displays an item for the article, plus two child items for the text components, plus a child item for the picture component. In addition, the picture component has a child item for the picture in the picture component.
You can supply different attribute values for each item. If you do not specify values for the child items, the child items inherit the values specified for the parent item.
-
Choose a target collection from the Collection drop-down menu.
You can use the search field to find a collection quickly. Mouse over each search result to see its collection path.
-
Choose a workflow from the Workflow drop-down menu.
-
To indicate the asset's current status, choose an option from the Status drop-down menu.
-
To send the asset to a particular user or group, choose an option from the Route to drop-down menu. (Note that if your workflow relies on automatic status-based routing, the Route to drop-down menu value might change automatically when you choose an option from the Status drop-down menu.)
If you do not choose any name from the Route to drop-down menu when you check in an asset for the first time, the asset is routed to the active user.
-
To specify whether the asset is saved with a major or minor version number, click Major or Minor under Revision.
Access to the Minor option is controlled by privileges.
-
Use the Revision Comment field to enter a revision comment for the version of the asset you are checking in. The revision comment will be stored with the asset. Depending on the preference setting of the user who checks out the asset, the revision comment displays during the check-out process. The revision comment also displays when you view revisions of the asset.
-
Modify any other available attribute fields as appropriate. Note that access to these attribute fields is determined by your privileges.
-
Click OK. Depending on your preferences, when the check-in process completes, Quark Publishing Platform Server may delete the local copy of the asset.
Check In Other command
The Check In Other command lets you check in new QuarkCopyDesk articles, QuarkXPress layouts, and files in third-party formats.
(MAC OS client) To use the Check In Other command, click the Check In Other button. (Quark Publishing Platform Client users can also choose Actions > Check In Other). Then navigate to the target asset and follow the procedure in the Check In command section. Click Check In Folder to check in a folder and all of its subfolders.
(Windows client) To use the Check In Other command, click the Check In Other and the drop-down menu displays the options: Check In File and Check In Folder. Click Check In File to display the Check In Other File dialog box. Then navigate to the target asset and follow the procedure in the Check In command section. Click Check In Folder to check in a folder and all of its subfolders.
The Last Modified and Last Modifier attributes indicate the name of the user who checks in a file, as well as the time and date the file is checked in.
Check in multiple assets
You can check in multiple assets in one check-in process with Quark Publishing Platform Client, QuarkXPress, and QuarkCopyDesk. The process is different if you are checking in assets you have checked out or if you are using the Check In Other command to check in new assets.
-
To check in new assets using Quark Publishing Platform Client, (MAC OS client) Click Check In Other or choose Actions > Check In Other. (Windows client ) Use the Check In Other drop-down menu to display the options: Check In File and Check In Folder. In QuarkCopyDesk and QuarkXPress, display the Workspace Browser window and click Check In Other. A directory dialog box displays for you to select one or more assets.
-
You can select a range of assets or non-consecutive assets in the list. To select a range of assets, press Shift, select the first asset in the range, select the last asset in the range, then click Open. To select non-consecutive assets in the list, press Command/Ctrl, select an asset, select one or more other assets you want to check in, then click Open.
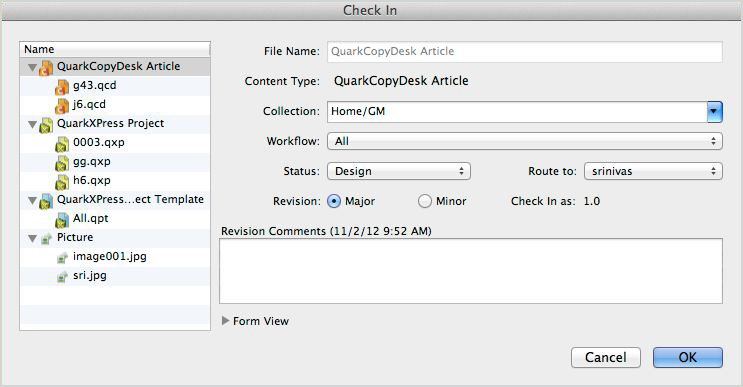
The Check In dialog box lists the assets on the left. Articles, pictures, and other files are listed in separate groups. -
Select an asset in the list on the left, and modify the attribute information on the right.
The asset selection on the left determines the attribute options on the right. You can specify attributes once for multiple assets in a group.
-
After you specify attributes for the assets, click OK.
-
To check in multiple assets you have checked out, select the assets in the Workspace Browser window and click Check In. The Check In dialog box displays sequentially for each asset. If Quark Publishing Platform Client users select checked-out QuarkXPress projects or QuarkCopyDesk articles in addition to other checked-out files, the articles and projects are not included in the sequence of Check In dialog box displays. See Check In command for more information about the Check In dialog box.
In Quark Publishing Platform Client, QuarkXPress, and QuarkCopyDesk, you can also check assets into a collection by dragging the assets from the file system to the collection's icon in the Workspace Browser window.
Check In Project With Pictures (QXP only)
If a checked-out project contains imported pictures, you can attach the pictures and check them in when you check in the project by choosing Platform > Check In Project With Pictures. This command allows you to specify Quark Publishing Platform attributes for each imported picture. See Check in multiple assets for more information about the Check In dialog box for multiple assets.
-
In QuarkXPress, open a project that contains at least one imported picture.
-
Choose Platform > Check In Project With Pictures. The Check In dialog box displays with the project name and picture names in separate groups on the left. If the project contains only one imported picture, the picture name displays below the layout name.
-
Click the project name at the top of the list. The available attributes apply to the project.
-
Click one or more pictures in the Pictures group. The available attributes apply to the pictures.
-
Follow the instructions in the Check In command section to check in the project and its imported pictures.
Assigning assets
Assignments make it easy for each user to know which jobs they should be working on. When you check in an asset, you can assign it to a particular user or group, or to No One. When you assign an asset, the following things happen:
-
A dialog box displays for the user to whom the asset is routed, indicating that the asset is assigned to them.
-
The asset is listed in the Assignments area in the Workflow navigation pane for the user to whom the asset is routed.
If the asset is routed to a group, the above is true for every user in that group.
Each user can view the assets assigned to them from any Quark Publishing Platform client in the Assignments area in the Workflow navigation pane.
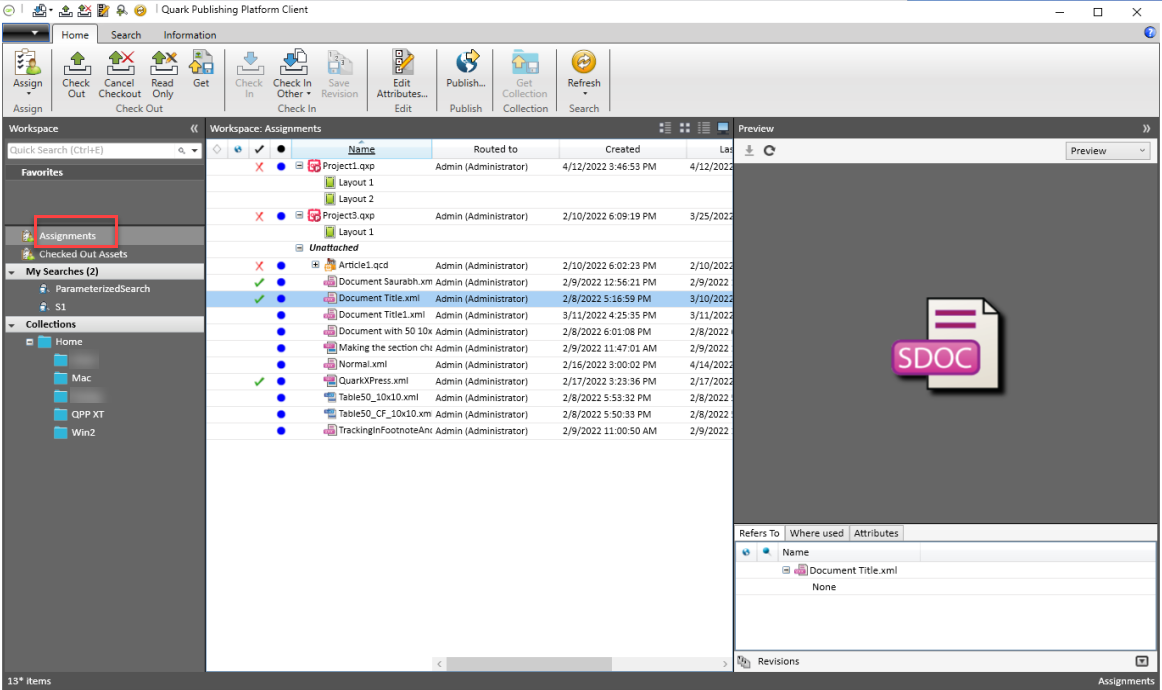
Assigning assets: Quark Publishing Platform Client
Quark Publishing Platform Client users can make seven kinds of assignments from the Actions > Assign submenu.
To make an assignment from Quark Publishing Platform Client:
-
Click Workspace in the Quark Publishing Platform Client window.
-
To assign a text file, choose Text File.
-
To assign a graphic file, choose Graphic.
-
To assign a QuarkCopyDesk article based on Quark Publishing Platform Server default settings, choose QuarkCopyDesk Article > From Defaults.
-
To assign a QuarkCopyDesk article based on an existing QuarkCopyDesk article, choose QuarkCopyDesk Article > From Article.
-
To assign a QuarkCopyDesk article based on a QuarkCopyDesk template, choose QuarkCopyDesk Article Template.
-
To assign a QuarkXPress project based on an existing QuarkXPress project, choose QuarkXPress Project.
-
To assign a QuarkXPress project based on an existing QuarkXPress template, choose QuarkXPress Project Template.
You can click the Assign button in the Workspace toolbar to access the Assign submenu.
When you create a graphic assignment, Quark Publishing Platform Client checks in a placeholder image that can be opened in an image-editing application and replaced with picture content.
The Content Creator field is empty when you check in a placeholder.
Assigning assets: QXP
When you route an asset to another user, you effectively assign it to that user. But Assign is also a specific command in the Workspace Browser window. To assign an asset from QuarkXPress:
-
Open or display a QuarkXPress project.
-
Draw a box.
-
Display the Workspace Browser window (Platform menu).
-
Do one of the following things:
-
With the box selected, click the Workspace Browser window and choose Assign. (If you are assigning from picture boxes, you can select more than one.)
-
Choose Platform > Assign as Article or Platform > Assign as Picture.
-
Control+click/right-click the box and choose Platform > Assign as Article or Assign as Picture from the context menu.
-
Click Assign in the Project Attachments palette.
-
-
If you choose Assign as Picture, the Assign Picture Options dialog box displays with options to assign a picture asset or a picture component of a QuarkCopyDesk article. Choose an option and click OK. The Check In dialog box displays.
If you selected a box containing text before choosing Assign, the Check In dialog box displays. Follow the instructions for Check In command.
You can enter asset attribute information in the Check In dialog box.
You can assign an article as a QuarkCopyDesk article or a QuarkCopyDesk article template by choosing an option from the Content Type drop-down menu in the Check In dialog box.
To display the Assign Picture dialog box when you drag a picture from the Workspace Browser window to a box in a QuarkXPress project, uncheck Attaching a picture under Do not show Assign dialog box when in the Attachments tab of the Alerts pane in the Preferences dialog box.
If you duplicate a picture box that contains an attached picture, the picture attachment displays as two separate attachments in the Project Attachments palette after you save a revision of the project or check it in.
To see which projects and articles are assigned to you, choose Platform > Workspace Browser.
Performing a search
You can use a variety of methods to search for assets and collections in Quark Publishing Platform. You can click Assignments in the Workspace navigation pane to display all assets routed to you. You can click Checked Out Assets in the Workspace navigation pane to display all assets you have currently checked out. You can click New Search to specify parameters for a new search. And you can choose from predefined search operations that you have created or that other users have shared with you.
To create a search:
-
In the Quark Publishing Platform Client, click the Workspace navigation pane.
-
Click New Search in the toolbar. Alternatively, you can Option+click/right-click a saved search in the Workspace navigation pane and choose New Search from the context menu.
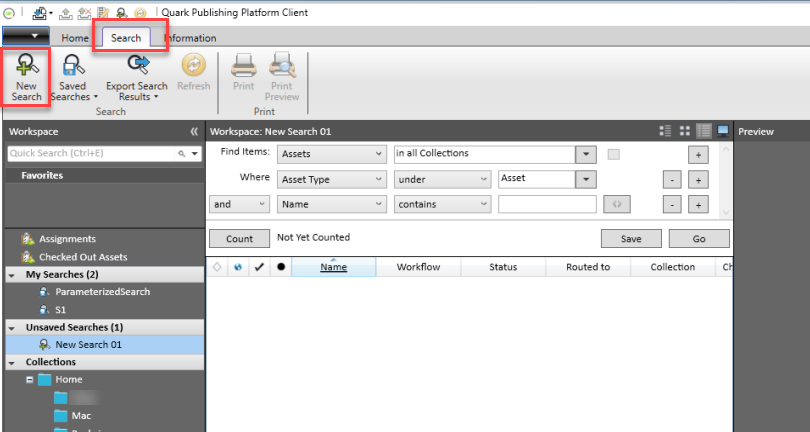
A new, unsaved search -
Use the drop-down menus at the top of the window to specify search criteria.
-
Choose a file type and collection from the two drop-down menus in the Find Items search criteria row. To search the subcollections of the selected collection as well as the selected collection itself, check the box on the right end of the row.
-
Use the controls in the Where row to narrow the search. To add a row of search options and further narrow the search, click +.
-
To specify inclusive or exclusive criteria, choose And or Or. Choosing And narrows your search. Choosing Or widens your search.
-
To delete a row, click the – (minus symbol) button for that row.
When you finish defining your search criteria, you can click Count to see how many assets match the criteria.
If the number of assets is too high, you can refine your search and save time by displaying a smaller search.
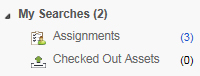
The number of assets that match the criteria will automatically be displayed next to the search name, for the Assignments and Checked Out Assets default searches.
-
-
If you plan to save this search and use it to search for different values, you can use the Ask feature. To use this feature, choose an attribute from the drop-down menu, then click the gray Ask icon
 . The Ask icon displays orange
 .
When someone executes the search, the Ask dialog box will display.
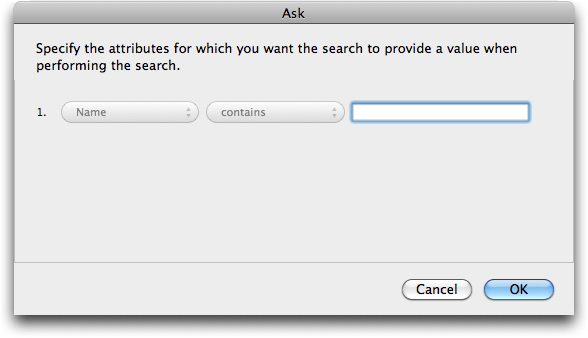
Ask dialog box -
To add a saved search to the conditions of a search, click New Search, add a row in the search criteria, choose Asset matches search or Asset does not match search from the attribute drop-down menu, and then choose a saved search from the drop-down menu to the right of the attribute drop-down menu. You can add as many conditions as you want on subsequent rows.
If you choose Asset matches search or Asset does not match search, searches that contain an "Ask" parameter are not included in the list.
-
To execute the search, click Go.
To save a search for future use, click Save and specify a name for the search. The search name is added to the My Searches area of the Workspace navigation pane and the Search drop-down menu.
To execute a search again, Control+click/right-click the search in the Workspace navigation pane and choose Reload Search from the context menu or click Refresh in the toolbar.
In QuarkXPress and QuarkCopyDesk, if you add the Save as PDF button to the Workspace Browser toolbar, you can create a PDF of your search results display. See Customizing the Workspace toolbar to learn how to add the Save as PDF button.
Using the Quick Search feature
You can quickly find Quark Publishing Platform assets with the Quick Search feature, regardless of the active application. To use the Quick Search feature, click the magnifier icon at the top of the Workspace navigation pane.
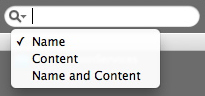
Choose an option from the drop-down menu.
-
Choose Name to search according to asset name exclusively.
-
Choose Content to search according to asset content exclusively.
-
Choose Name and Content to search according to asset name and content.
Performing a nested search
You can narrow a search by creating a nested hierarchy of search conditions. In the example below, the search uses a nested search to look for all assets routed to Tracy or Pat.
-
Click New Search.
-
To add a row of search options, click +.
-
To add a nested condition, choose Asset matches condition from the Where drop-down menu. The Asset matches condition dialog box displays.
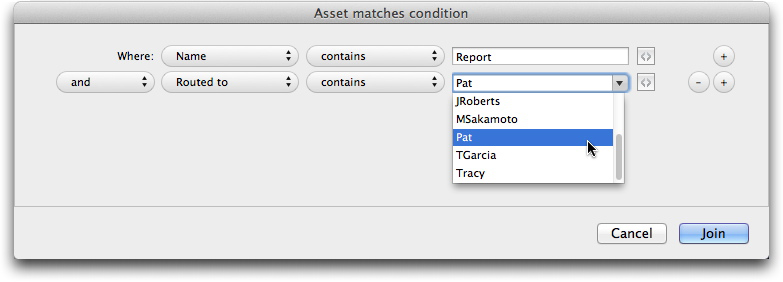
Asset matches condition dialog box -
Specify an attribute and choose a condition. You can click + in the Asset matches condition dialog box to combine multiple conditions.
You can also click the Ask icon
in the Asset matches condition dialog box to display a prompt when a user performs a conditional search. -
After you specify parameters in the Asset matches condition dialog box, click Join.
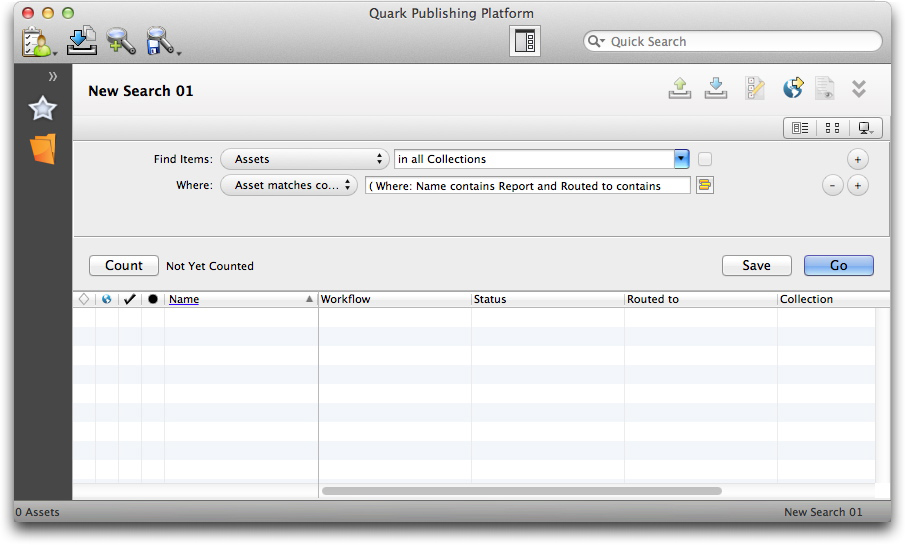
Nested search The Nested icon
 displays when you specify a nested search.
Performing a full-text search
The Quick Search control lets you search for assets according to text contained in the assets.
-
Click the Quick Search control to display the Quick Search drop-down menu.
Use the Quick Search control to search for assets according to text contained in the assets. -
Choose Content to search according to asset content exclusively. Choose Name and Content to search according to asset name and content.
-
Enter text in the Quick Search field and press Enter. The Workspace Browser window displays the results of your Quick Search. The search is also displayed in the Unsaved Searches area in the Workspace navigation pane.
By default, only assets with all the text you enter in the Quick Search field are returned.
-
To refine your full-text search, you can use the following in the Quick Search field:
-
Phrase search: You can specify exact wording for more than one word by enclosing your phrase in quotation marks, such as "Bike History." A space between words in a phrase functions like the "AND" operator, and all the words in quotation marks must be together to display in the search results.
-
Proximity search: Use "~<number of words>" after a phrase search to specify the number of words that can exist between the words in your phrase. For example, if you enter "Bike History" ~10, the search will find instances of "Bike" and "History" within 10 words of each other.
-
Wildcard search (single character): Use "?" to specify a search with a single wildcard character, such as "r?de" to find "ride" and "rode."
-
Wildcard search (multiple characters): Use "*" to specify a search with multiple wildcard characters, such as "ride*" to find "rider" and "riders."
-
Fuzzy search: Use "~" to specify a search with a range of possibilities for a single word, such as "gearing~" to find "hearing," "gears," and "gearing."
-
Boolean operators (AND): You can narrow a search by using the "AND," "&&," and "+" operators to search for exact word combinations. For example, you can search for "Bike" and "History" by entering Bike AND History in the Quick Search field. Use "+" before search terms to search for one mandatory term and another possible term. For example, use +Bike History to find instances where "Bike" exists and "History" might or might not exist.
Boolean operators must be entered in ALL CAPS.
-
Boolean operators (OR): You can expand a search by using the "OR" operator to search for one or more words. For example, if you enter "Bike" OR "History" in the Quick Search field, the results can include one or both words.
By default, a space between search terms works like the "AND" operator.
-
Boolean operators (NOT): You can limit a search by excluding certain words after "NOT" in the Quick Search field. For example, if you enter "Bike History" NOT "History of Skiing," the search results will not include the "History of Skiing" text string combinations.
You can use "!" or "-" instead of "NOT."
You cannot use the "NOT" operator with a single term, such as NOT "Bike History."
-
Performing a collection search
You can use a collection search to locate a collection that has specific attributes. To perform a collection search:
-
Click the Workspace navigation pane.
-
Click New Search in the toolbar. In Quark Publishing Platform Web Client, click New Search in your browser window.
-
In the Find Items drop-down menu, click Collections to make collection options available.
-
To search a particular collection, choose the collection's name from the following drop-down menu. You can also type the collection's name in the Quick Search field.
-
To search the selected collection's subcollections, check the box at the end of the first row.
-
Use the drop-down menus at the top of the window to specify search criteria.
-
Use the controls in the Where row to narrow the search. To add a row of search options and further narrow the search, click +.
-
To specify inclusive or exclusive criteria, choose And or Or. Choosing And narrows your search. Choosing Or widens your search.
-
To delete a row, click the – (minus symbol) button for that row.
When you finish defining your search criteria, you can click Count to see how many collections match the criteria.
If the Count value is too high, you can refine your search and save time by displaying a smaller search.
-
-
To execute the search, click Go.
Not all view options are available for the results of collection searches.
To save a search for future use, click Save and specify a name for the search. The search name is added to the My Searches area of the Workspace navigation pane and the Search drop-down menu.
To execute a search again, Control+click/right-click the search in the Workspace navigation pane and choose Reload Search from the context menu or click Refresh in the toolbar.
In QuarkXPress and QuarkCopyDesk, if you add the Save as PDF button to the Workspace Browser toolbar, you can create a PDF of your search results display. See Customizing the Workspace toolbar to learn how to add the Save as PDF button.
Search from here
To create a search that starts from a particular collection, Option+click/right-click that collection and choose Search from Here. Quark Publishing Platform creates an unsaved search in that collection and includes its subcollections.
You can limit the search to that particular collection by unchecking Search this Collection and its Subcollections (on the right end of the first row in the search interface).
Working with saved searches
To save the active search for future use, click Save and specify a name for the search. The search name is added to the My Searches area of the Workspace navigation pane and the Search drop-down menu.
To return to an unsaved search, click the search in the Unsaved Searches area in the Workspace navigation pane. Unsaved searches are named "New Search XX," where XX is a number.
To execute a saved search, click the search in the Saved Search area in the Workspace navigation pane. To re-execute a saved search, Control+click/right-click the search and choose Reload Search from the context menu.
Managing searches
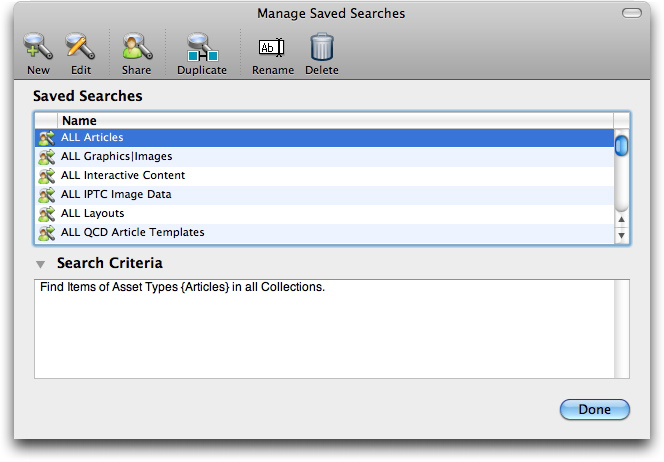
Use the Manage Saved Searches dialog box to create, edit, share, duplicate, rename, and delete searches. To display this dialog box, click Saved Searches in the Workspace toolbar and choose Manage (Mac OS only) or choose Search > Saved Searches > Manage.
-
To create a search, click New. The Edit Search dialog box displays. Enter a name in the Search Name field, and then specify search criteria according to the instructions for Performing a search. Click Save, then click Done to close the Manage Saved Searches dialog box.
-
To edit an existing search, select a search in the Manage Saved Searches dialog box and click Edit. The Edit Search dialog box displays. Update the criteria, then click Save. Click Done to close the Manage Saved Searches dialog box.
-
To share a search with other members of your Quark Publishing Platform workgroup, select the search name and click Share. Then use the controls in the Select the Users to share the saved searches with dialog box to choose the users with whom you want to share the search.
-
To duplicate a search, select the search name and click Duplicate. A new search with the word "Copy" added to the name displays in the Saved Searches area.
-
To rename a search, select the search name and click Rename. The search name becomes editable.
-
To delete a search, select the search name and click Delete.
Only the user who shares a search can modify it. Other users can delete the shared search from their lists, but they cannot edit the search.
Search results
Right-clicking on any search result will display the following context menu:
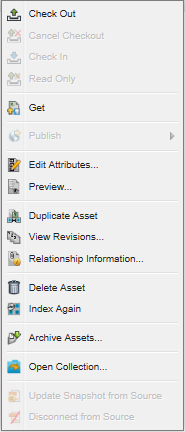
Clicking on Open Collection will take you to the collection that particular asset belongs to and will show all assets belonging to that collection in the search results.
Specifying search result display options
Use the View > Displays submenu (Mac OS only), the Display drop-down menu in the Workspace window, or the buttons at the top of the pane to specify how search results display. For more information about asset display options, see View display options.
Some of these options are not available for collections searches. For more information, see Performing a collection search.
Quark Publishing Platform assets that match your search criteria but are attached to QuarkXPress projects that have never been checked in to the Platform are listed under the Attached to other projects attribute (in the Name attribute column). Attached assets can display under multiple projects if they are attached to multiple projects.
If an item attached to a project matches the search, the project and all the other assets attached to the project also display.
An article or picture can display under more than one page if it is attached to multiple pages in a project.
If you change the view display options for a saved search or collection, the new options are saved for you for that particular collection or search.
Checking out assets
To check out an asset, use one of the following methods.
Checking out an asset: Quark Publishing Platform Client
To check out an asset in Quark Publishing Platform Client, click the Check Out icon in the Quark Publishing Platform Client Workspace toolbar or choose the Check Out command in the Actions menu.
Checking out an asset: QCD
To check out an article in QuarkCopyDesk, display the article in the Workspace Browser window and click Check out, Open, or Display. Or, you can choose Platform > Check Out Article. The Check Out dialog box displays with the user's assignments displayed by default.
Choose a saved search from the My Searches area. Then select the asset in the list and click Check Out.
You can select an article in the Workspace Browser window, and click Read-Only to open a read-only copy of the article.
Checking out an article or project: QXP
To check out an article in QuarkXPress, you begin by checking out the project to which the article is attached. You can select the text box in the active project that contains the article and choose Check Out > Article (Platform menu) or Control+click/right-click the box and choose Platform > Check Out Article. You can also click the Check Out button in the Workspace Browser window.
To check out a project in QuarkXPress, choose File > Open from Server. Then select the target project asset in the Check Out dialog box and click Check Out. You can also click the Check Out, Open, or Display button in the Workspace Browser window.
You can select a project and click Read-Only to open a read-only copy of the project.
Checking out a project with attachments: QXP
When you check out a project, you can check out the project's attachments at the same time with a single operation.
-
Display a Workspace Browser window in QuarkXPress.
-
Click the Check Out with Attachments icon and drag it to the toolbar of the Workspace Browser window.
-
Select a project in the Workspace Browser window that contains attachments and click Check Out with Attachments.The project and its attachments are checked out.
Checking out and editing pictures: QXP & QCD
You can check out and edit attached pictures in QuarkXPress by choosing Platform > Check Out Picture. After a picture is checked out, it is located in the folder you specify for storing checked-out files (QuarkXPress/Edit > Preferences > Quark Publishing Platform > General).
If the Edit Original XTensions software is installed, you can also check out and edit attached pictures. Double-click a box that contains an attached picture to display the Edit Original dialog box and check out the picture in the background.
You can also Control-click/right-click a picture box that contains an attached picture and choose Edit Original from the context menu.
Whether you use Edit Original or Platform > Check Out Picture, you must check in the picture or save a revision to update Quark Publishing Platform Server.
You can also choose Platform > View Picture Revisions to view revisions of the image or revert to a previous version.
In QuarkXPress, you can also check out pictures that are not attached to a layout. When you check out such a picture, it opens in the default image-editing application.
Using Advanced search: QCD and QXP
You can create a search by choosing Advanced Search from the drop-down menu attached to the Quick Search field. You can use this search once, or you can save it with your other searches.
-
Choose Advanced Search. The advanced search interface displays.
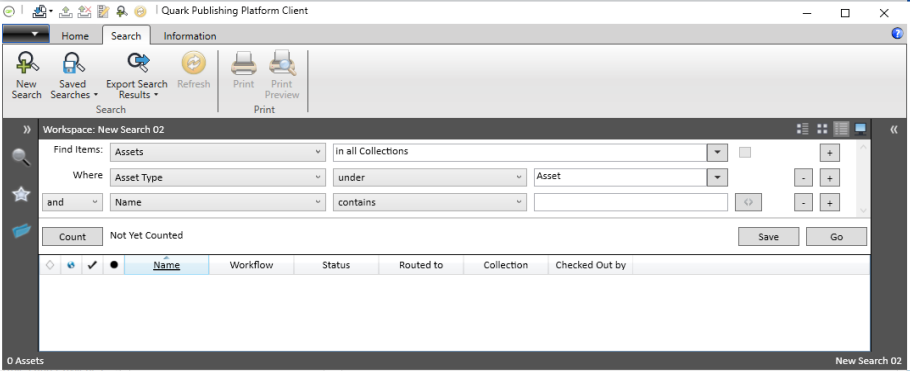
Use the advanced search mode to specify search criteria. -
To save the search, enter a name in the Search Name field, specify search criteria, and click Save to execute and save the search. If you do not want to save the search, click Go after you specify criteria.
-
Select a file and click Check Out.
Cancelling a Checkout
To cancel a checkout of an asset, select the asset in the Workspace window and click Cancel Checkout. The asset is removed from your computer and any changes made since checkout are discarded. However, if you made any changes, an alert notifies you that your changes may be lost. If you saved a revision of the asset on Quark Publishing Platform Server, the revision becomes the current version.
You can also cancel the checkout of assets that you have currently checked out in other applications.
Working with templates
In order to maintain consistency in your workgroup, you can create articles from article templates and create projects from project templates.
-
To create an article template, design an article in QuarkCopyDesk, choose File > Save As, and choose Article Template from the Type drop-down menu before you click Save. QuarkCopyDesk article templates have a suffix of .qct.
-
To create a project template, design a layout in a QuarkXPress project, choose File > Save As, and choose Project Template from the Type drop-down menu before you click Save. QuarkXPress project templates have a suffix of .qpt.
You can check article templates and project templates into Quark Publishing Platform like you would articles and projects.
To create a new project from a template in QuarkXPress, choose File > New > Project from Server Template. In the dialog box that displays, you can choose any project template available to you in Quark Publishing Platform.
To create a new article from a template in QuarkCopyDesk, choose File > New > Article from Server Template. In the dialog box that displays, you can choose any article template available to you in Quark Publishing Platform.
You can use Quark Publishing Platform article templates to create and replace geometry in QuarkXPress layouts. For more information, see Attaching articles by dragging.
Attaching content to layouts
In some workflows, content is created in QuarkCopyDesk or another application, and then added to a layout by a layout artist. In other workflows, the layout is created first, and then boxes in the layout are assigned to content contributors as articles. Both adding content from Quark Publishing Platform to a layout and assigning articles from a layout are examples of attaching content to a layout.
When you attach an asset to a layout, the Assign dialog box may display, depending on whether the asset is attached as a primary or secondary attachment to the layout (see Primary and secondary attachments). You can use this dialog box to make any necessary changes to the asset's metadata. For example, you might change the status to indicate that it is now in layout, or add to the revision comment.
To see which assets are attached to the active layout in QuarkXPress, click Attachments in the Workspace navigation pane of the Workspace Browser palette.
If you attach an asset to a layout in a project that has not yet been checked in to Quark Publishing Platform, that asset is referred to as a local asset. Once you have checked the project in, the asset is referred to as a global asset.
Primary and secondary attachments
There are two kinds of attachments: primary attachments and secondary attachments. An article can be a secondary attachment to layouts in multiple projects, but can be a primary attachment for only one layout. The layout that has an article as a primary attachment determines the article's geometry. You cannot edit secondary attachments directly, but you can update them to reflect changes to the contents of the primary attachment.
If an article is a primary attachment for a layout, Quark Publishing Platform sends notifications when certain modifications are made to that article.
-
When a layout artist alters the geometry of such an article and then chooses Platform > Update All Geometry, an alert displays for the QuarkCopyDesk user who is working on the text of the article, allowing that person to update the article with the latest geometry from the layout. This allows the QuarkCopyDesk user to respond to any changes in component size. Geometry is also updated at check-in and check-out when the QuarkXPress user checks in the project if Auto update geometry on: Check In and Auto update geometry on: Check Out are checked in the Project and Attachments preferences pane in QuarkXPress.
-
If a layout artist updates the geometry for an article, but then cancels the checkout of the project, the geometry is updated to restore it to its original settings if your preferences allow it to.
-
If a QuarkCopyDesk user updates the content of such an article and then saves a revision, Content Differs displays in the Update State column of the Workspace Browser window for that article. A QuarkXPress user can then update the content by Control+clicking/right-clicking the article and choosing Update Content, clicking the Update Content button in the toolbar of the Workspace Browser window, or double-clicking the asset's icon in the Attachments view in the Workspace Browser window. This allows the QuarkXPress user to respond to any changes in text or picture content. Article content is automatically updated when you check out a project if Auto update content on: Check-Out is checked in the Project and Attachments preferences pane in QuarkXPress. Article content is automatically updated when you save a revision of a project, check in a project, or output a project if Auto update content on: Check-Out Check-In/Save Revision/Output is checked in the same pane.
Pictures are always secondary attachments, because they do not have geometry. Unlike articles, though, pictures can be attached multiple times in the same layout.
A QuarkXPress user can also update geometry with the Update Geometry drop-down menu icon in the Workspace Browser window and by Control+clicking/right-clicking the asset icon and choosing an option from the Update Geometry submenu.
When a layout artist updates an article's geometry, Geometry Differs displays in the Update State column of the Workspace Browser window for that article.
To override an article or component's primary attachment, press Shift and then drag the article or component to a layout. This makes the article or component a primary attachment to the current layout, and converts the old primary attachment into a secondary attachment.
Attaching article components by dragging
To attach a single article component by dragging, drag the article component from the Workspace Browser window to a text or picture box. If the type of the target box does not match the component type, you can press Command/Ctrl to force the box to accept the content.
To attach multiple components, drag them from the Workspace Browser window to a blank part of the page.
You can also drag and drop multiple components by dragging them to a group of boxes. A dialog box allows you to map the components to the appropriate boxes.
When you attach a component to a layout, Quark Publishing Platform assigns the component's type and name to the component's box (whether or not the component has geometry). QuarkXPress users can view a box's component information in the Component tab of the Modify dialog box (Item menu).
Attaching articles by dragging
You can attach an article by dragging either an article or an article template to a layout. The topics below explain how.
To cancel a drag-and-drop operation, press Escape before you release the mouse button.
Dragging articles
The following table explains what happens when you drag an article to various targets in a layout.
|
Target |
Result |
|
Blank area on the page |
Quark Publishing Platform creates boxes for all the components in the article. If the article has geometry, Quark Publishing Platform uses that geometry (including any relative geometry) when it creates the boxes for the components. If the article has text or pictures, they are added to the layout. Text box links are maintained. The Assign dialog box displays. The list on the left side of the Assign dialog box lets you change the attributes of all the components from a single dialog box. When you click OK, the entire article is attached to the layout. |
|
One of two or more selected boxes without attachments |
Quark Publishing Platform attempts to map the components in the article to the selected boxes based on content type, component type, and component name. If it cannot, it displays the Map Components to Boxes dialog box (see below) so that you can manually map the content to the boxes. The Assign dialog box displays. The list on the left side of the Assign dialog box lets you change the attributes of all the components from a single dialog box. When you click OK, the mapped components are attached to the layout. If you press Option/Alt, the existing box is ignored and everything works as if you had dragged the article to a blank area on the page. |
|
Box without attachment |
If the article has one component, Quark Publishing Platform attempts to map the component to the box. If the article has multiple components, Quark Publishing Platform displays the Select Component dialog box so that you can specify which component should be mapped to the box. The Assign dialog box displays. When you click OK, the component is attached to the layout. If you press Option/Alt, the existing box is ignored and everything works as if you had dragged the article to a blank area on the page. |
|
Box with attachment |
Nothing happens. If you press Option/Alt, the existing box is ignored and everything works as if you had dragged the article to a blank area on the page. |
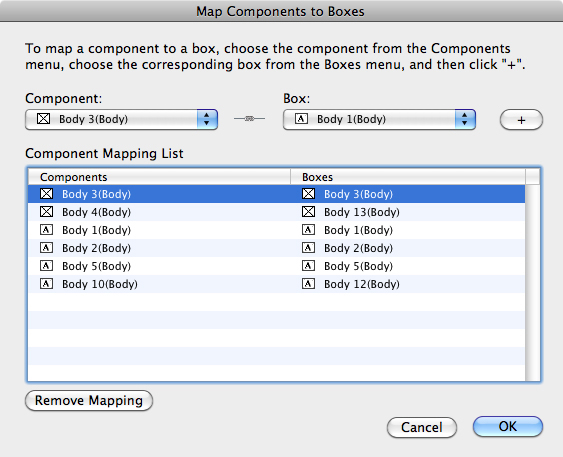
In the Map Components to Boxes dialog box, the list on the left shows the component names of the boxes in the article, and the list on the right shows the component names of the boxes in the layout. To map a component to a box, choose the component's name from the Component drop-down menu, choose the box's name from the Box drop-down menu, and then click +. Repeat this procedure until all desired components have been mapped, then click OK. You do not have to map every component to a box.
To remove a mapping, select the mapping and click Remove Mapping.
If you map a text component to a picture box or a picture component to a text box, the box type changes to accommodate the component content.
If you drag a multipage article or article template with geometry into a layout, and there are enough pages in the layout to accommodate the content from the article or article template, Quark Publishing Platform places the first page's content at the drop point and then places each remaining page of content on a subsequent page. If there are not enough pages in the layout, Quark Publishing Platform stacks the content from any remaining pages in front of the content on the last page.
Dragging article templates
The following table explains what happens when you drag an article template to various targets in a layout.
|
Target |
Result |
|
Blank area on the page |
Quark Publishing Platform creates boxes for all the components in the article template. If the article template has geometry, Quark Publishing Platform uses that geometry (including any relative geometry) when it creates the boxes for the components. If the article template has text or pictures, they are added to the layout. Text box links are maintained. Quark Publishing Platform also automatically creates an article from the template and displays the Assign dialog box. The list on the left side of the Assign dialog box lets you change the attributes of all the components from a single dialog box. When you click OK, the new article is attached to the layout. This makes it easy to create documents using standard layouts from article templates. |
|
Box without attachment |
The existing box is ignored and everything works as if you had dragged the article template to a blank area on the page. |
|
Box with attachment |
See Replacing article geometry. If you press Option/Alt, the existing box is ignored and everything works as if you had dragged the article template to a blank area on the page. |
If you drag a multipage article or article template with geometry into a layout, and there are enough pages in the layout to accommodate the content from the article or article template, Quark Publishing Platform places the first page's content at the drop point and then places each remaining page of content on a subsequent page. If there are not enough pages in the layout, Quark Publishing Platform stacks the content from any remaining pages in front of the content on the last page.
Attaching articles by assigning
To attach an article to a layout by assigning:
-
Create one or more text boxes and picture boxes for the article.
-
Select all the boxes that should be in the article.
-
In the Workspace Browser window, click the Assign button
 . You can also Option+click/right-click the box and choose Platform > Assign as Article. If the box is a picture box, you can choose Platform > Assign as Picture to create a direct attachment.
-
A dialog box displays. Fill out any desired fields. For example, you would probably want to set a status and route the article to someone.
-
Click OK.
Attaching text files to layouts
You can attach text files in the following formats to a layout:
-
Microsoft Word
-
RTF
-
Plain text
To attach a text file to a layout, drag it to a text box or to a blank area on the page. (You can also press Command/Ctrl and drag the file to a picture box or no-content box.) Quark Publishing Platform treats a text file as an article with a single text component and no geometry or page picture.
After you attach a text file to a layout, you can check the text file out in QuarkXPress, QuarkCopyDesk, or Quark Publishing Platform Client and make changes. (Note, however, that you cannot do this when using Quark Publishing Platform with InDesign and InCopy.)
In QuarkXPress and QuarkCopyDesk, you can check out an attached text file, make changes to the content in QuarkXPress or QuarkCopyDesk, and then check it back in as a new revision.
Similarly, a Quark Publishing Platform Client user can check out a text file that is attached to a layout, make changes to the content in a text editing application, and check it back in. In any QuarkXPress layout or InDesign document that has the text file as an attachment, the Update State column in the Workspace Browser window displays Content Differs, and you can choose Update Content to get the latest version of the text file's contents.
Attaching pictures to layouts
There are two types of picture attachments: Direct attachments and component attachments. In a direct attachment, you attach only the picture to the layout. In a component attachment, you attach a new article with one picture component (and the picture it contains) to the layout.
To attach a picture asset to a layout, drag the picture file to a picture box or to a blank area on the page. (You can also press Command/Ctrl and drag the file to a text box or no-content box.) The Assign Picture dialog box displays, allowing you to change the picture's attributes.
You can attach a picture to an anchored picture box, but only as a direct attachment.
Attaching multimedia assets to ePub layout
When you are working with an ePub layout in QuarkXPress, you can associate picture, audio, and video Quark Publishing Platform assets with picture boxes, for display in exported ePUB e-books. To use a Quark Publishing Platform audio or video asset in an ePub layout, add an audio or video component as described in A Guide to QuarkXPress.
When Quark Publishing Platform XTensions software for QuarkXPress is installed, you can attach picture, video, and audio Quark Publishing Platform assets to HTML5 objects using the HTML5 palette. In general, such assets are referred to as digital assets. To add a Quark Publishing Platform asset to an HTML5 object, click Quark Publishing Platform in the HTML5 palette, then click Browse Quark Publishing Platform.
Tracking attachments
Attachments make it easy for an administrator to determine which assets are being used in which layouts. Administrators can get information about asset usage in the following ways:
-
In the Workspace Browser window, Control+click/right-click an article or component and choose Relationship Information. The Relationship Information dialog box shows which projects the component is used in. If an article has an attached picture, the Refers to tab shows the picture as having a relationship with the article. For each project, the dialog box indicates which layout and page number the component occurs on.
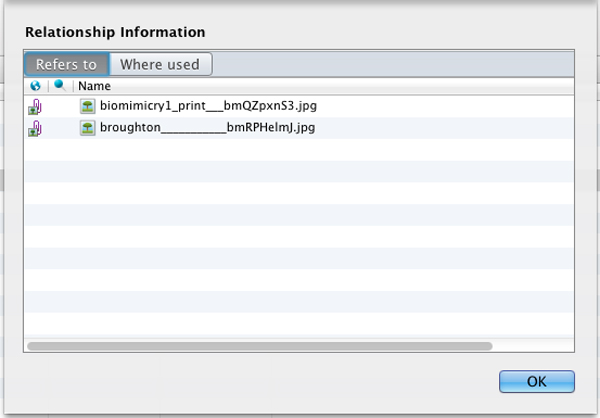
Relationship Information dialog box You can view the same information in the tabs at the bottom of the Preview pane.
-
Choose Project and Page from the Display Mode drop-down menu
 , then expand the projects in the palette to see which components are attached to
them. For each project, the dialog box indicates which layout and page number the
component occurs on.
Detaching components
When you detach a component from a layout, Quark Publishing Platform handles the detachment differently depending on the component type.
-
When you detach a picture component, a dialog box lets you choose to delete the picture from the layout or save a linked local copy of the picture file.
-
When you detach a text component, the text box and content remain in the layout by default. To delete them during the detach process, press Option/Alt before you click the Detach button. You can also delete and detach an item by pressing Shift+Delete or by selecting the item, pressing Delete, and then clicking Continue if necessary. (By default, the Do not show alert when: Deleting a box with a server attachment preference is checked, so you may not need to press Continue.)
To detach a component, select it in the layout and choose Platform > Detach, or Control+click/right-click the component in the layout and choose Detach from the context menu.
Attaching digital assets to digital layouts
When Quark Publishing Platform XTensions software for QuarkXPress is installed, you can attach picture, video, and audio Quark Publishing Platform assets to HTML5 object using the HTML5 palette. In general, such assets are referred to as digital assets.
To add a Quark Publishing Platform asset to an HTML5 object, click Quark Publishing Platform in the HTML5 palette, then click Browse Quark Publishing Platform.
Once you have checked in or saved a revision of the project, the Workspace Browser will show that multiple assets are attached to the box. (Digital assets that are
attached to a digital layout are referred to as overlay assets, and are identified with an  icon.)
In the QuarkXPress Usage dialog box (Utilities menu), digital assets added from Quark Publishing Platform are identified with a Platform in the Source column.
All asset-related privileges under are honored for audio and video assets.
For more information about digital layouts, see Digital Publishing with QuarkXPress.
Attachments that have been attached through the HTML5 palette do not display in the Project Attachments palette.
For information on creating AVE issues with Quark Publishing Platform, see A Guide to QuarkXPress.
Replacing article geometry
In QuarkXPress, you can replace an attached article's geometry with the geometry from an article template. To do so, drag the article template to a box that is part of the existing attached article. Quark Publishing Platform attempts to automatically map the article template components to the appropriate boxes based on content category, component type, and component name.
In order for Quark Publishing Platform to map the components automatically, the content types, component types, and component names in the article template must exactly match the content types, component types, and component names in the article.
Working with libraries
You can check a QuarkXPress library into and out of Quark Publishing Platform, route it, change its status, and so forth, just like any other type of asset.
To check an open library into Quark Publishing Platform from within QuarkXPress, open the library and then choose Platform > Check In Library. If more than one library is open, the frontmost library is checked in.
By default, double-clicking a library in the Workspace Browser window opens a read-only copy of that library. To change what happens when you double-click a library, use the controls in the QuarkXPress/Edit > Preferences > Quark Publishing Platform > Workspace > Mouse Settings tab > QuarkXPress Libraries area.
When working with libraries, remember:
-
Libraries created on Mac OS cannot be opened on Windows, and libraries created on Windows cannot be opened on Mac OS.
-
You cannot see previews of libraries in the Workspace Browser window.
Libraries have the same metadata as QuarkXPress projects.
You cannot attach a library to a layout.
Libraries and picture components
If you drag a picture box that contains an attached picture into a library, then check the library into Quark Publishing Platform, the picture attachment is maintained. If you drag the picture box out of the library into a different layout, a new picture attachment is created in the new layout. So if you then update the picture in Quark Publishing Platform, the picture in the new layout is updated.
The same is not true for text boxes, however; when you drag a text box with an attached article from a library to a layout, Quark Publishing Platform simply creates a copy of the text box with no links to Quark Publishing Platform.
Using Read-Only to view an asset
To open a read-only version of an asset, select it in the Workspace window and click Read-Only. The read-only asset is copied to your Quark Publishing Platform local files folder and the asset opens in read-only mode.
If you want to create a file based on a read-only copy, choose File > Save As to create an asset. If you want to check in the asset, you must have the privilege to check in new files.
In QuarkCopyDesk and QuarkXPress, you can click the Read-Only button in the Check Out dialog box to open an asset in read-only mode.
In the Platform Adapter for Microsoft Office - Word, you can click the Open as Read-Only button in the Open from Server dialog box to open a document in read-only mode.
Publishing assets
To publish a Quark Publishing Platform asset and store the published copy on your workstation, select it in the Workspace Browser window and click Publish, or right-click the asset and choose Publish. The Publish dialog box displays. Use this dialog box to specify the format you want to publish the asset in.
The Publish dialog allows you to publish a layout in one of the following supported formats:
-
App Studio Article: This option creates an App Studio article from an App Studio layout in an App Studio Article. (For more information, see A Guide to App Studio.) Note that you must supply App Studio Publishing Portal credentials in QuarkXPress Server in order to be able to upload App Studio articles to the Portal; for more information, see A Guide to QuarkXPress Server.
-
App Studio Package: This option creates an App Studio Package.
-
ePUB: This option creates an ePUB file from a reflow article in a Print or App Studio layout. This option is available only if the layout includes a reflow article. (For more information, see "Working with Reflow view" in A Guide to QuarkXPress.) You can specify which layout and which export settings to use.
-
Collect for Output: This option delivers the selected asset, along with all references (images, audio, videos, reference XML), to the configured delivery channel or to a particular location.
-
HTML5 Publication: This option publishes the selected asset as HTML5 output with interactive graphics.
-
Responsive HTML: This option publishes the selected asset as responsive HTML5 output.
-
PDF: This option creates a PDF rendering of a Print or App Studio layout in a QuarkXPress project. You can specify which layout and which PDF output style to use.
-
QuarkXPress Project: This option publishes the selected asset as a QuarkXPress project.
Viewing and editing attribute information
You can view and edit an asset's attributes in the Check In, Save Revision, and Edit Attribute dialog boxes. If you want to view and edit attributes without opening an asset, use the Edit Attribute command in the Workspace Browser window.
To use Edit Attribute:
-
Select the asset in the Workspace window and click Edit Attribute. The Edit Attributes dialog box displays.
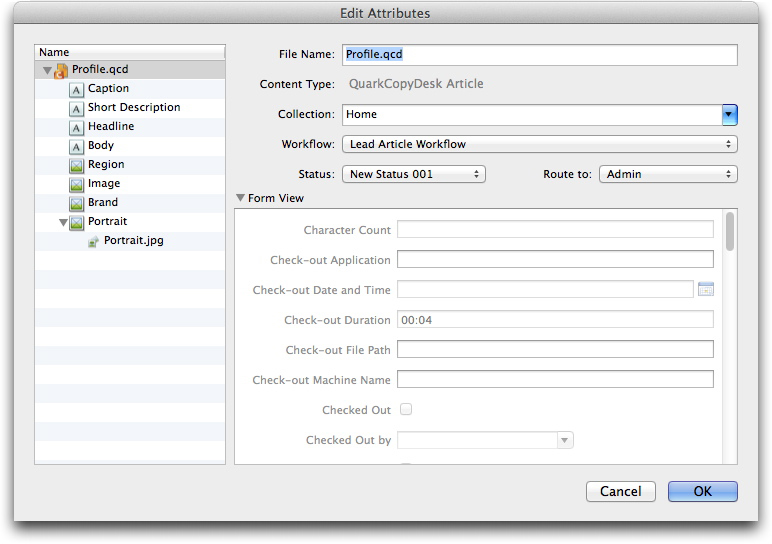
Use the Edit Attributes dialog box to view and edit an asset's attributes without checking out the asset. Non-editable attributes are either automatically maintained by the application or restricted based on user privileges or status. You can view all attributes, but you might not be able to edit all of them.
Changing an asset's status can change the Route to value if an automatic rule applies. A change in status can change the Quark Publishing Platform constraints specified for the asset type.
-
When you finish editing attributes, click OK.
This feature is particularly useful if you want to route an asset to a different user without checking out the asset and creating another revision.
This dialog box also displays when you drag an asset from one collection to another. If the asset cannot be moved to the target collection, you can use the dialog box to edit the asset's other attributes.
Saving a revision of an asset
To update Quark Publishing Platform Server with your most recent changes to an asset, use the Save Revision command.
-
To save a revision of the active article in QuarkCopyDesk, choose Platform > Save Article Revision.
-
To save a revision of the checked-out and active article or project in QuarkXPress, choose Platform > Save Article Revision or Platform > Save Project Revision.
-
To save a revision of the active asset in Quark Publishing Platform Client, click Save Revision in the Quark Publishing Platform Client toolbar.
Platform adapter for Microsoft Office
You can save a revision of a Microsoft Office (Word, Excel, Visio, PowerPoint) document to the Platform server by using the following command:
-
The Save Revision to Server command from the Info tab of the File menu. This command will update the Quark Publishing Platform Server with your most current changes while leaving the document open for more editing.
Saving a new asset
If you are saving a version of a brand new asset, selecting this command will bring up the Save dialog:
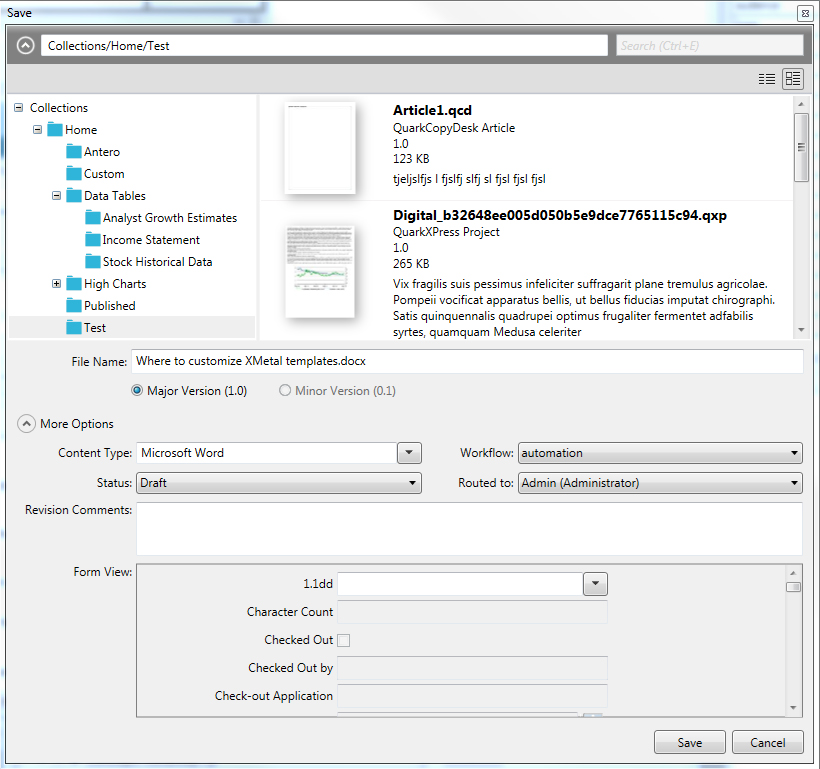
-
Choose a target collection from the collection list..
-
Enter a file name for the document in the File Name field.
-
To specify whether the asset is saved with a major or minor version number, click Major Version (1.0) or Minor Version (0.1).
Access to the Minor Version (0.1) option is controlled by privileges.
-
Click More Options and modify any other available attribute fields as appropriate. Note that access to these attribute fields is determined by your privileges.
-
Choose a content type from the Content Type drop-down menu.
-
Choose a workflow from the Workflow drop-down menu.
-
To indicate the asset's current status, choose an option from the Status drop-down menu.
-
To send the asset to a particular user or group, choose an option from the Routed to drop-down menu. (Note that if your workflow relies on automatic status-based routing, the Routed to drop-down menu value might change automatically when you choose an option from the Status drop-down menu.)
If you do not choose any name from the Routed to drop-down menu when you check in an asset for the first time, the asset is routed to the active user.
-
Use the Revision Comment field to enter a revision comment for the version of the asset you are checking in. The revision comment will be stored with the asset. Depending on the preference setting of the user who checks out the asset, the revision comment displays during the check-out process. The revision comment also displays when you view revisions of the asset.
-
Modify any other available attribute fields as appropriate. Note that access to these attribute fields is determined by your privileges.
-
Click Save. Depending on your preferences, when the check-in process completes, Quark Publishing Platform Server may delete the local copy of the asset.
Saving an existing asset
If you are saving a revision of an existing asset, selecting this command will bring up the Save dialog:
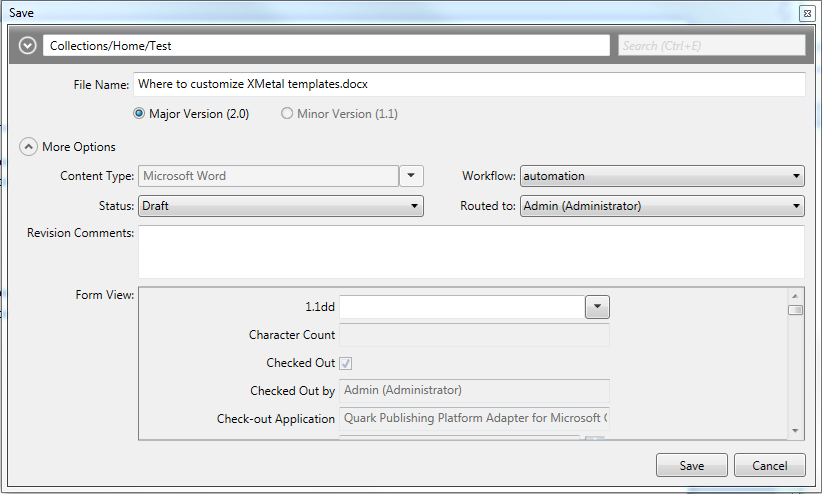
-
To specify whether the asset is saved with a major or minor version number, click Major Version (1.0) or Minor Version (0.1).
Access to the Minor Version (0.1) option is controlled by privileges.
-
Use the Revision Comment field to enter a revision comment for the version of the asset you are checking in. The revision comment will be stored with the asset. Depending on the preference setting of the user who checks out the asset, the revision comment displays during the check-out process. The revision comment also displays when you view revisions of the asset.
-
Click More Options and modify any other available attribute fields as appropriate. Note that access to these attribute fields is determined by your privileges.
-
Click Save. Depending on your preferences, when the check-in process completes, Quark Publishing Platform Server may delete the local copy of the asset.
Customizing the search results pane
To specify the columns you want to display in the search results pane, Control-click/right-click any column header and choose Customize Current View. The Configure Columns tab displays.
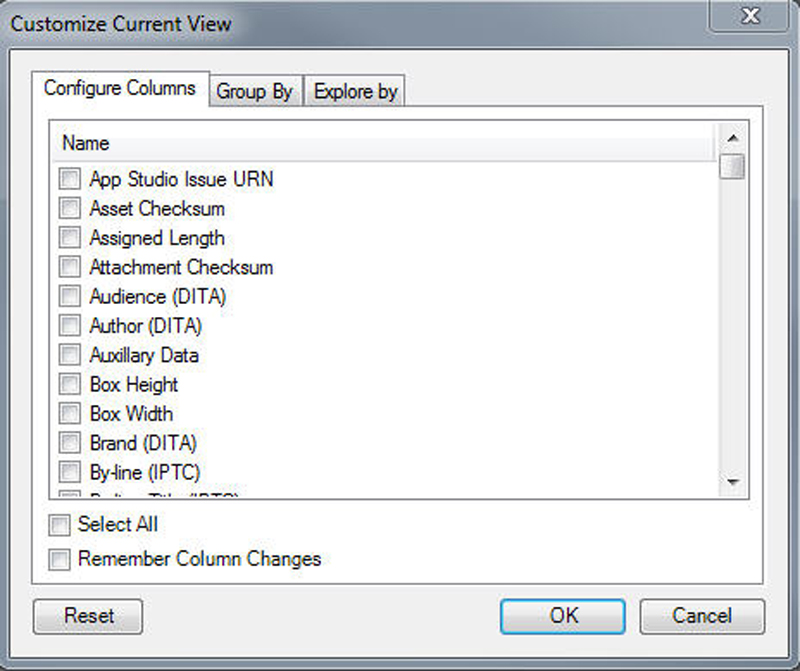
-
Check the attribute columns you want to display, and uncheck the attribute columns you want to hide. You can check and uncheck the individual columns you want to show and hide, or use the Select All check box to select all or none of the attributes.
You can add the Thumbnails column to display thumbnail asset previews.
-
Check Remember Column Changes to maintain the column display.
If you have the Enable Enhanced Search Displays in Workspace Browser privilege, the Group By and Explore By tabs display.
Use the Group By tab to group the results by attribute values.
Use the Explore By tab to control attachment display:
-
Show Relationship Information: Lets you expand projects to see their attachments.
-
Show Asset Usage (Project Mode): Displays projects and their attachments first, followed by assets that are attached to other layouts and then unattached assets. Check With Layout and Page to expand projects to see their layouts and pages, and indicate which layout and page each attachment is attached to.
-
Show Related Assets: Lets you expand projects to see their attachments. Check With Relation View to see the relationships between attachments.
-
Show Collections Hierarchy: Displays assets in the collections hierarchy.
Quark Publishing Platform Adapter for Microsoft Office
Open from Server
You can open a Microsoft Office (Word, Excel, Visio, PowerPoint) document from the Platform server by using the following command:
-
The Open from Server command from the File menu.
Selecting this command will bring up the Open from Server dialog:
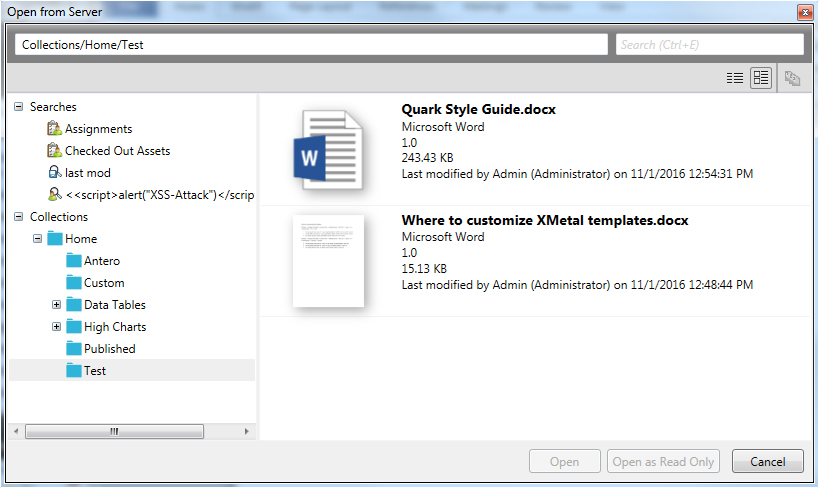
-
From the list of collection on the left side of the screen, navigate to the collection containing the document you wish to open.
You can use the search field to find a document or collection quickly. You can also use the search to access Assignments, and saved searches that the logged in user has access to.
-
Select the document you wish to open from the list on the right side of the screen.
-
Click Open to open an editable copy of the document or Open as Read-Only to open a read-only copy of the document.
You can open a read only earlier version of the document by clicking on the View Revisions icon at the top right of the dialog.
Discard Changes
To discard any changes you have made to a document, close the document and makes the document available for others to check out, use the following command:
-
The Discard Changes command from the Info tab of the File menu. This command will discard the checkout, close the document and makes the document available for others to check out. This option is only available for a checked out document.
An alert displays, allowing you to save or discard any changes made since your checkout :
Editing a read-only copy
If you have a read-only copy of a Microsoft Office (Word, Excel, Visio, PowerPoint) document open and you now want to make changes to that document you can do that by using the following command:
-
The Edit command from the Info tab of the File menu.
Selecting this command will close the document and then re-open an editable checked out version of the document. This option is only available if you have a read-only copy of a document open. dialog:
Save to Server
You can save a Microsoft Office (Word, Excel, Visio and PowerPoint) document to the Platform server by using the following command:
-
The Save to Server & Close command from either the File menu or the Info tab of the File menu. This command will update the Quark Publishing Platform Server with your most current changes and then close the document.
Selecting this command will bring up the Save dialog:
-
Choose a target collection from the collection list..
-
Enter a file name for the document in the File Name field.
-
To specify whether the asset is saved with a major or minor version number, click Major Version (1.0) or Minor Version (0.1).
Access to the Minor Version (0.1) option is controlled by privileges.
-
Choose a content type from the Content Type drop-down menu.
-
Choose a workflow from the Workflow drop-down menu.
-
To indicate the asset's current status, choose an option from the Status drop-down menu.
-
To send the asset to a particular user or group, choose an option from the Routed to drop-down menu. (Note that if your workflow relies on automatic status-based routing, the Routed to drop-down menu value might change automatically when you choose an option from the Status drop-down menu.)
If you do not choose any name from the Routed to drop-down menu when you check in an asset for the first time, the asset is routed to the active user.
-
Use the Revision Comment field to enter a revision comment for the version of the asset you are checking in. The revision comment will be stored with the asset. Depending on the preference setting of the user who checks out the asset, the revision comment displays during the check-out process. The revision comment also displays when you view revisions of the asset.
-
Modify any other available attribute fields as appropriate. Note that access to these attribute fields is determined by your privileges.
-
Click Save. Depending on your preferences, when the check-in process completes, Quark Publishing Platform Adapter may delete the local copy of the asset, based on a confirmation dialog.
Setting Quark Publishing Platform Client preferences
To set Quark Publishing Platform Client preferences, choose Quark Publishing Platform Client > Preferences. Use the dialog box to specify Workspace and alert display options, file management rules, and other defaults. Most preferences are stored on Quark Publishing Platform Server, so they apply to the user name you enter when you log on, regardless of the workstation settings.
General pane
The General pane includes three tabs: Basic, Notification, and Mouse Settings.
Basic tab
The Basic tab of the General pane includes basic Quark Publishing Platform Client preferences.
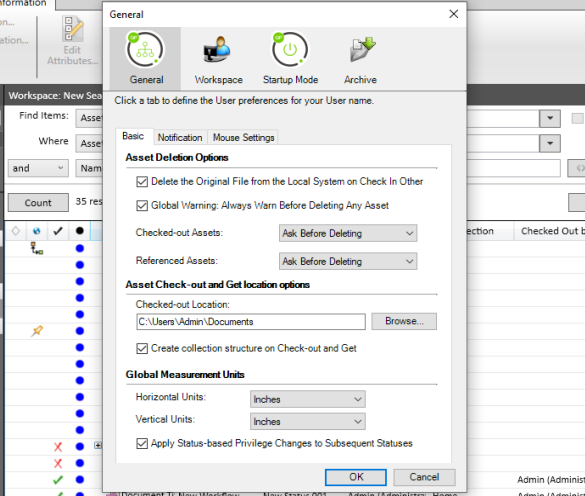
-
Uncheck Delete the Original File from the Local System on Check In Other to always retain original files when you use the Check In Other command. If you check Delete the Original File from the Local System on Check In Other, a warning message displays every time you use the Check In Other command, enabling you to retain or delete the selected file.
-
Check Global Warning: Always Warn Before Deleting Any Asset to display a warning each time you delete a Quark Publishing Platform asset in Quark Publishing Platform Client.
-
To specify how Quark Publishing Platform Client responds when you attempt to delete checked-out assets and assets attached to QuarkXPress projects, use the Checked-out Assets and Referenced Assets drop-down menus in the Asset Deletion Options area. The controls are identical for both options. Choose Delete Asset Without Warning to delete checked-out or attached assets without displaying a warning. Choose Never Allow Deletion to prevent the deletion of checked-out or attached assets. Choose Ask Before Deleting to display an alert so you can decide each time you delete a checked-out or attached asset.
-
To specify where checked-out and read-only assets are stored temporarily while you work on them, click Browse in the Location Options area and choose a location. The path will display in the Checked-out Assets field.
-
To specify the horizontal and vertical measurements units used for your Quark Publishing Platform workflow, choose options from the Horizontal Units and Vertical Units drop-down menus (Inches, Inches Decimal, Picas, Points, Millimeters, Centimeters, Ciceros, Agates, and Q).
-
Check Apply Status-based Privilege Changes to Subsequent Statuses to maintain privilege settings specified at the status level when subsequent statuses are selected for an asset.
Notification tab
The Notification tab of the General pane includes notification-related Quark Publishing Platform Client preferences.
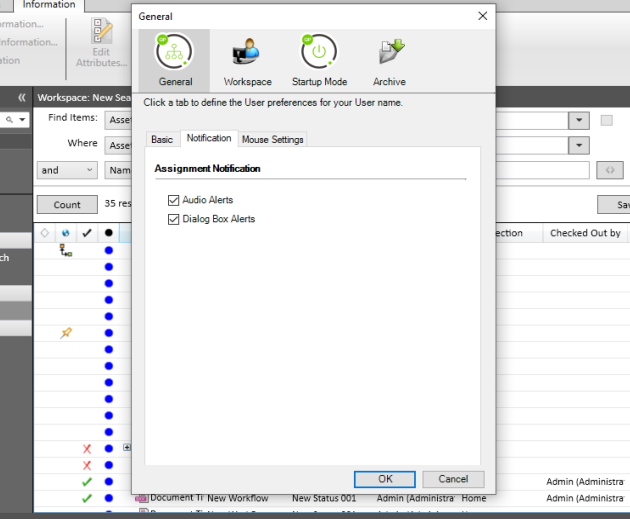
-
To specify how you want to be notified of assets routed to you while you're logged on, use the controls in the Assignment Notification area. Check Audio Alerts to hear a sound when an asset is routed to you. Check Dialog Box Alerts to display a dialog box that identifies the asset (or assets) routed to you.
Mouse Settings tab
To specify what happens when you double-click an asset in the Workspace window, click the drop-down menu in the Double-click Options area and choose Check Out, Edit Attributes, or Read Only.
If you choose Check Out, double-clicking a checked-out asset in a Workspace Browser window displays the Check In dialog box.
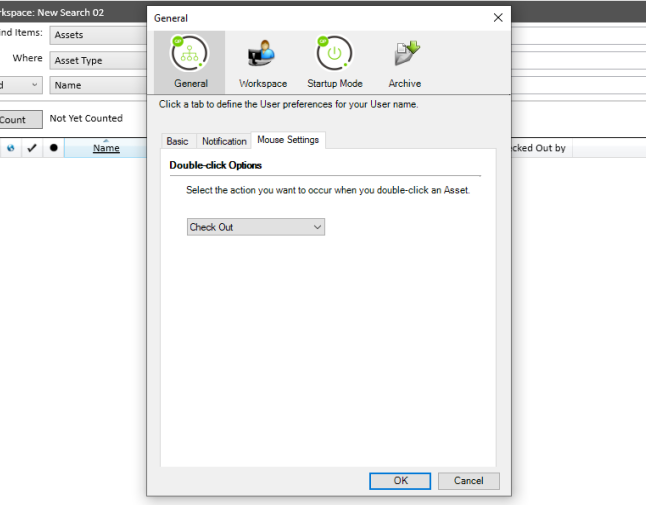
Workspace pane
The Workspace pane includes controls for how revision comments, asset previews, and text in the Workspace window display.
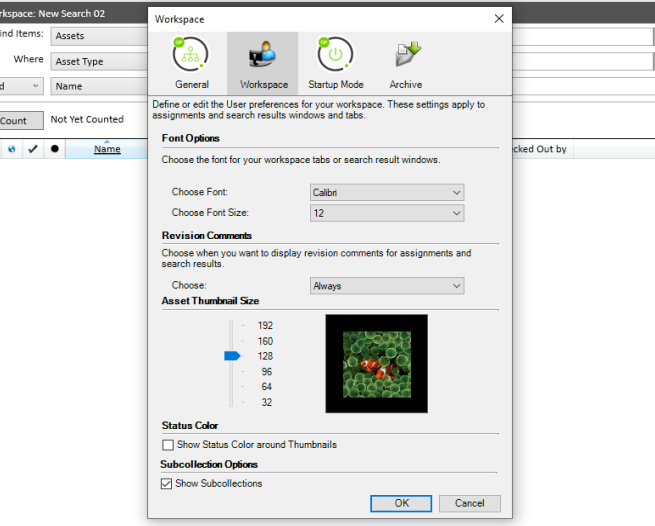
-
To specify the font and font size displayed for assets in the Workspace window, choose options from the drop-down menus in the Font Options area.
On Mac OS, if you choose a font that does not have a bold version, the enhanced search displays show all headings in plain text. For example, if you choose the Issue and Page display option, Unattached and <Collection Name> do not display in bold.
-
To specify how revision comments are displayed when you check out an assignment, choose Always, Never, or New Assignments Only from the drop-down menu in the Revision Comments area.
-
To control the size of thumbnail previews of assets in the Workspace window, adjust the slider in the Asset Thumbnail Size area.
-
Check Show Status Color around Thumbnails to display the color of an asset's status in the border of the thumbnail preview that displays when you choose Thumbnails, Filmstrip, or Detailed Thumbnails View from the Displays > Name submenu.
-
Check Show Subcollections to display subcollections. The subcollections will be displayed just above the main area in the Workspace Browser window. They will be displayed in whatever view you have chosen (thumbnail, list, etc.).
Startup Mode pane
The Startup Mode pane provides controls for logging on when you launch Quark Publishing Platform Client.
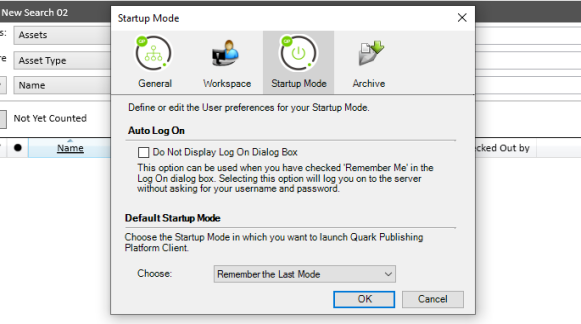
-
If you checked Remember Me in the Log On dialog box, you can check Do Not Display Log On Dialog Box to automatically log on to Quark Publishing Platform when you launch Quark Publishing Platform Client. This check box is also included at the bottom of the Log On dialog box.
-
Choose an option in the Default Startup Mode area to specify how Quark Publishing Platform Client starts the next time you launch the application. Options include Remember the Last Mode and Do Not Remember My Last Mode.
Archive pane
The Archive pane provides controls for handling revisions and deleting assets when archiving assets.
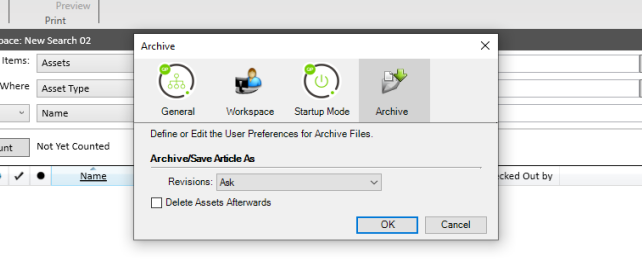
Setting Quark Publishing Platform preferences: QXP
You can use the Quark Publishing Platform panes in the Preferences dialog box (QuarkXPress/Edit menu) to specify default behaviors for handling assets, assignments, and search parameters. Except for the Use Default Path for Asset Check-out and Do not Display Log-On Dialog Box preferences, all other Quark Publishing Platform preferences are stored on Quark Publishing Platform Server. Preference settings apply to the user name you enter when you log on, regardless of the workstation settings.
On Mac OS X, the user can customize keyboard shortcuts for QuarkXPress Platform menu options, Preferences > Application > Key Shortcuts.
Use the Key Shortcuts pane of the Preferences dialog box (QuarkXPress/Edit menu) to customize key shortcuts for QuarkXPress.
Use the Key Shortcut Sets drop-down menu to choose from the existing key shortcuts sets or click on the  icon to duplicate an existing set.
Choose All to display all key shortcuts, Menu to display only shortcuts related to QuarkXPress menu items and Non-Menu to display all shortcuts not related to menu items.
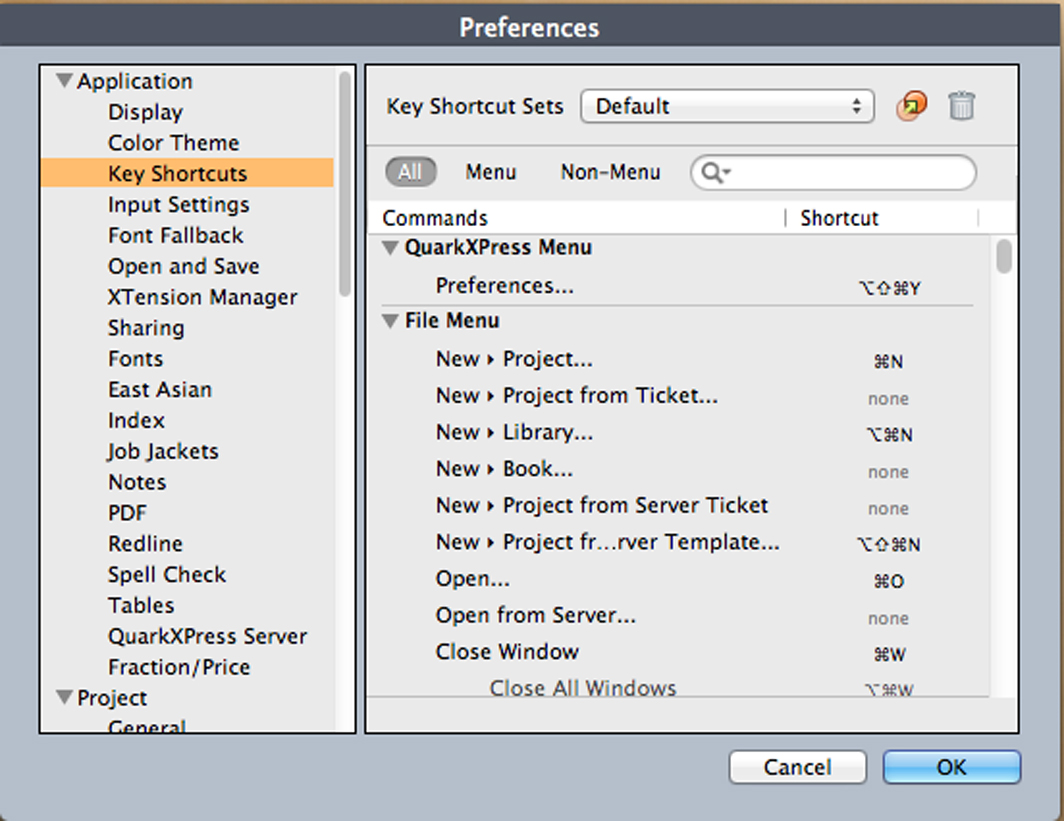
QXP preferences: General pane
The Quark Publishing Platform - General pane of the QuarkXPress Preferences dialog box includes three tabs: Basic, Notification, and Auto Log On/Off.
QXP preferences: General > Basic
To specify how the application responds when you attempt to delete checked-out assets and assets attached to QuarkXPress projects, use the controls in the Asset Deletion Options area in the Basic tab.
-
Uncheck Delete the Original File from the Local System on Check-In to always retain original files when you use the Check In command. If you check Delete the Original File from the Local System on Check-In, a warning message displays every time you use the Check In command, enabling you to retain or delete the selected file.
-
Check Global Warning: Always Warn Before Deleting Any Asset to display a warning each time you delete a Quark Publishing Platform asset.
-
The controls are the same in the Checked-out Assets and Attached Assets drop-down menus. Choose Delete Asset Without Warning to delete checked-out or attached assets without displaying a warning. Choose Never Allow Deletion to protect against deleting checked-out or attached assets. Choose Ask Before Deleting to display an alert each time you delete a checked-out or attached asset.
To specify where you temporarily store assets while you work on them, click Browse in the Location Options area. Navigate to the folder and click Choose/OK.
To control when revision comments display, choose an option from the Choose drop-down menu in the Display Revision Comments area.
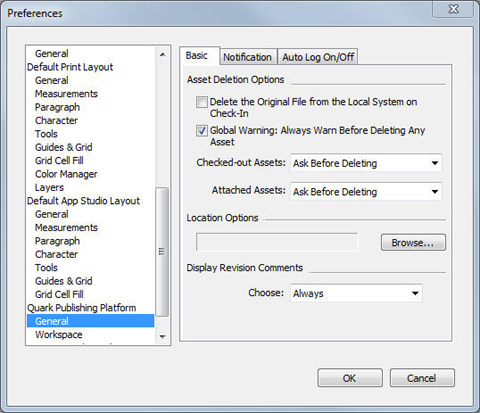
QXP preferences: General > Notification
The Notification tab lets you determine how you want to be notified of assets routed to you while you're logged on. Check Audio Alerts to hear a sound when an asset is routed to you. Check Dialog Box Alerts to display a dialog box that identifies the asset (or assets) routed to you.
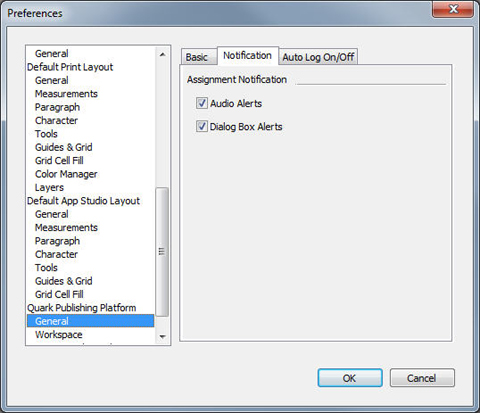
QXP preferences: General > Auto Log On/Off
The Auto Log Off Settings area lets you specify the interval of inactivity that must pass before you are automatically logged off. Check Warn Before Logging Off to receive a warning message before you are automatically logged off.
If you want to bypass the Log On dialog box the next time you log on to a Quark Publishing Platform Server, check Do Not Show This Dialog Box Again and Remember Me in the Log On dialog box. If you want the Log On dialog box to display again the next time you choose the command, uncheck Do Not Display Log-On Dialog Box in the Auto Log Off Settings area.
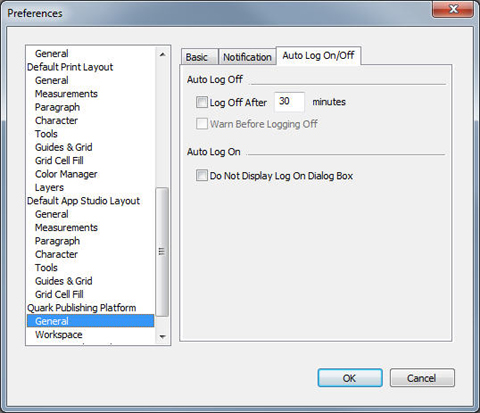
QXP preferences: Workspace pane
The Quark Publishing Platform - Workspace pane of the QuarkXPress Preferences dialog box includes two tabs: Workspace Browser and Mouse Settings.
QXP preferences: Workspace > Workspace Browser
The Workspace Browser tab lets you choose the font and font size to display in the Workspace Browser window's search results pane, whether or not to show status colors around thumbnails and whether or not to show subcollections.
Use the fields in the Depth Search area to specify parameters for a default Fit to Text Box–Depth search in QuarkXPress. When you select a text box and choose Quark Publishing Platform > Saved Searches > Fit to Text Box–Depth, Quark Publishing Platform calculates the length of the entire text chain (which might include multiple linked text boxes) and then compares this available space with the values in the Longer by and Shorter by fields.
-
The value in the Longer by field and the available space in the selected text chain equal the maximum article length to be displayed in the Workspace Browser window when you choose the Depth search. For example, if the Longer by value is two inches and the text chain length is four inches, the search returns articles that are no longer than six inches (the combination of the Longer by setting and the available space).
-
The available space in the selected text chain minus the value in the Shorter by field equals the minimum article length to be displayed in the Workspace Browser window when you choose the Depth search. For example, if the Shorter by value is two inches and the text chain length is four inches, the search returns articles that are no shorter than two inches (the available space value minus the Shorter by setting).
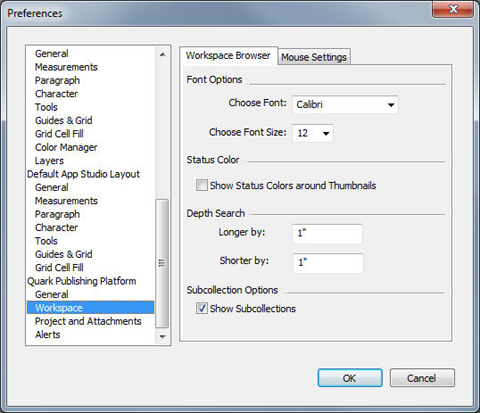
QXP preferences: Workspace > Mouse Settings
The Mouse Settings tab of the Workspace pane lets you specify what happens when you double-click an asset in the Workspace Browser window. For projects, templates, and libraries, you can choose New Project, Check Out, File Information Dialog Box, or Read-only.
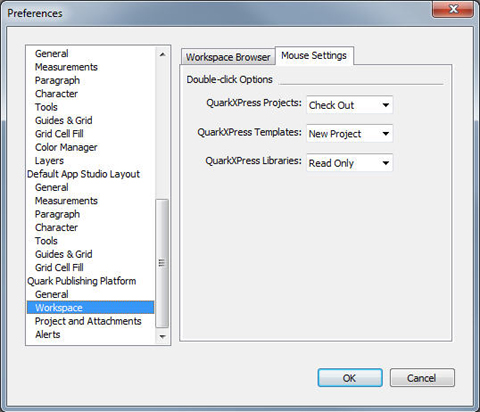
QXP preferences: Project and Attachments pane
The Project and Attachments pane of the Preferences dialog box includes four tabs: Attachments, Auto Upload, Article and Visual Indicators.
QXP preferences: Project and Attachments > Attachments
The Attachments tab lets you control the attachment settings.
To synchronize the "Issue" attribute of any attached items with that of the project to which they are attached, check Change the issue of the attached items to match the project.
To retain geometry in detached articles, check Retain article geometry after detaching articles.
To automatically restore an article's geometry to its previous state when the checkout of the project to which it is attached is cancelled, check Restore original article geometry after cancelling project checkout.
Set the Check Out with Attachments options:
-
Check the Check Out Articles option to also check out any attached articles when a project with attachments is checked out.
-
Check the Check Out Pictures option to also check out any attached pictures when a project with attachments is checked out.
Set the Duplicate Layout options:
-
Check the Sychronize Article Content option and duplicated article boxes will be synchronized on both layouts.
-
Check the Create Article Boxes as Secondary Attachments option and duplicated article boxes will be converted to secondary attachments.
-
Check the Clear Platform Links for Article Boxes option and Platform links will be removed from duplicated boxes (legacy behavior).
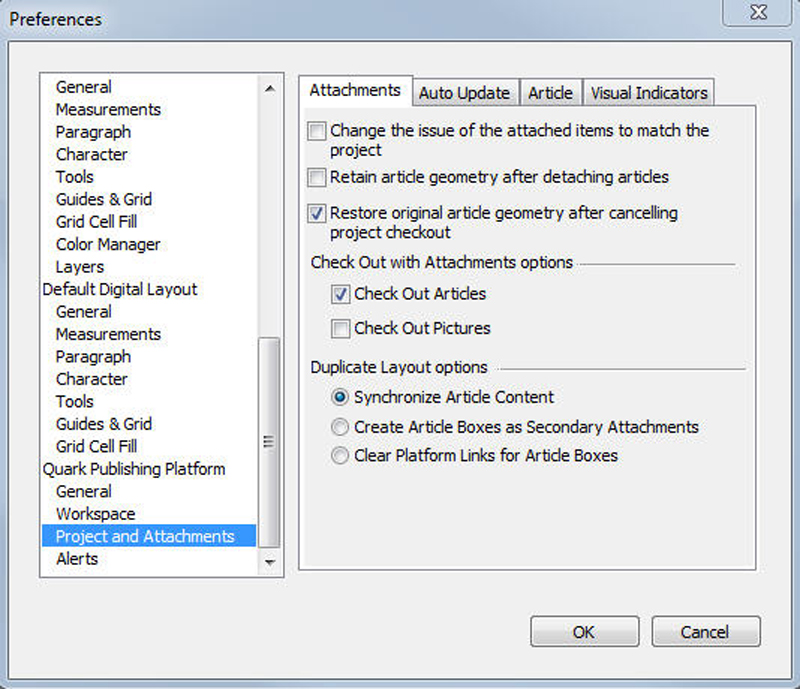
QXP preferences: Project and Attachments > Auto Update
The Auto Update tab lets you control auto update settings.
To automatically update content, check Auto update content on: and then check the events on which you want to automatically update content.
To automatically save a revision of a project after its content is updated, check Save New Revision of Project after Auto Update Content.
To automatically update geometry, check Auto update geometry on: and then check the events on which you want to update geometry.
The Auto update Page Pictures on Check In preference allows a user to send the latest page Pictures to QCD Users while performing Save Project Revision or Project Check in.
This preference allows user to send latest page Pictures to QXP Users while performing Save Project Revision or Project Check in
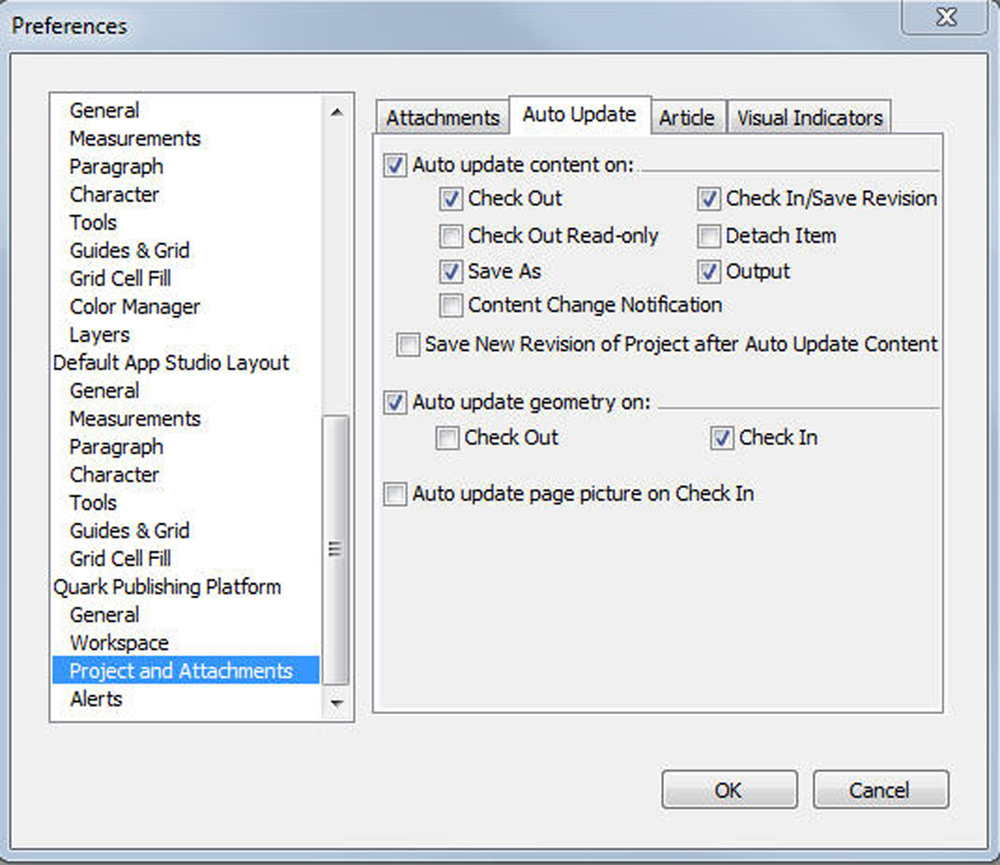
QXP preferences: Project and Attachments > Article
The Article tab lets you to set the User Preferences for configuring the Article Page Picture options while assigning articles from Projects.
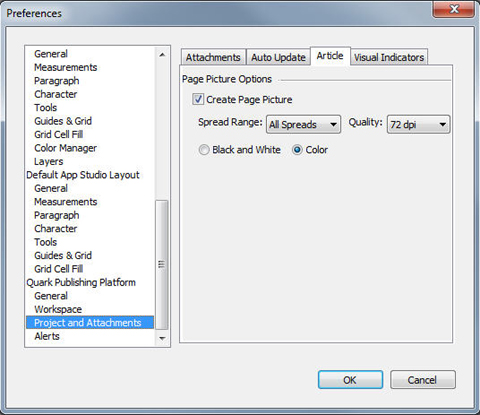
QXP preferences: Project and Attachments > Visual Indicators
The Visual Indicators tab lets you control the visual indicators settings.
To automatically show visual indicators in your project, check Show Visual Indicators for: and then check the events for which you want visual indicators to be displayed.
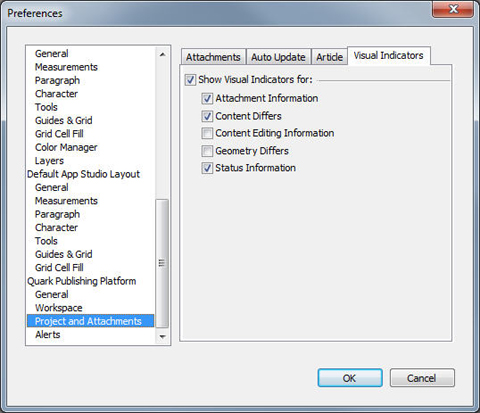
QXP preferences: Alerts pane
The Alerts pane lets you control when project- and attachment-related alerts display.
The Alerts pane of the Preferences dialog box includes two tabs: Project and Attachments.
QXP preferences: Alerts > Project
The Project tab of the Quark Publishing Platform - Alerts pane lets you control when project-related alerts display.
To suppress the alert that normally displays when you save a Platform project as a non-Platform project, check Do not show alert while saving a server project as a non-server project.
To save local copies of attached assets when you save a Platform project as a non-Platform project, check Save server assets when saving a server project as a non-server project and then indicate where to save them.
To suppress the alert that normally displays when you check out a Platform project that has attachments that are checked-out, check Do not show alert for checked-out articles when checking out a project with attachments.
To control when Job Jackets resources are updated, choose an option from the Choose drop-down menu in the Update Job Jacket Resources area.
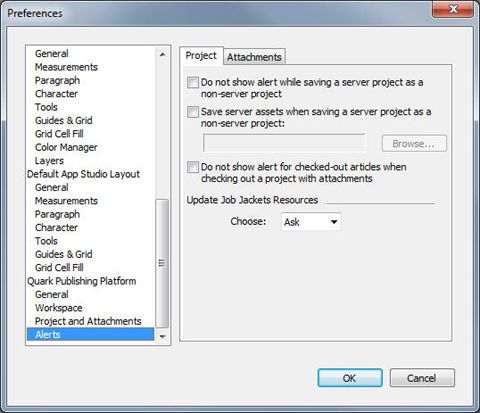
QXP preferences: Alerts > Attachments
The Attachments tab of the Alerts pane lets you control when attachment-related alerts display.
To suppress alerts in specific situations, check options under Do not show alert when.
To automatically save local copies of assets when they are detached, check Save a local copy of detached assets and then indicate where to save them.
To suppress the display of the Assign dialog box when attaching an article or picture, check the appropriate options under Do not show Assign dialog box when.
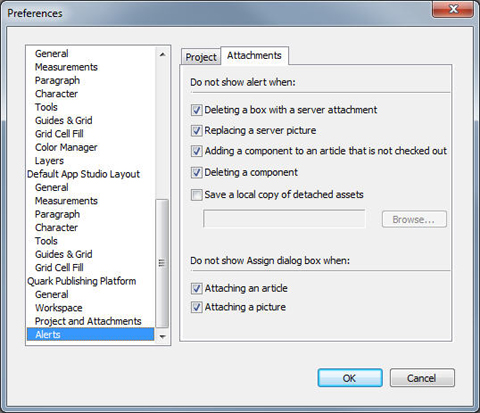
Setting Quark Publishing Platform preferences: QCD
You can use the Quark Publishing Platform panes in the Preferences dialog box (QuarkCopyDesk/Edit menu) to specify default behaviors for handling Quark Publishing Platform assets, assignments, and search parameters. Except for the Location Options and Do Not Display Log-On Dialog Box preferences, all other Quark Publishing Platform preferences are stored on Quark Publishing Platform Server. Preference settings apply to the user name you enter when you log on, regardless of the workstation settings.
On Mac OS X, the user can customize keyboard shortcuts for QuarkCopyDesk Platform menu options.
Use the Key Shortcuts pane of the Preferences dialog box (QuarkCopyDesk/Edit menu) to customize key shortcuts for QuarkCopyDesk.
Use the Key Shortcut Sets drop-down menu to choose from the existing key shortcuts sets or click on the icon to duplicate an existing set.
Choose All to display all key shortcuts, Menu to display only shortcuts related to QuarkCopyDesck menu items and Non-Menu to display all shortcuts not related to menu items.
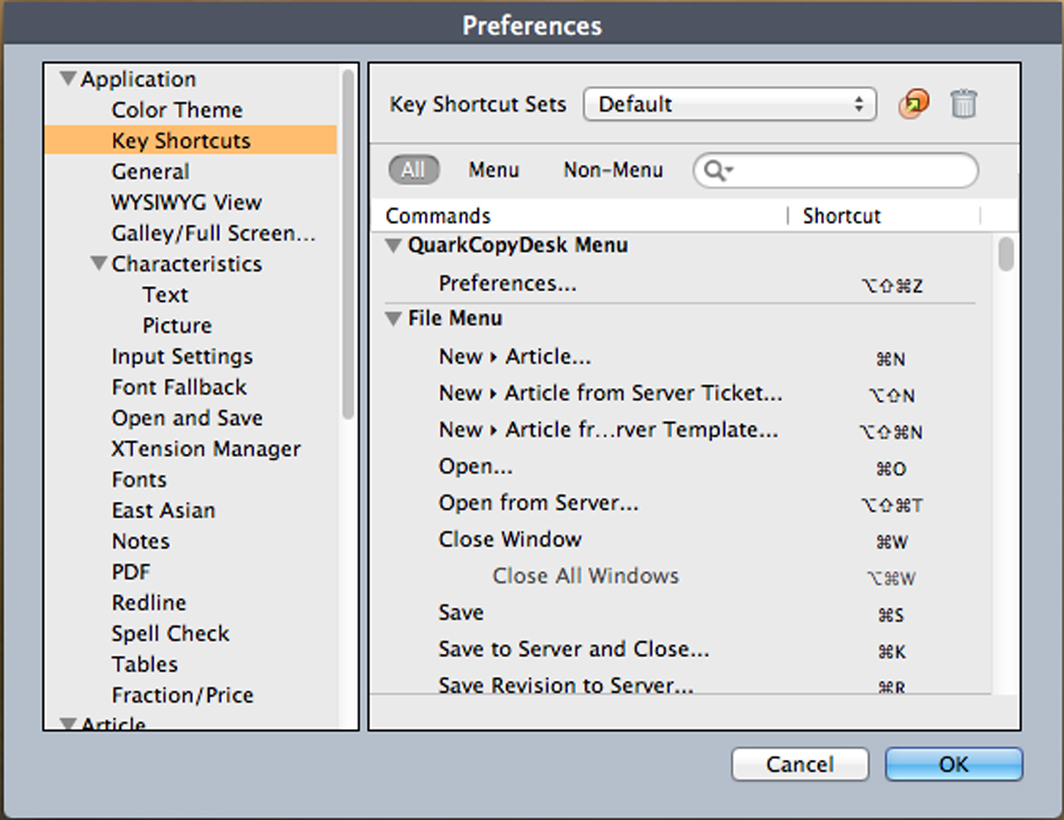
QCD preferences: General pane
The General pane of the Preferences dialog box includes three tabs: Basic, Notification, and Auto Log On/Off.
QCD preferences: General > Basic
To specify how the application responds when you attempt to delete checked-out assets and assets attached to QuarkXPress projects, use the controls in the Asset Deletion Options area in the Basic tab.
-
Uncheck Delete the Original File from the Local System on Check-In to always retain original files when you use the Check-In command. If you check Delete the Original File from the Local System on Check-In, a warning message displays every time you use the Check-In command, enabling you to retain or delete the selected file.
-
Check Global Warning: Always Warn Before Deleting Any Asset to display a warning each time you delete a Quark Publishing Platform asset.
-
The controls are the same in the Checked-out Assets and Attached Assets drop-down menus. Choose Delete Asset Without Warning to delete checked-out or attached assets without displaying a warning. Choose Never Allow Deletion to protect against deleting checked-out or attached assets. Choose Ask Before Deleting to display an alert each time you delete a checked-out or attached asset.
To specify where you temporarily store assets while you work on them, click Browse in the Location Options area. Navigate to the folder and click Choose/OK.
To control when revision comments display, choose an option from the Choose drop-down menu in the Display Revision Comments area.
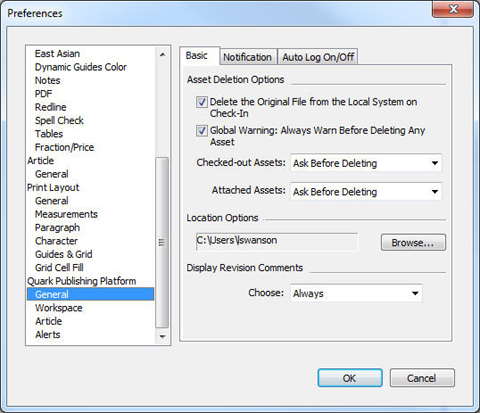
QCD preferences: General > Notification
The Notification tab lets you determine how you want to be notified of assets routed to you while you're logged on. Check Audio Alerts to hear a sound when an asset is routed to you. Check Dialog Box Alerts to display a dialog box that identifies the asset (or assets) routed to you.
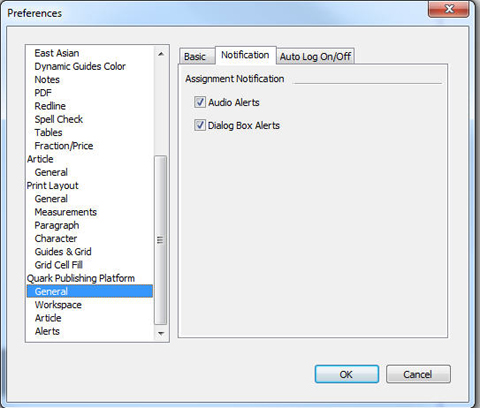
QCD preferences: General > Auto Log On/Off
The Auto Log Off Settings area lets you specify the interval of inactivity that must pass before you are automatically logged off. Check Warn Before Logging Off to receive a warning message before you are automatically logged off.
If you want to bypass the Log On dialog box the next time you log on to a Quark Publishing Platform Server, check Do Not Show This Dialog Box Again and Remember Me in the Log On dialog box. If you want the Log On dialog box to display again the next time you choose the command, uncheck Do Not Display Log-On Dialog Box in the Auto Log Off Settings area.
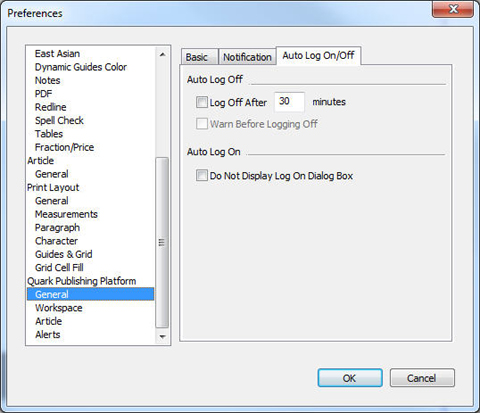
QCD preferences: Workspace pane
The Workspace pane of the Preferences dialog box includes two tabs: Workspace Browser and Mouse Settings.
QCD preferences: Workspace > Workspace Browser
The Workspace Browser tab lets you choose the font and font size to display in the Workspace Browser window's search results pane and whether or not to show status colors around thumbnails.
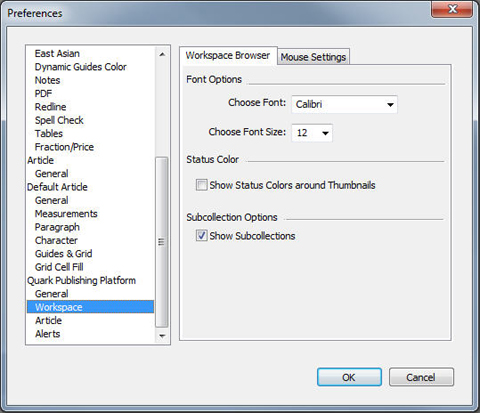
QCD preferences: Workspace > Mouse Settings
The Mouse Settings tab of the Workspace pane lets you specify what happens when you double-click an asset in the Workspace Browser window. For both articles and templates, you can choose New Article, Check Out, Edit Attributes, or Read-only.
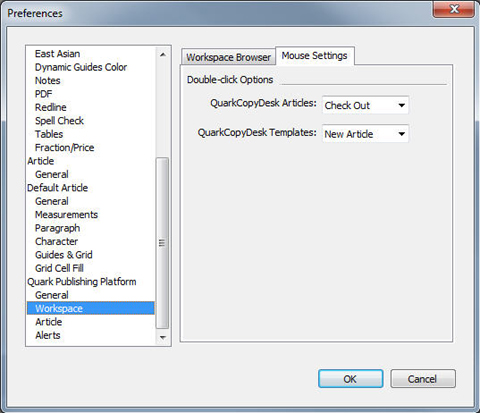
QCD preferences: Article pane
The Article pane lets you control initial article views, invisible characters, and page pictures.
To specify the initial article view when you check out, open, or display a QuarkCopyDesk article, click Keep Last Setting, WYSIWYG, Galley View, or Full Screen.
To automatically show invisible characters when you check out, open, or display a QuarkCopyDesk article, check Show Invisibles.
To display a graphic representation of the QuarkXPress layout page to which a QuarkCopyDesk article is attached, check Retrieve Page Picture.
The Auto update page picture preference allows user to update only the page picture of an article without updating the geometry.
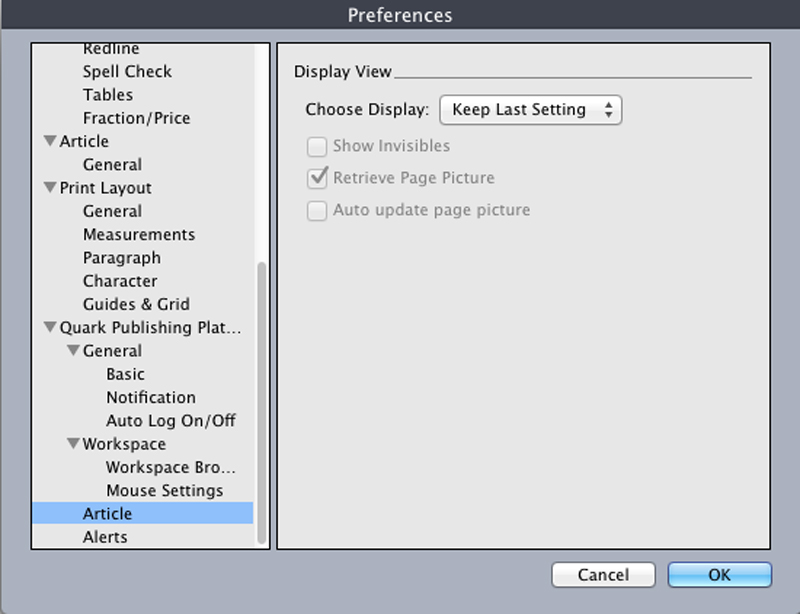
QCD preferences: Alerts pane
The Alerts pane lets you control alerts and Job Jackets updates.
To control when alerts display, use the checkboxes in the Do not show alert when area.
To control when Job Jackets resources are updated, choose an option from the Choose drop-down menu in the Update Job Jacket Resources area.
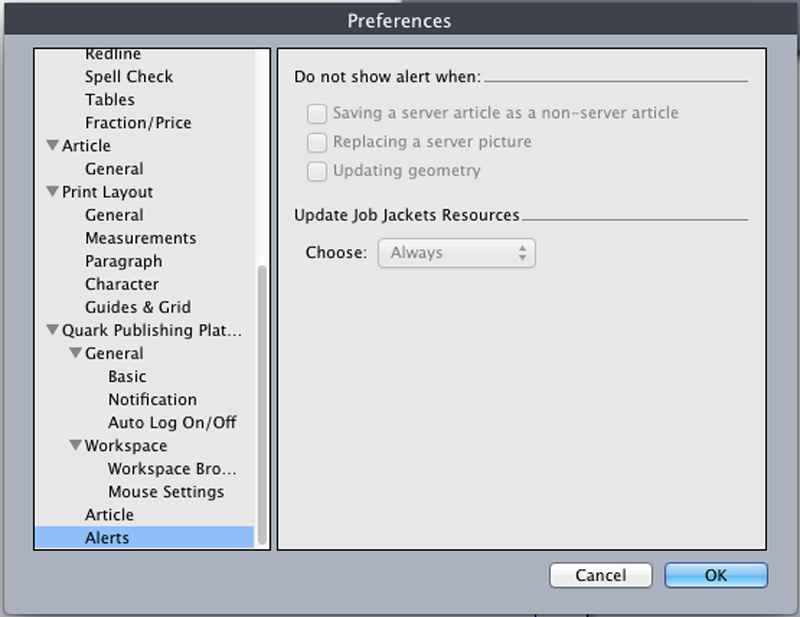
Setting preferences for Quark Publishing Platform Adapter for Microsoft Office
You can use the Preferences tab of the File menu (File > Preferences) to set your Quark Publishing Platform Adapter for Microsoft Office preferences.
All other Quark Publishing Platform preferences are stored on the Quark Publishing Platform Server.
Platform adapter for Microsoft Office preferences: General tab
The General tab of the Preferences dialog box allows you to specify the local folder that documents you check out will be located in. The Deletion Options drop-down menu displays the following deletion options:
-
Delete Without Warning: to delete checked-out documents without displaying a warning.
-
Never Allow Deletion: to protect against deleting checked-out documents.
-
Ask Before Deleting: to display an alert each time you attempt to delete a checked-out document.
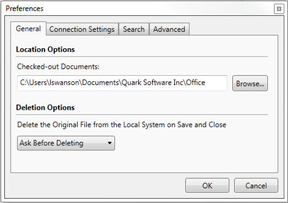
Platform adapter for Microsoft Office preferences: Connection Settings tab
The Connection Settings tab of the Preferences dialog box enables you to specify the connection settings for Quark Publishing Platform.
-
Enter the Quark Publishing Platform Server's IP address and port number in the Server Name fields.
-
The Protocol controls let you choose whether to use HTTP or HTTPS for communication with Quark Publishing Platform Server. If you're not sure which to use, ask your Quark Publishing Platform administrator.
-
You can choose to automatically log in with your current user credentials, or you can choose to provide your log in credentials by specifying a User Name and Password now.
-
The values in the User Name and Password field are defined for each user by the Quark Publishing Platform administrator. For Quark Publishing Platform sites that use Lightweight Directory Application Protocol (LDAP) to manage user lists, Quark Publishing Platform users log on with their network user names and passwords. Log-on passwords may or may not be case-sensitive, depending on the Quark Publishing Platform administrator's specifications.
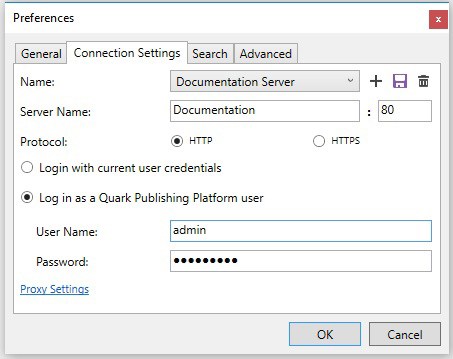
Platform adapter for Microsoft Office preferences: Search tab
The Search tab of the Preferences dialog box enables you to specify the search settings and to control how revision comments are displayed.
The Search Options allows you to specify what to search for. The drop-down menu displays the following options:
-
Name
-
Content
-
Name and Content
The Revision Comments allows you to specify when to display revision comments. The drop-down menu displays the following options:
-
Always
-
Never
-
New Assignments only
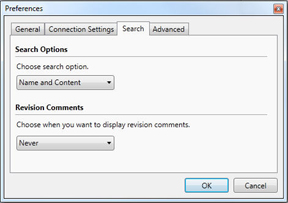
Platform adapter for Microsoft Office preferences: Advanced tab
The Advanced tab of the Preferences dialog box enables you to reset all preferences to their default state.