Browse
The Browse tab opens the file manager of the server, from where you can see all the files and folders you have access to. The complete collection hierarchy is on the Collections pane. The right-hand side of the screen displays the sub-collection and files in the collection you select on the Collections pane.

Like other pages, the option to upload a file or folder is available at the upper-left
corner of the Browse page as well. You can also show/hide the search queries pane through the icon  . Additionally, there are several options on the Browse page, which for the sake of simplicity are categorized as collection operations,
asset operations, and generic page operations.
Collections Operations
You can perform the following operations related to collections:
-
Create a new collection, a new collection template, or a new collection from a template. You can invoke these operations through the New Collection dropdown menu.
-
View and edit collection properties through the properties icon
 .
-
Mark a collection favorite through the star icon
 .
-
Generic operations related to collections.
Collections operations provide several ways to create a new sub-collection in the collection you are in the Browse tab and other generic operations related to collections. The following are some ways to create a new collection/sub-collection:
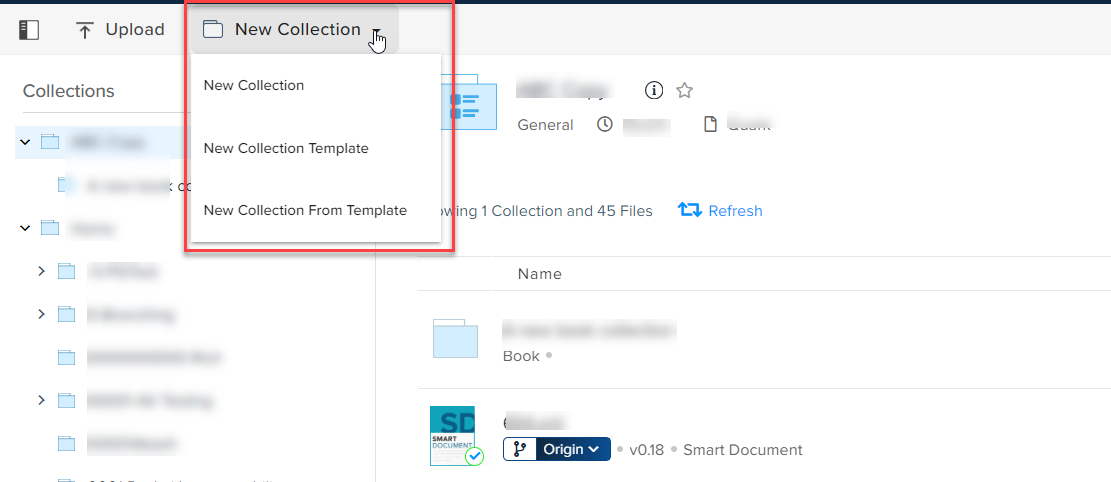
New Collection
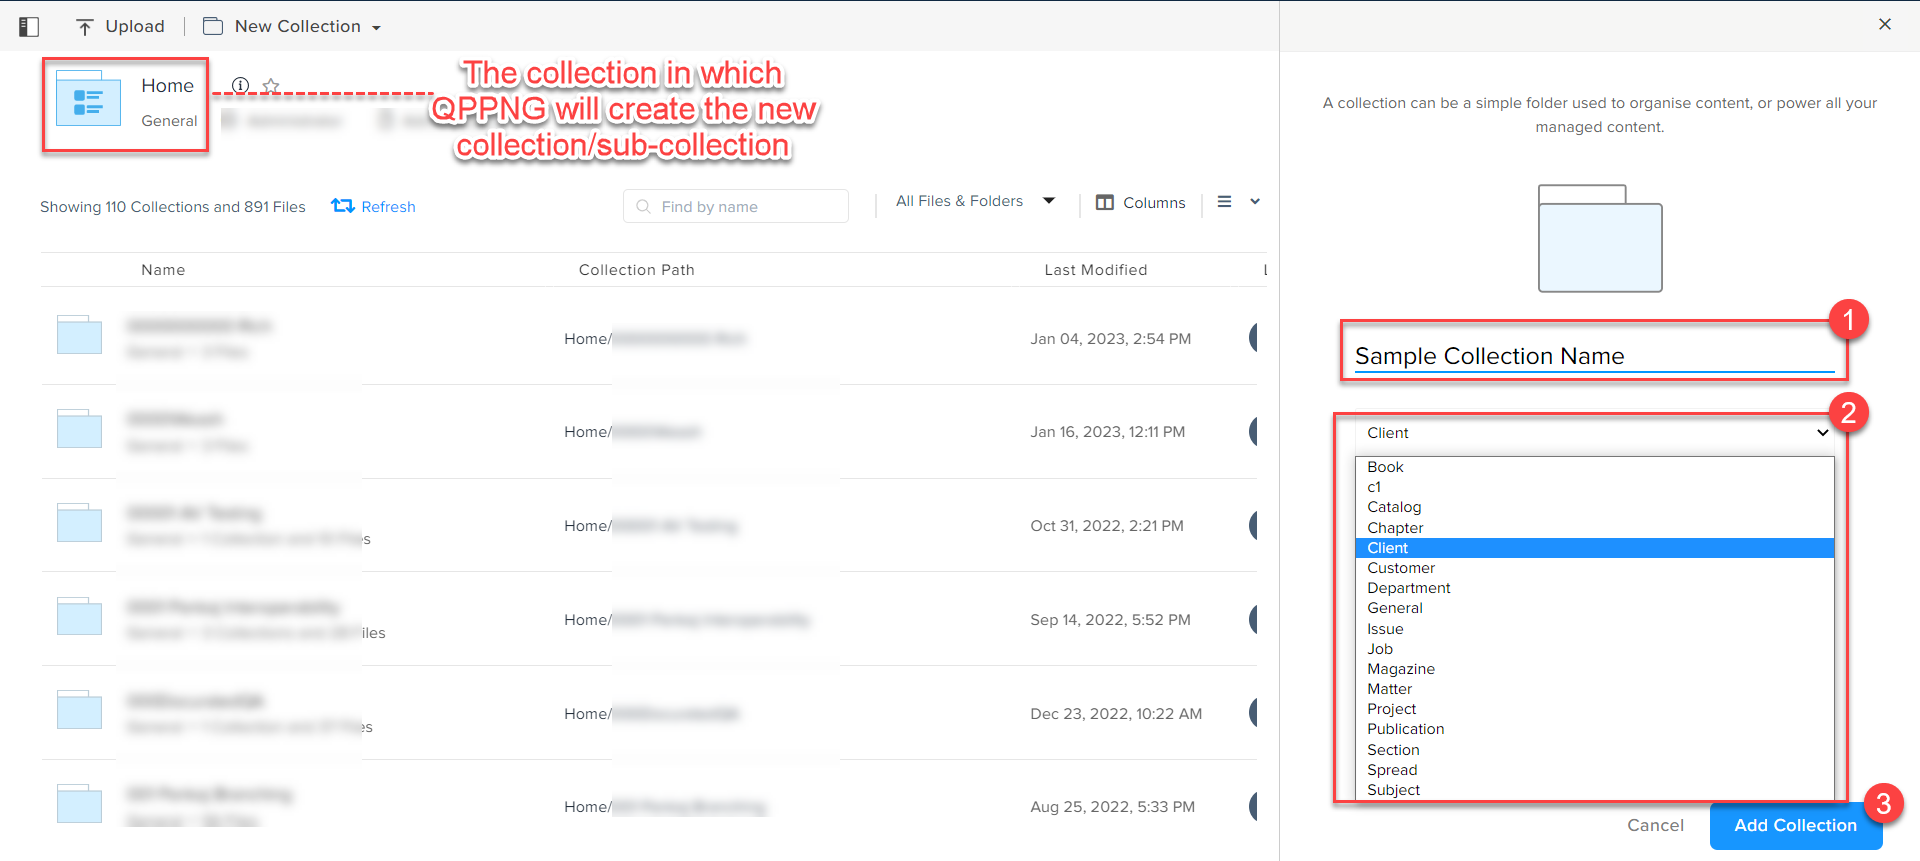
This allows you to create a new stand-alone collection/sub-collection. To create a new collection:
-
Enter the name and asset type in the Add New Collection pane.
-
Select the button Add Collection.
New Collection Template
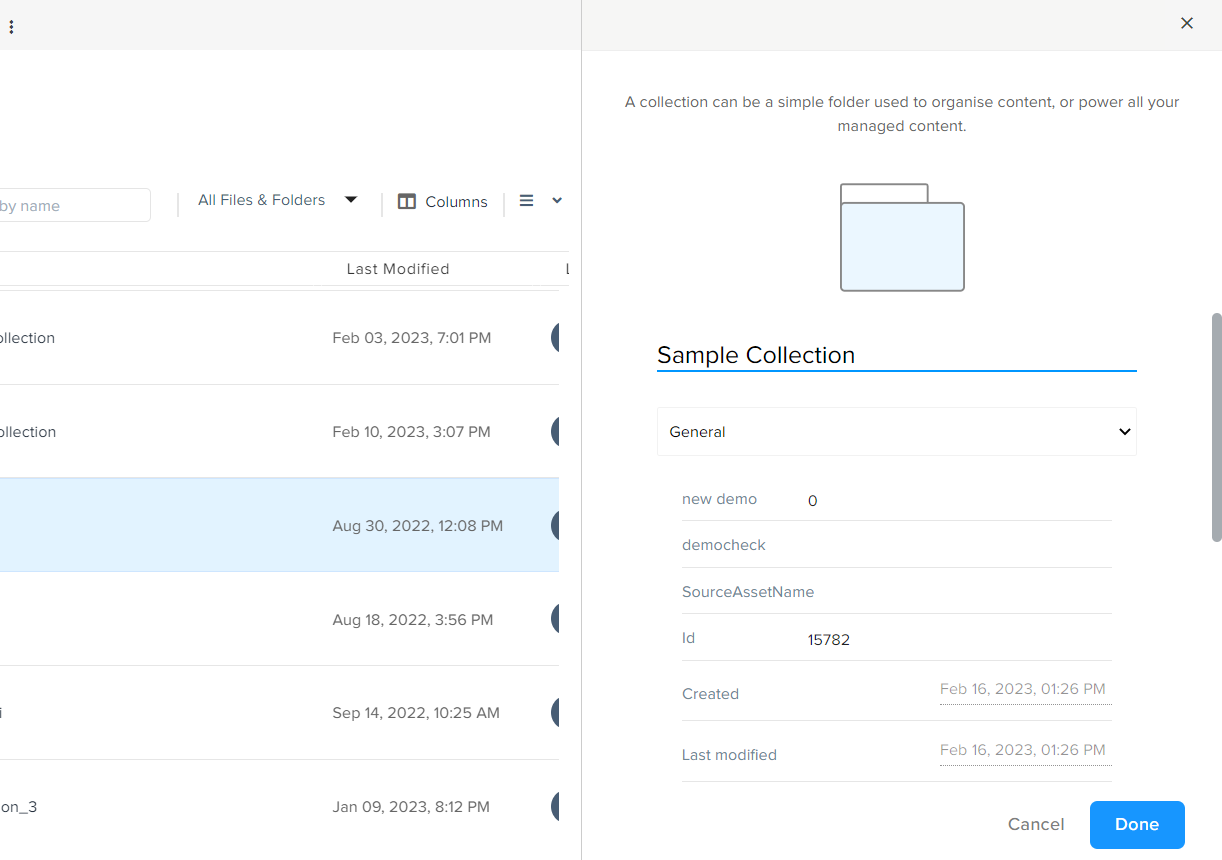
This option allows you to create a new collection that you can use as a template to create a new collection. The process to create a new collection template is exactly the same as creating a new collection.
New Collection from Template
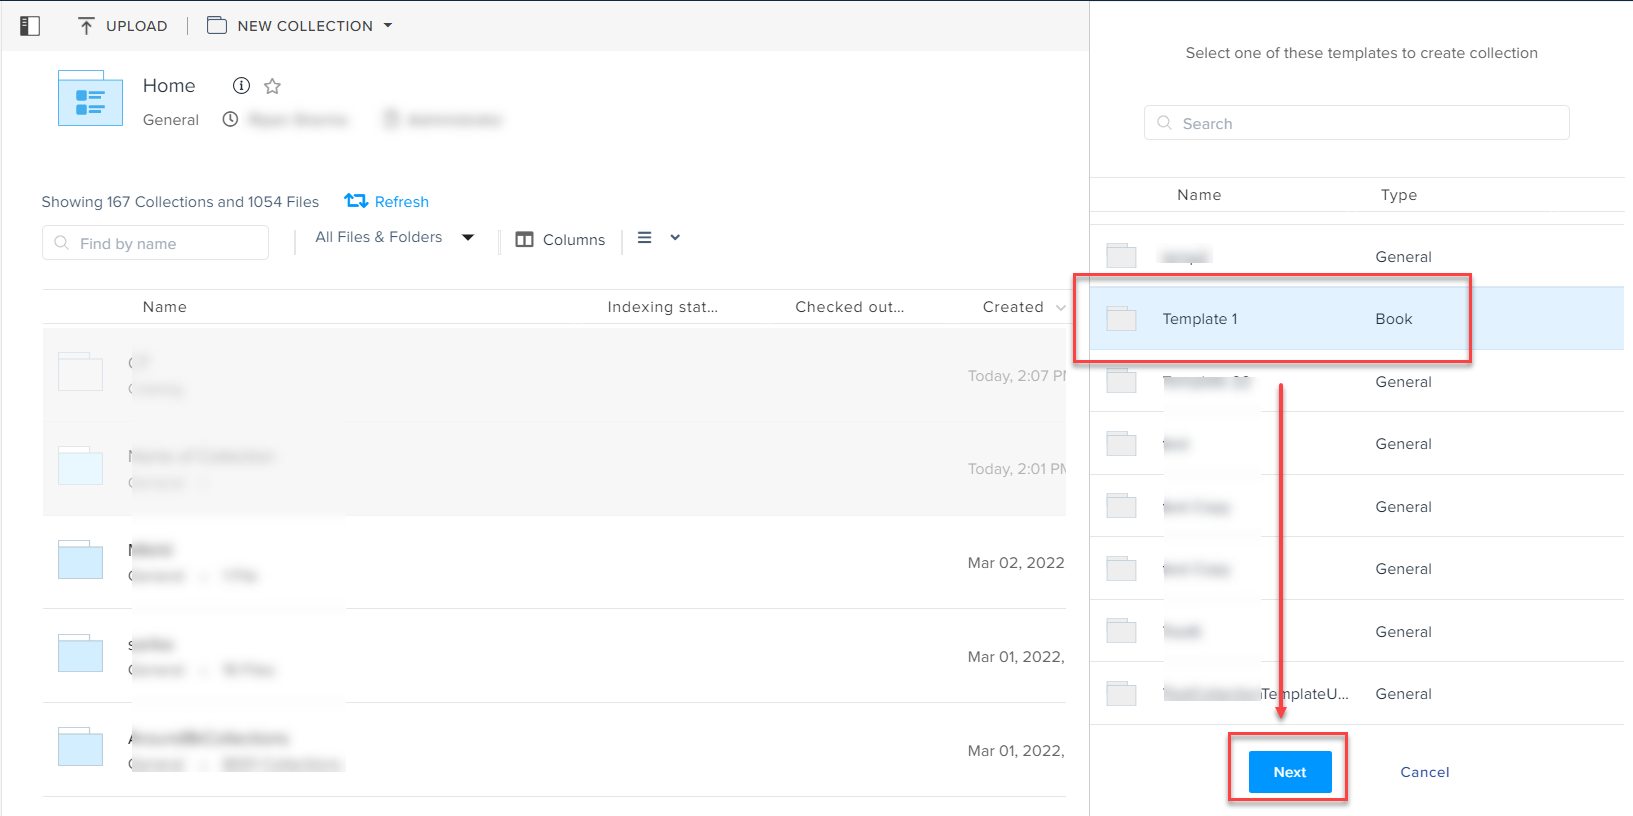
This option allows you to create a new collection based on a collection template on the server. To create a collection from a template:
-
Select the template in the Add New Collection from Template pane from which you want to create a new collection.
-
Select the button Next.
-
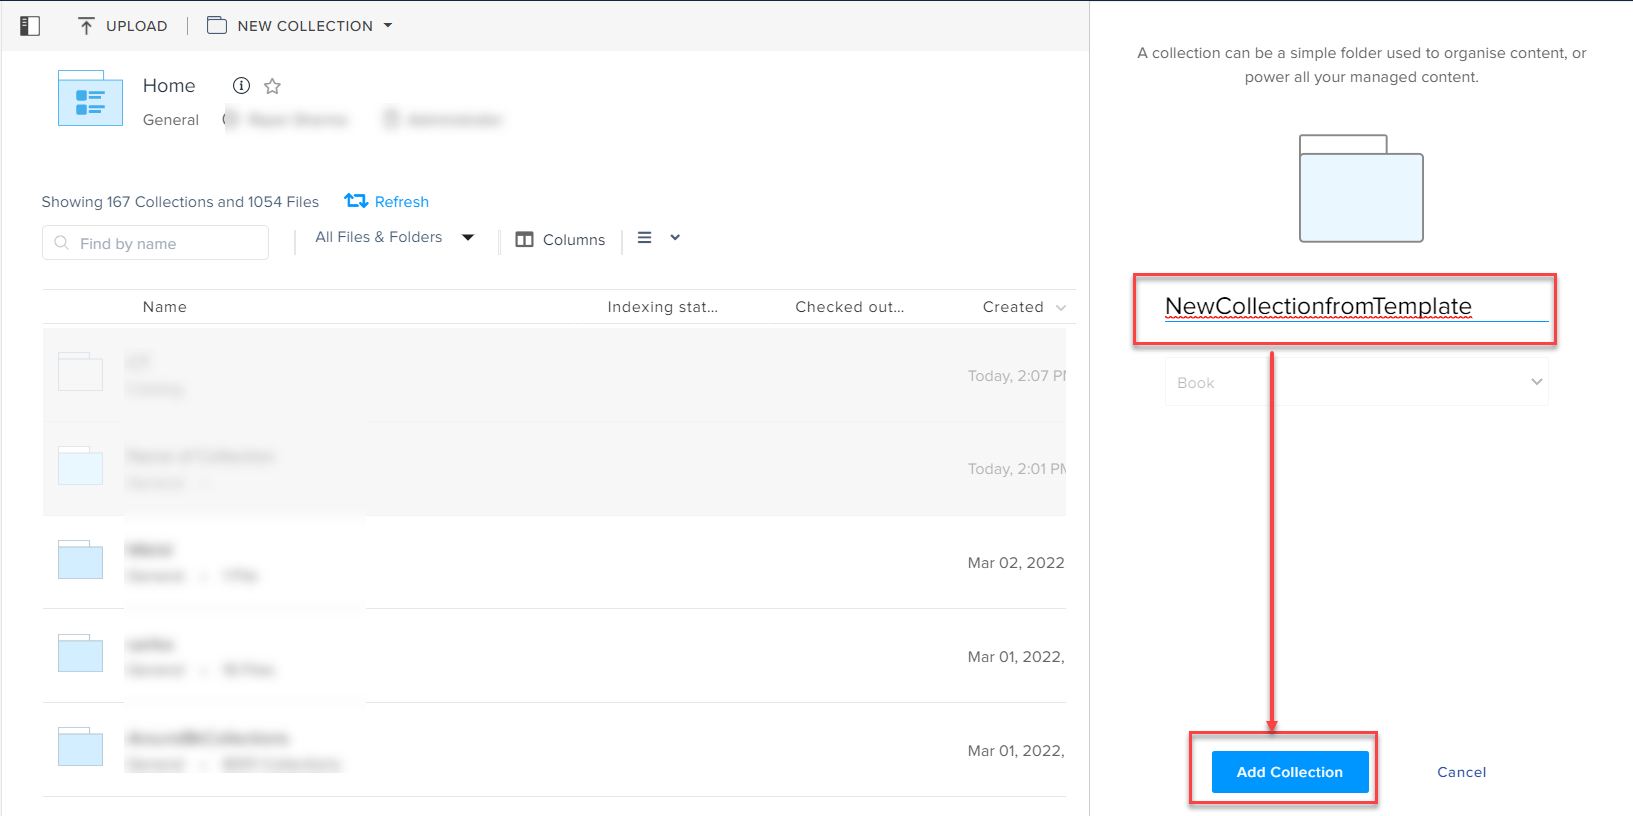
Enter a new for the collection and then select the button Add Collection.
View and Edit Collection Properties
To view a collection's properties:
-
Select the properties icon
next to the collection name to open the Collection Details pane. 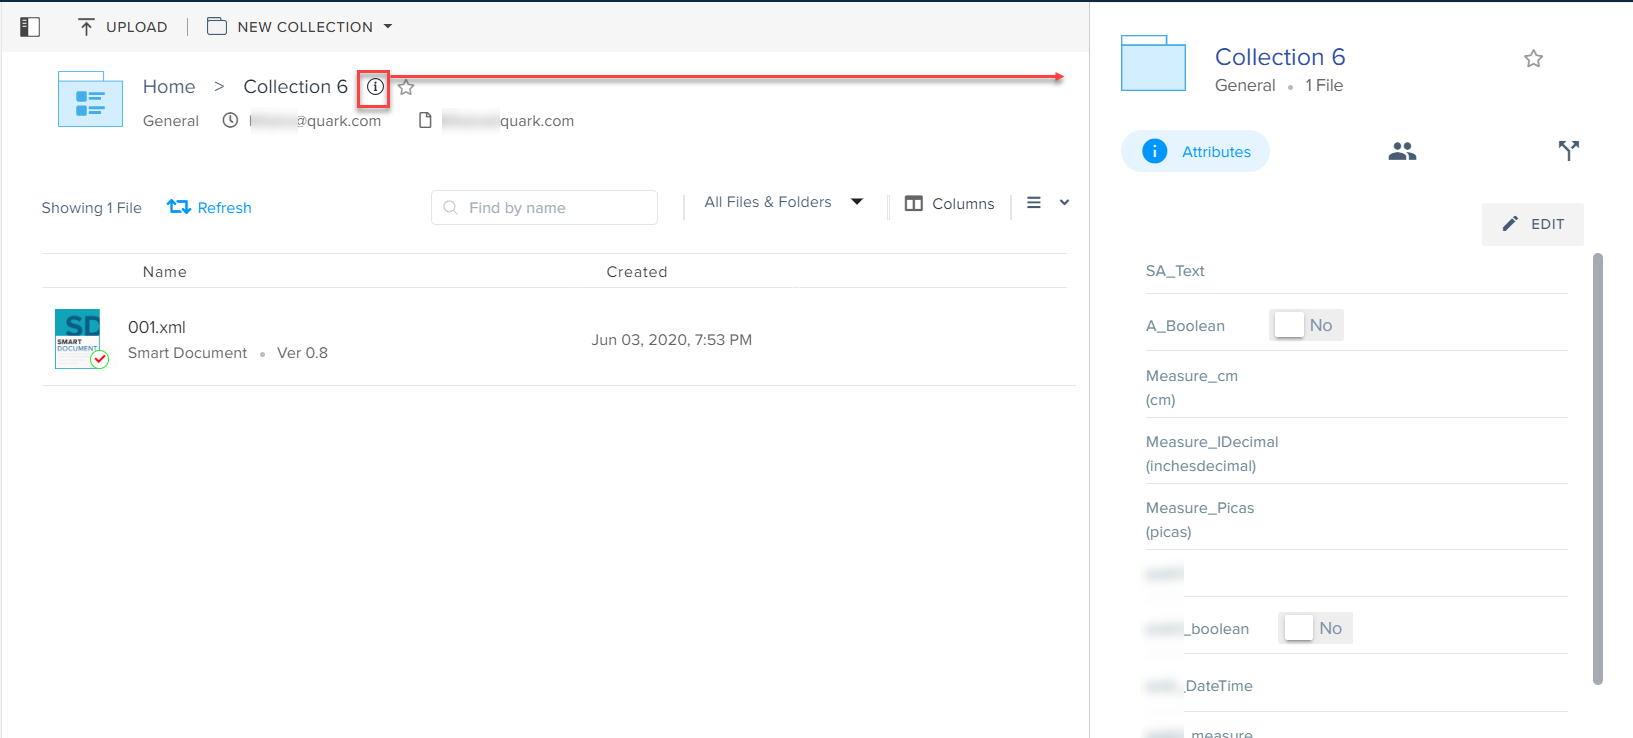
-
Switch between the Attributes, Members, and Workflow tabs to view the list of attributes of the collection, members (or user groups) who have access to the collection, and all the workflows applied across all the assets in the collection.
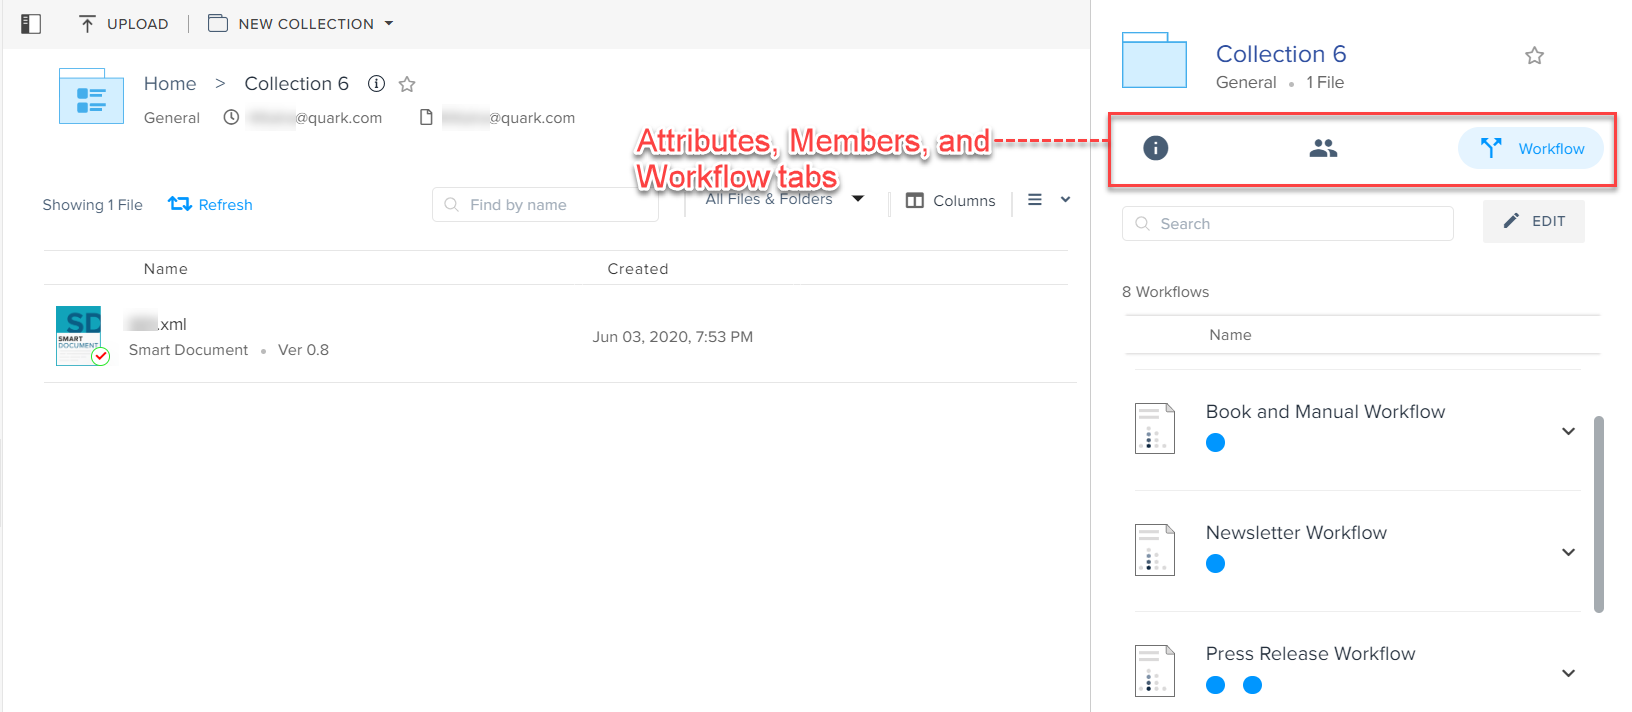 You can also search for an attribute, member, or workflow by name through the Search tool within the Collection Details pane.
To edit a collection's properties:
-
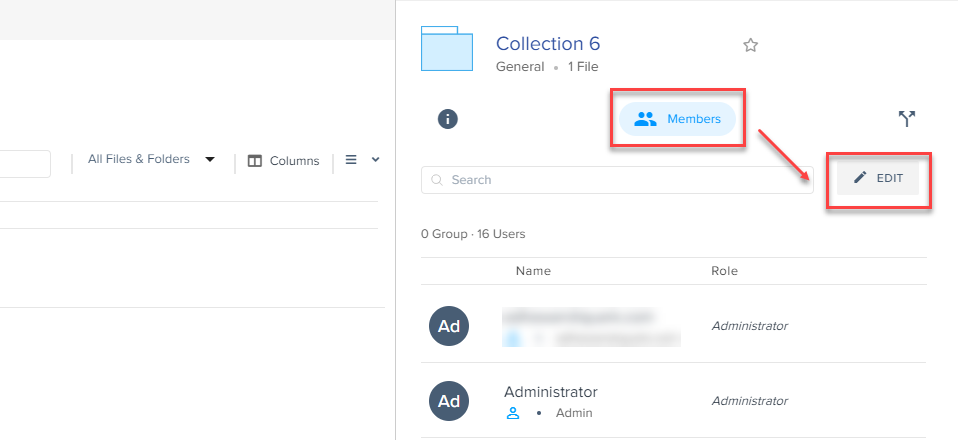
In the Collection Details pane, select a tab (Attributes, Members, or Workflows) for which you want to edit a property.
-
Select the button Edit.
-
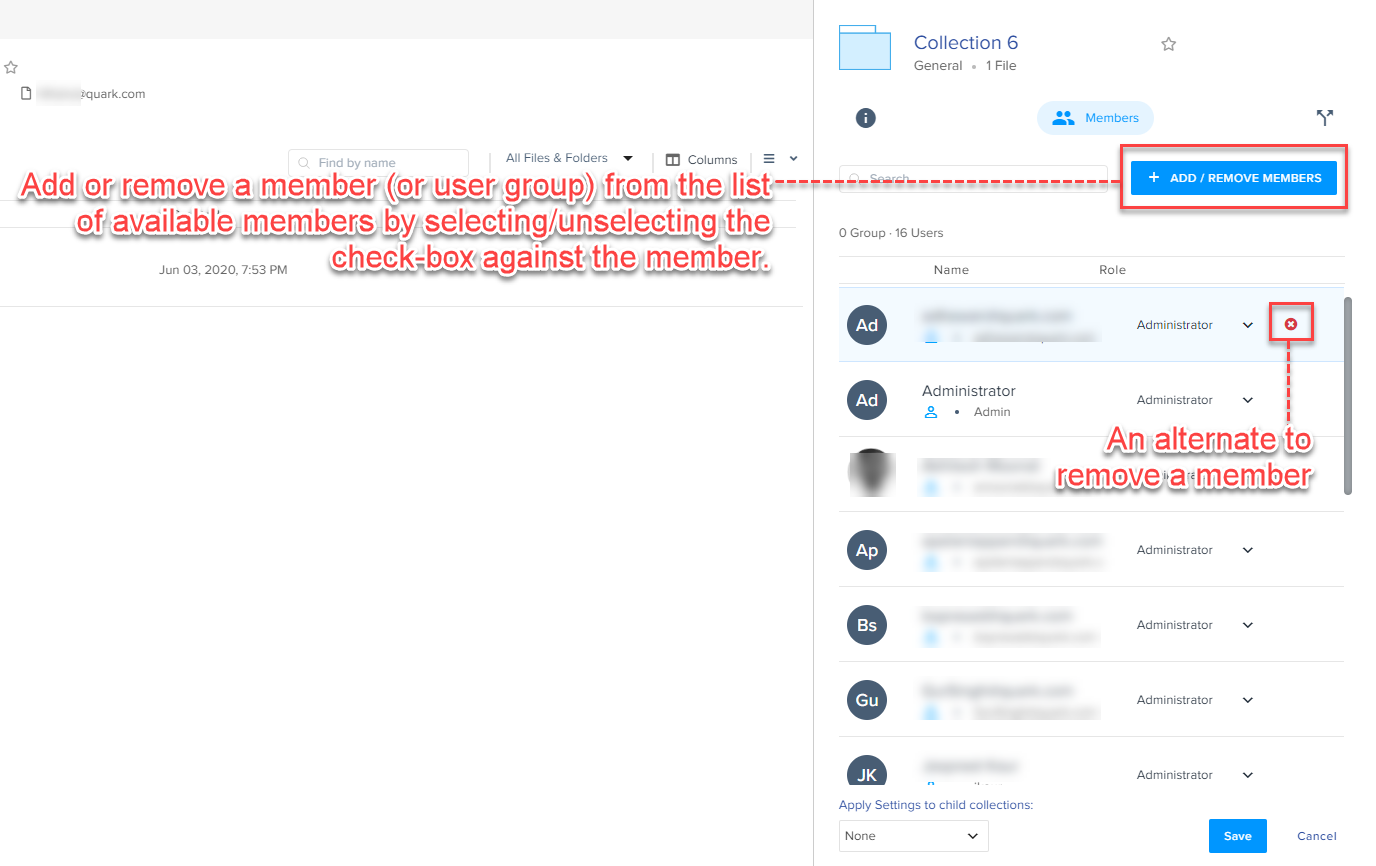
Change an attribute or add/remove a member (user group)/workflow based on the tab you are in.
-
Click Save.
You can also apply the changes you make to the members and workflows of a collection to the children collections.
To apply member and workflow edits to children collections:
-
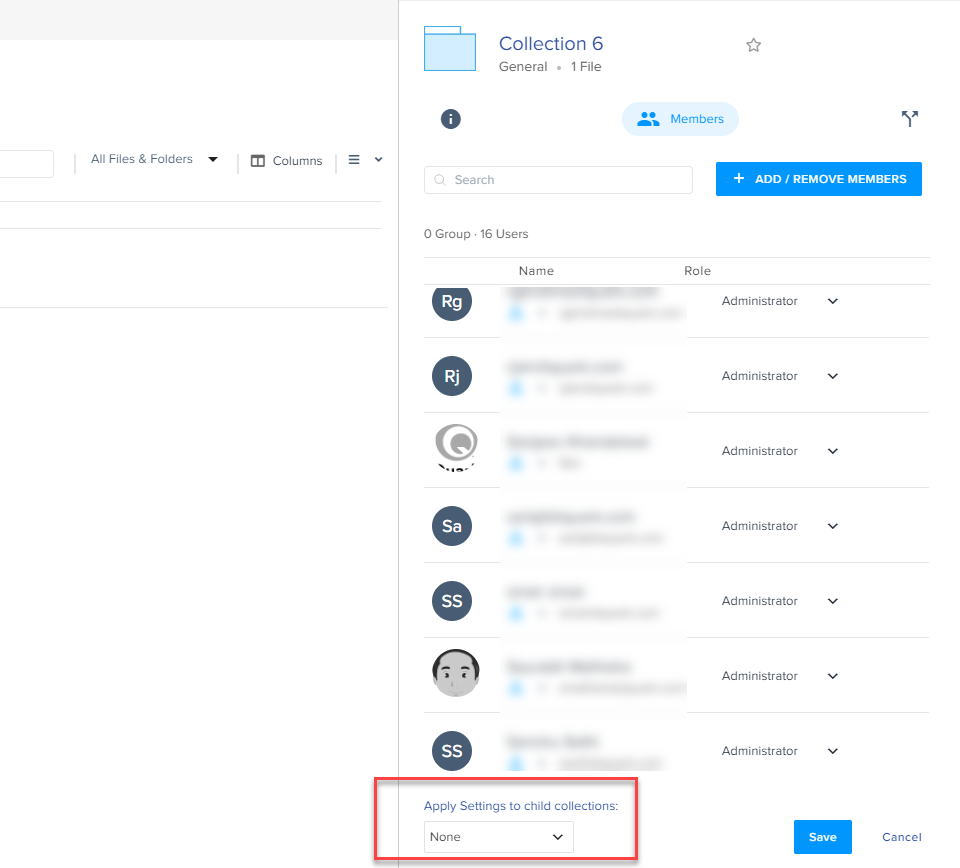
While you are editing members/workflows, in the Collection Details pane, click the drop-down menu Apply Settings to Child Collections:
-
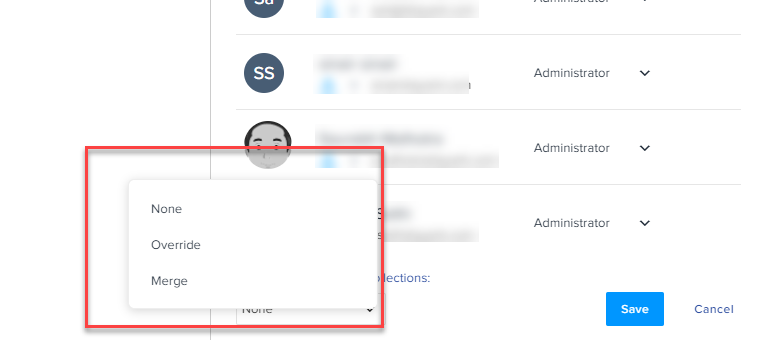
Select one of the following options based on your requirement:
-
None: To not apply the same changes to children collections.
-
Override: To override the properties of children collections with the properties of the parent collection.
-
Merge: To merge the properties of children collections and the parent collection.
-
-
Click Save.
Generic Collection Operations
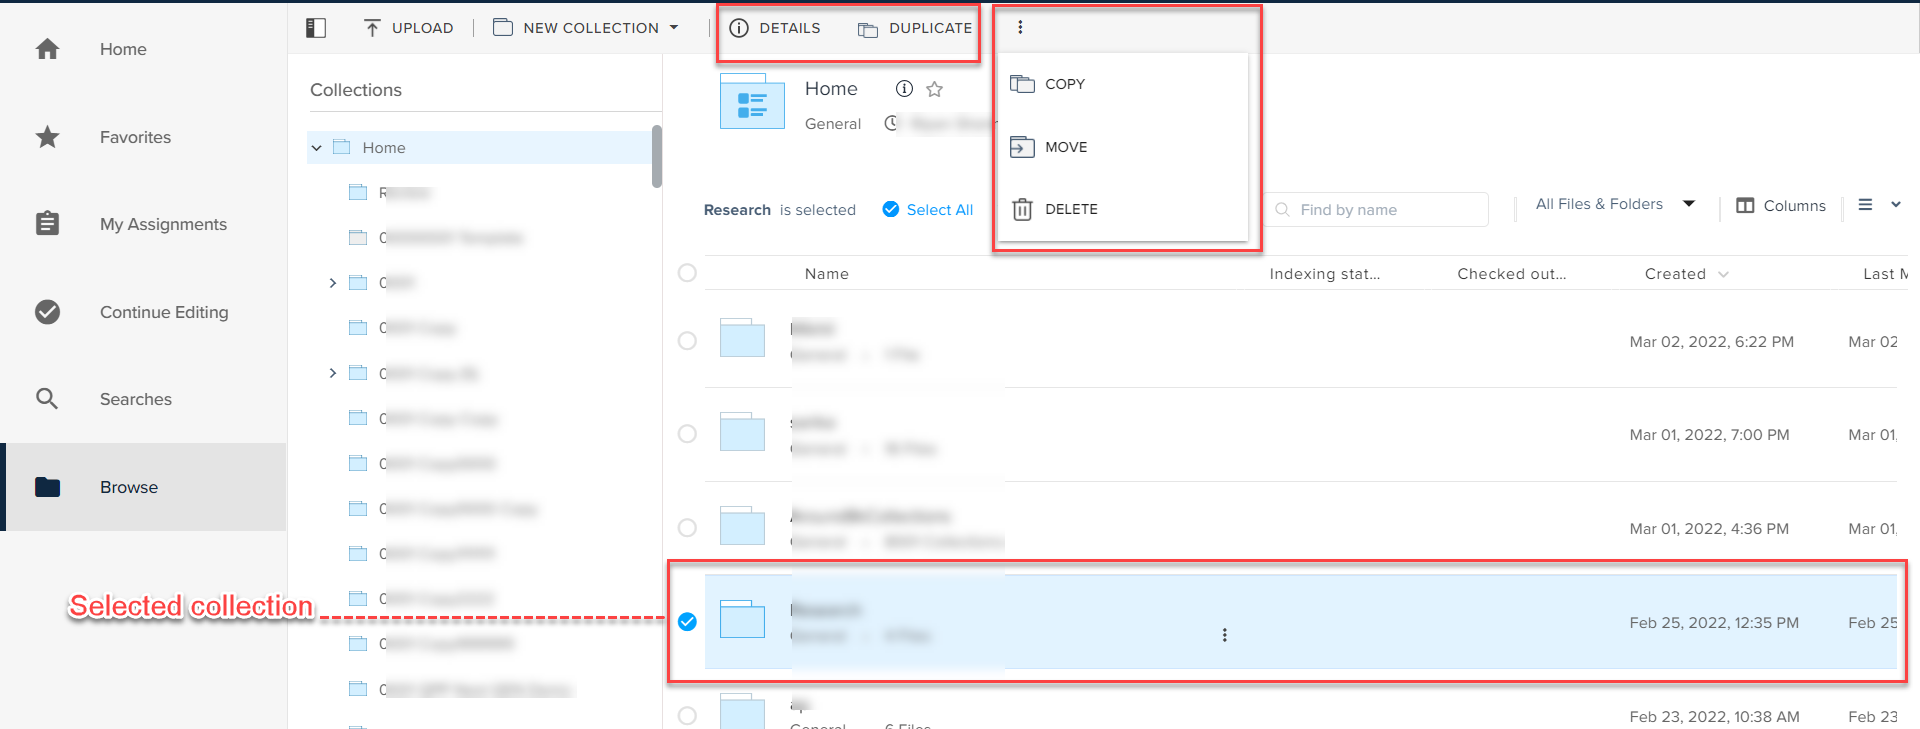
The following are some generic collection operations that appear as top-of-the-bar actions when you select a sub-collection:
-
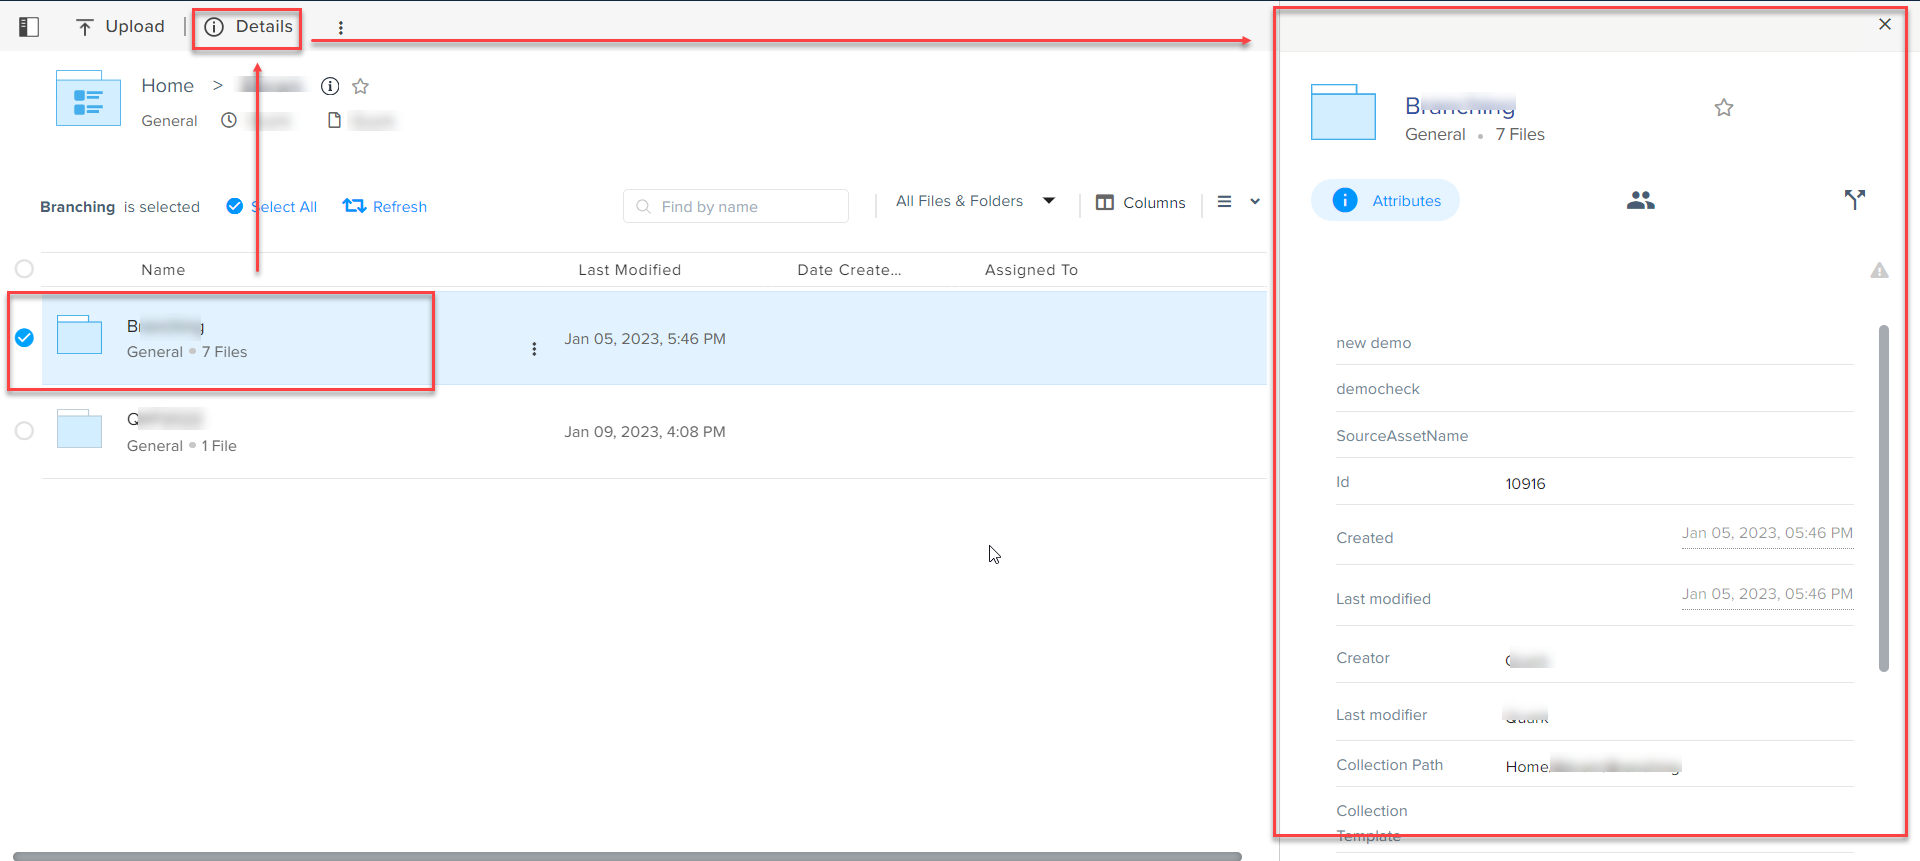
Details: Displays information about a collection in the Collection Details pane, such as attributes, members who have access to the collection, and workflow, which you can edit from within the Collection Details pane.
-
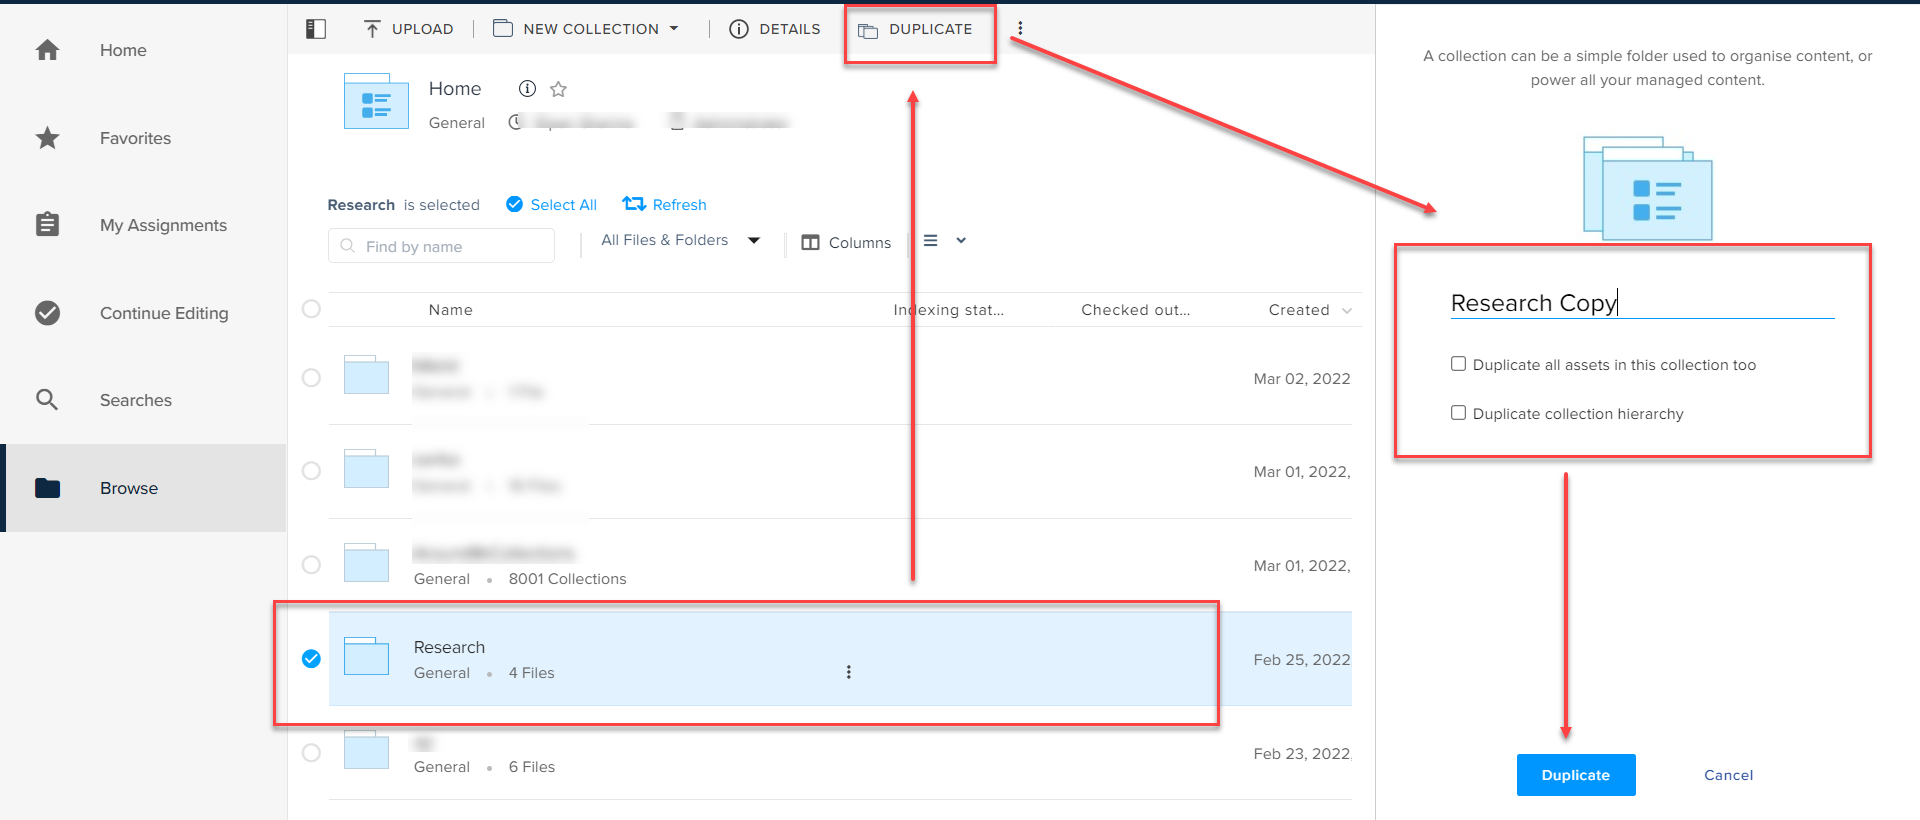
Duplicate: Creates a copy of a collection at the same location on the server with options to duplicate all assets and duplicate collection hierarchy.
-
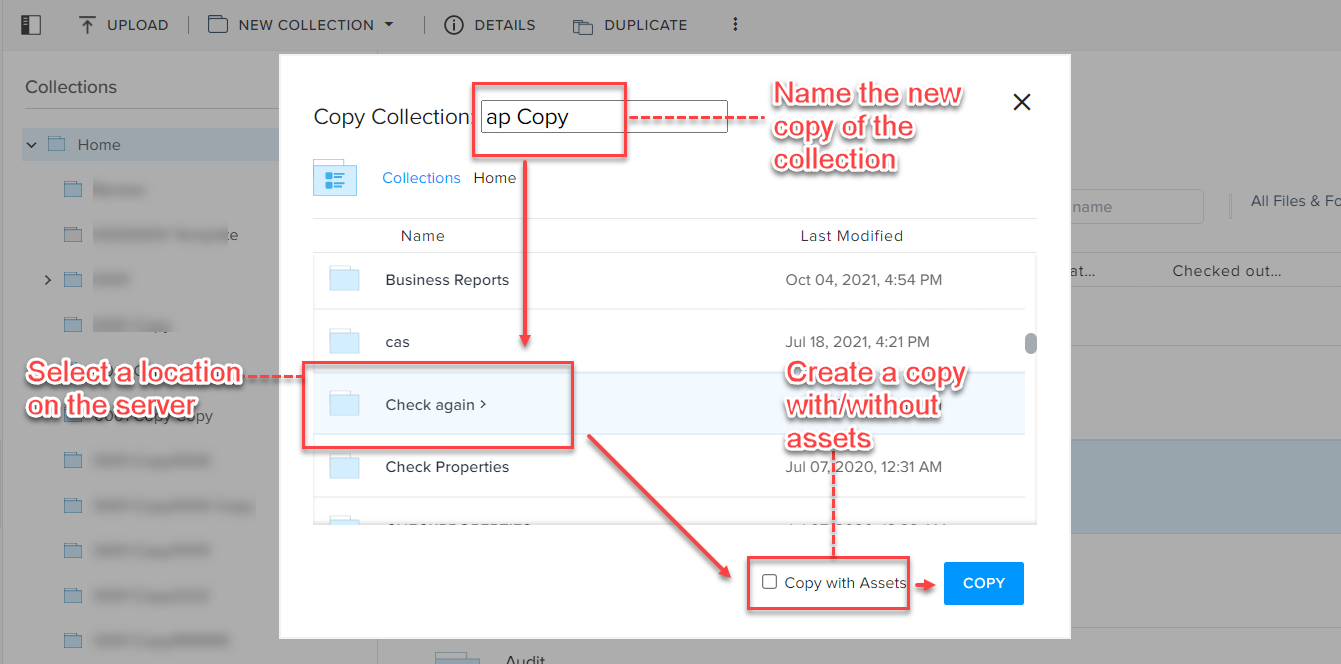
Copy: Create a copy of a collection at a different location on the server.
-
Move: Moves a collection to a different location on the server.
-
Delete: Deletes a collection.
Assets Operations
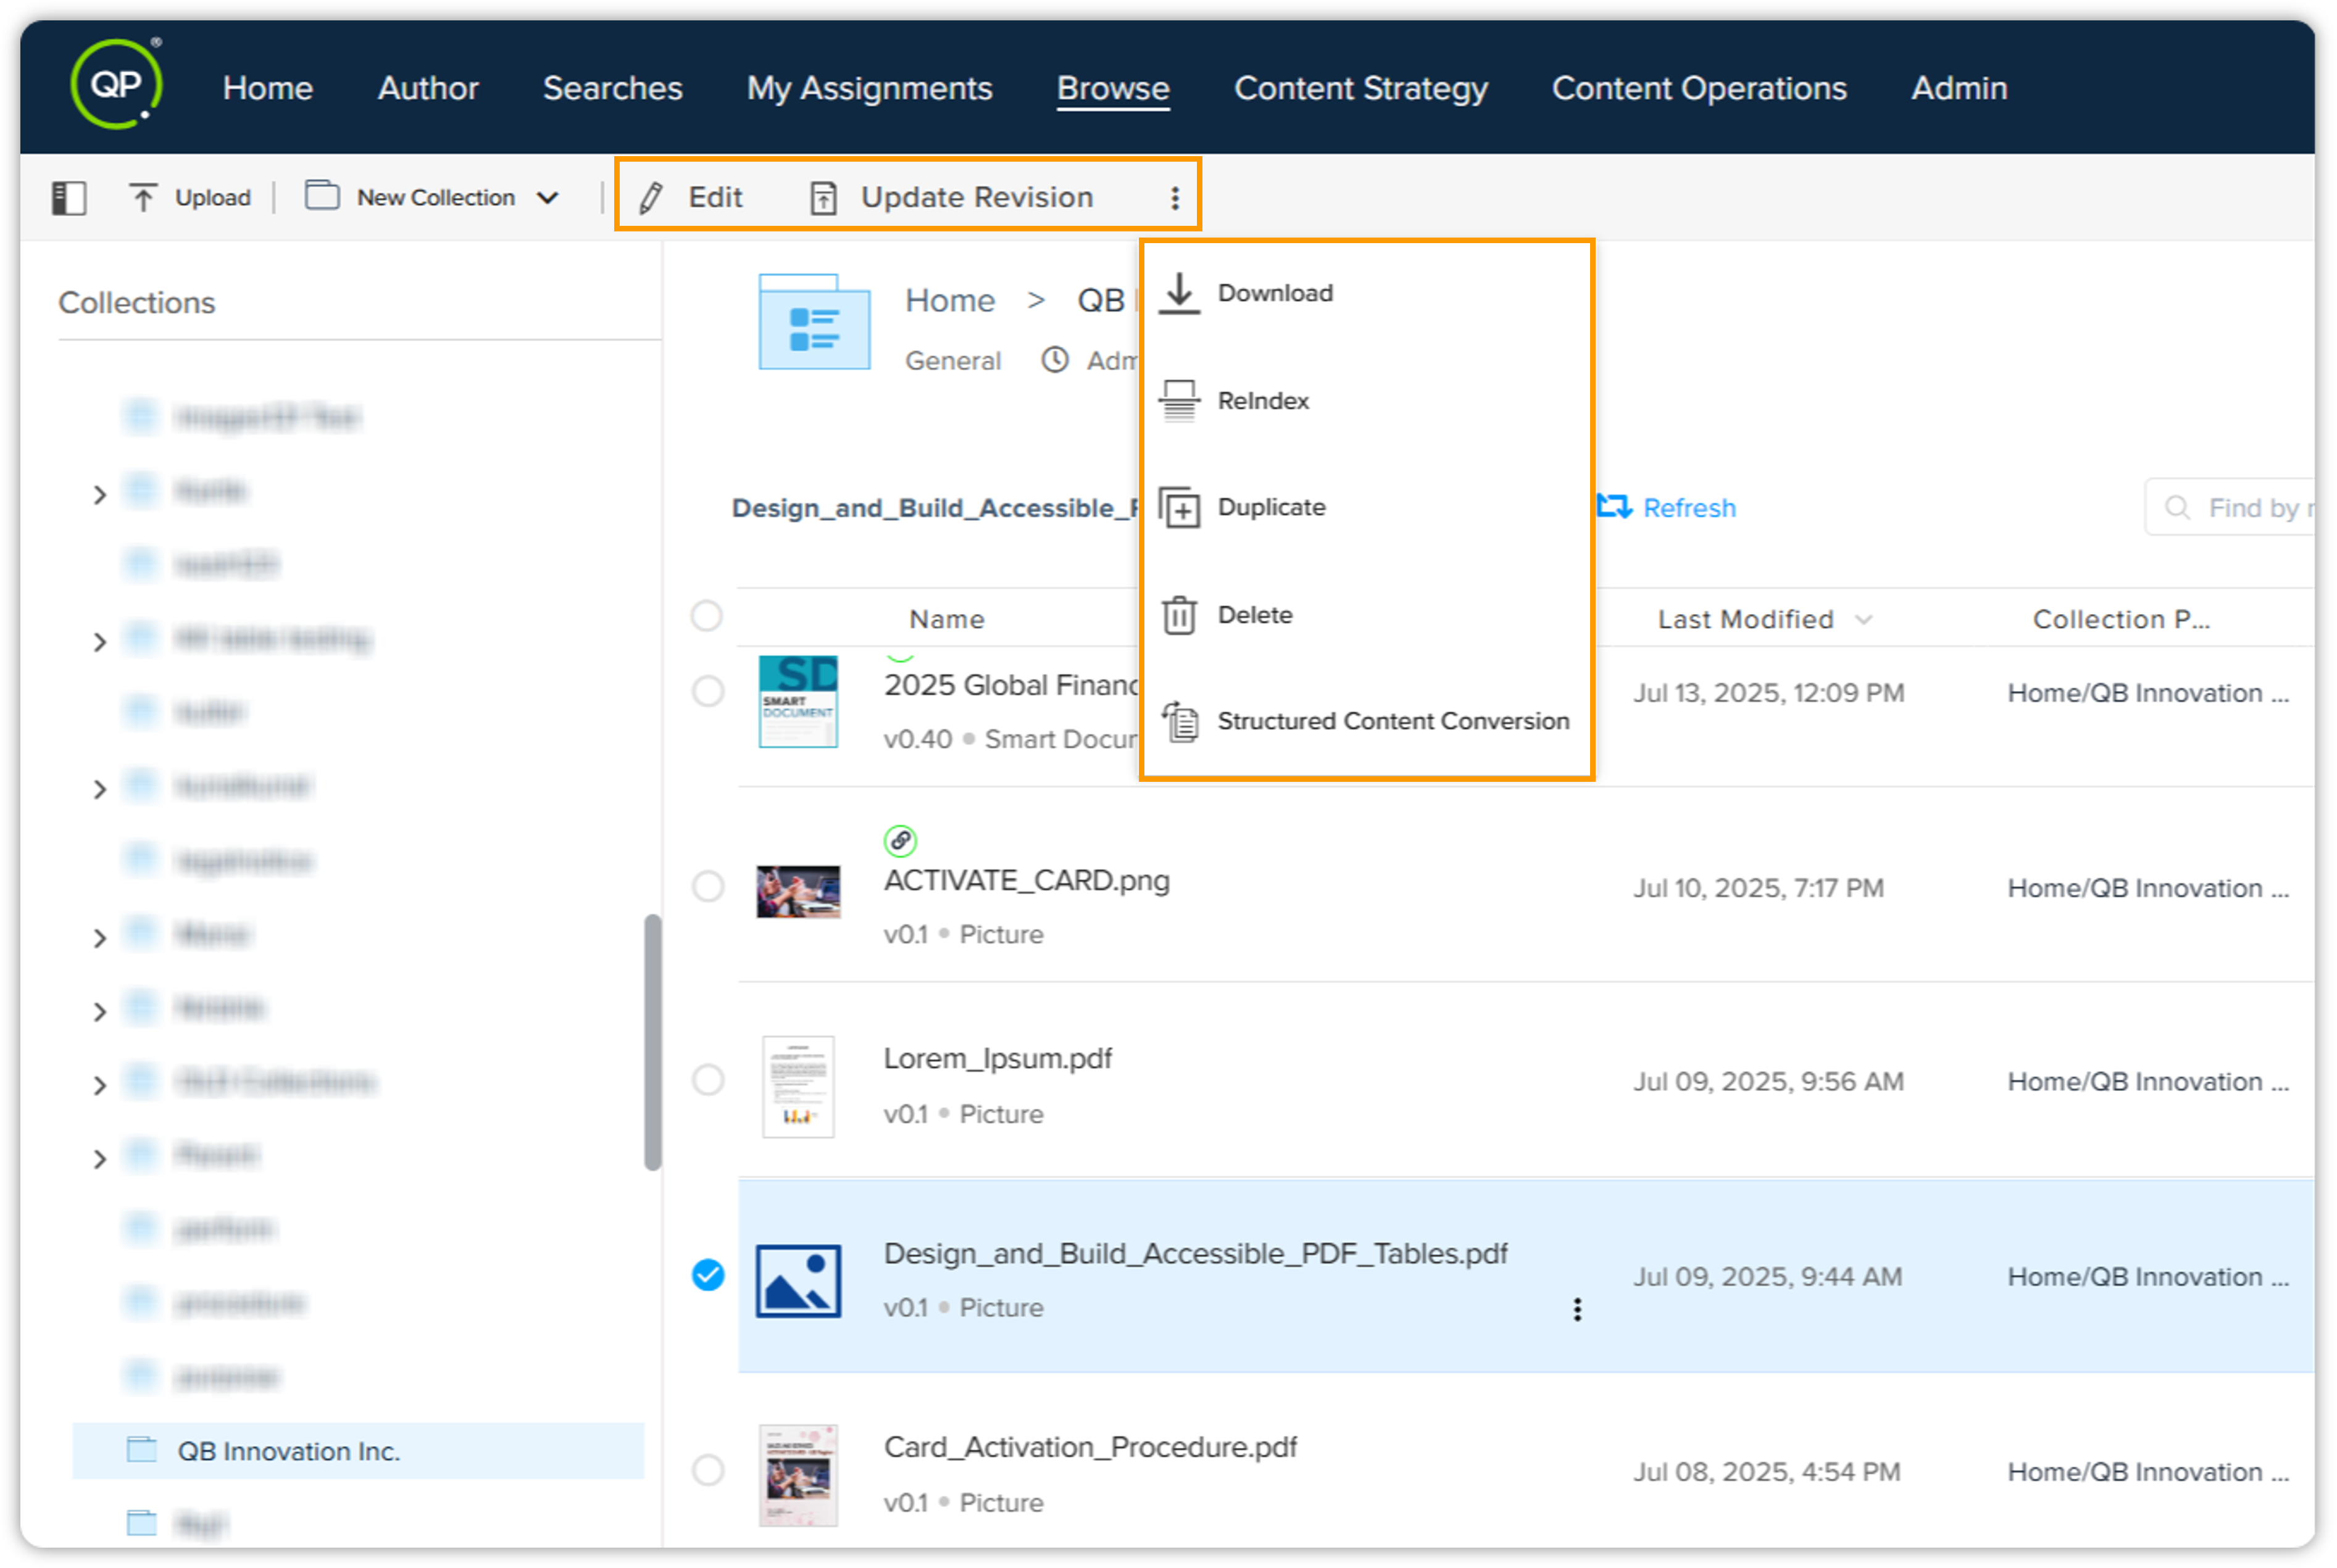
Assets operations appear when you select an asset, which are the same operations that appear when you select an asset under My Assignments tab. These operations are as follows:
-
Edit: Checks out the selected asset and opens the asset in the content editor of QPP for you to make edits.
-
Update Revision: Allows you to replace the version saved on the server with an updated version saved on your local machine.
-
Download: Downloads the selected asset to your local machine.
-
Reindex: Re-indexes the file on the system (refreshes and reloads the file on the server).
-
Duplicate: Creates a copy of the file on the server.
-
Discard: Removes the checkout status of an asset. This option only appears for the assets that are checked out.
-
Delete: Deletes the file from the server.
-
Structured Content Conversion: Converts your unstructured documents into structured format. For detailed information, refer to the Structured Content Conversion.
When you hover the cursor over an asset's listing, icons for quick menu options appear against an asset's name. These options work in the same manner as described in the section My Assignments > File Operations > Quick Menu Operations.

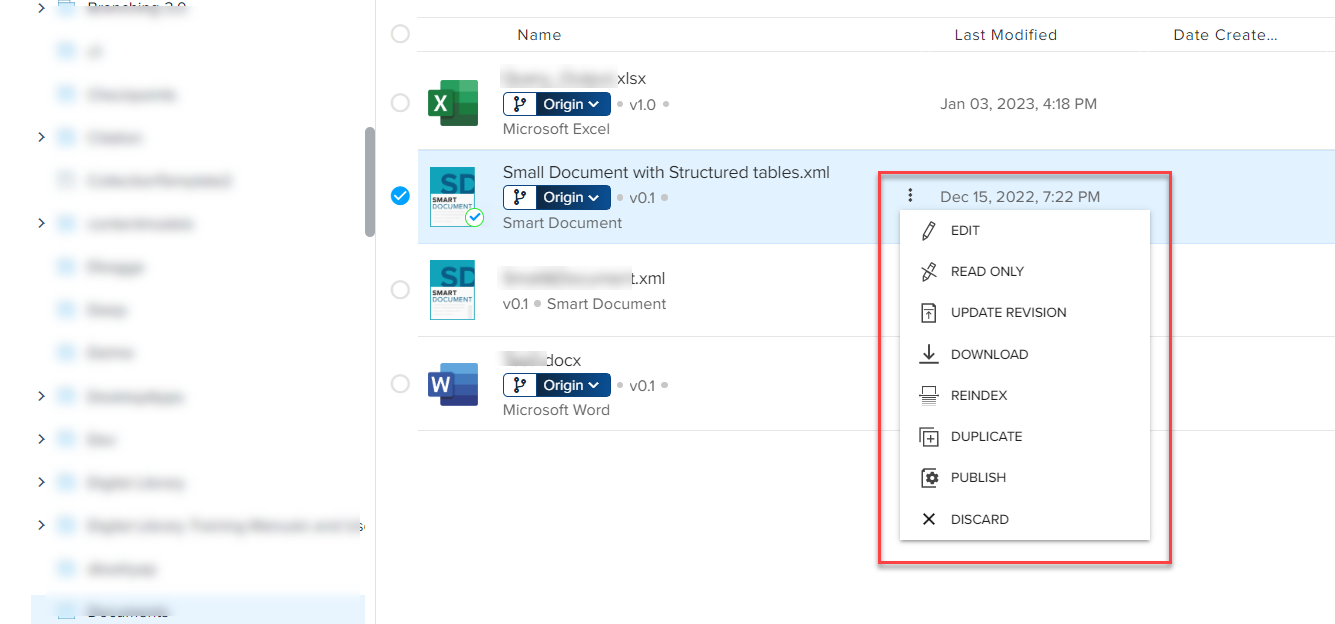
Additionally, you can also invoke all the file operations through the kebab menu against a file name in the file listing.
Generic Page Operations
The Browse page has the following generic page operations:
-
Select All: Selects all the assets and sub-collections listed in the selected collection.
-
Refresh: Refreshes the list to reflect any recent changes.
-
Find by Name: This search tool allows you to search for an asset or sub-collection within the selected collection by name.
-
Files and Folders: Filters the result list either by File or by Folder.
-
Column Options: Allows you to select which columns to display against a file listing.
-
View: Allows you to switch the view from the list to the grid and vice versa.
Move Assets & Collections using Drag & Drop
Our drag & drop feature allows you to organize assets and collections more efficiently within the workspace. You can select one or multiple assets and/or collections and move them into another collection using intuitive drag & drop. Please go through the important behaviors and exceptions described below.
-
On the Browse tab of Quark Publishing Platform, navigate to the collection from which you want to move assets/collections into another collection.
-
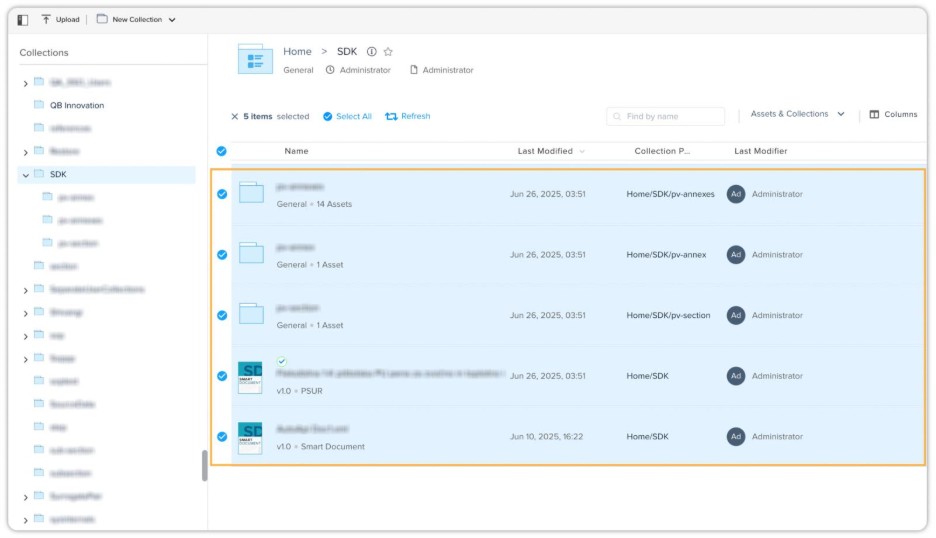
Select the desired assets/collections you want to move.
-
Now drag and drop the selected items to the desired collection.
-
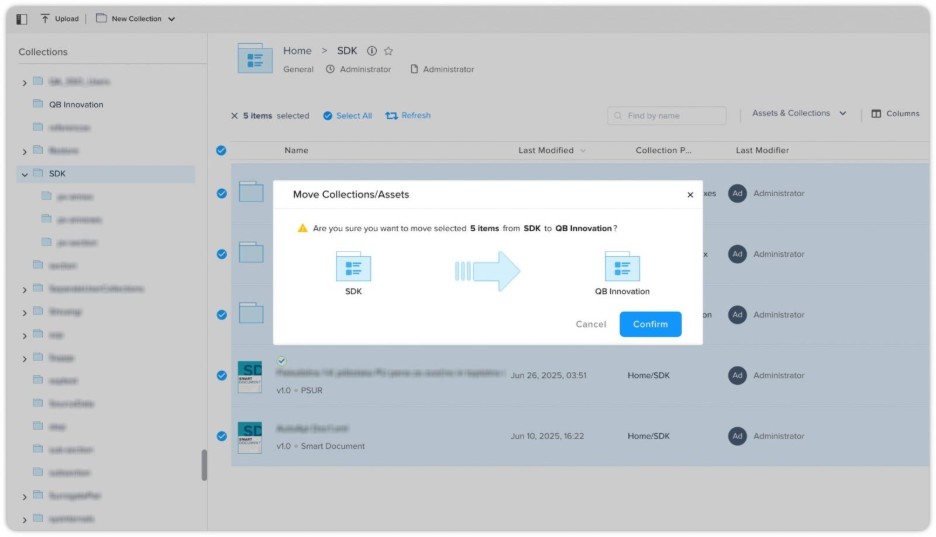
A confirmation message appears on the screen. Click Confirm.
-
The selected items (both assets and collections) will be successfully moved to the collection.
Known Behavior
-
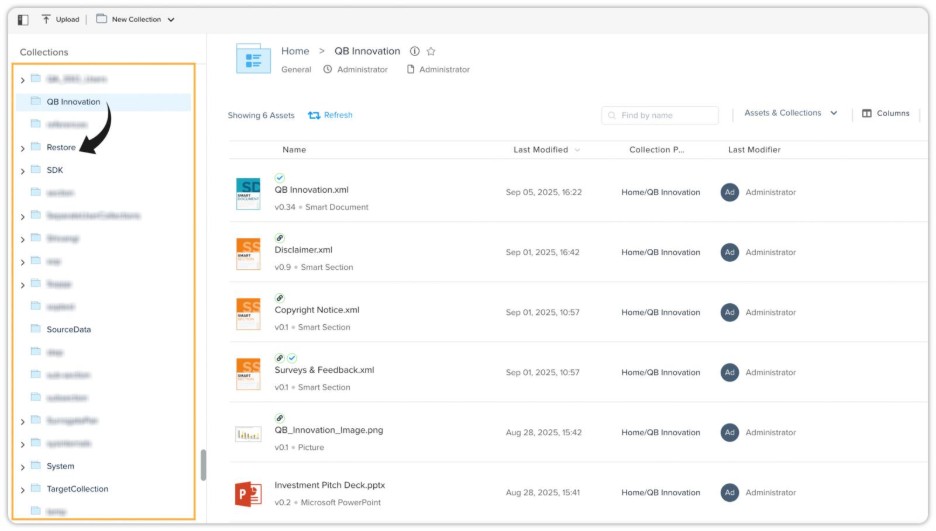
Left Pane Collection Movement Unchanged
You can still move a collection into another collection from the left pane, where all collections are listed, just as before. This existing functionality remains unchanged.
-
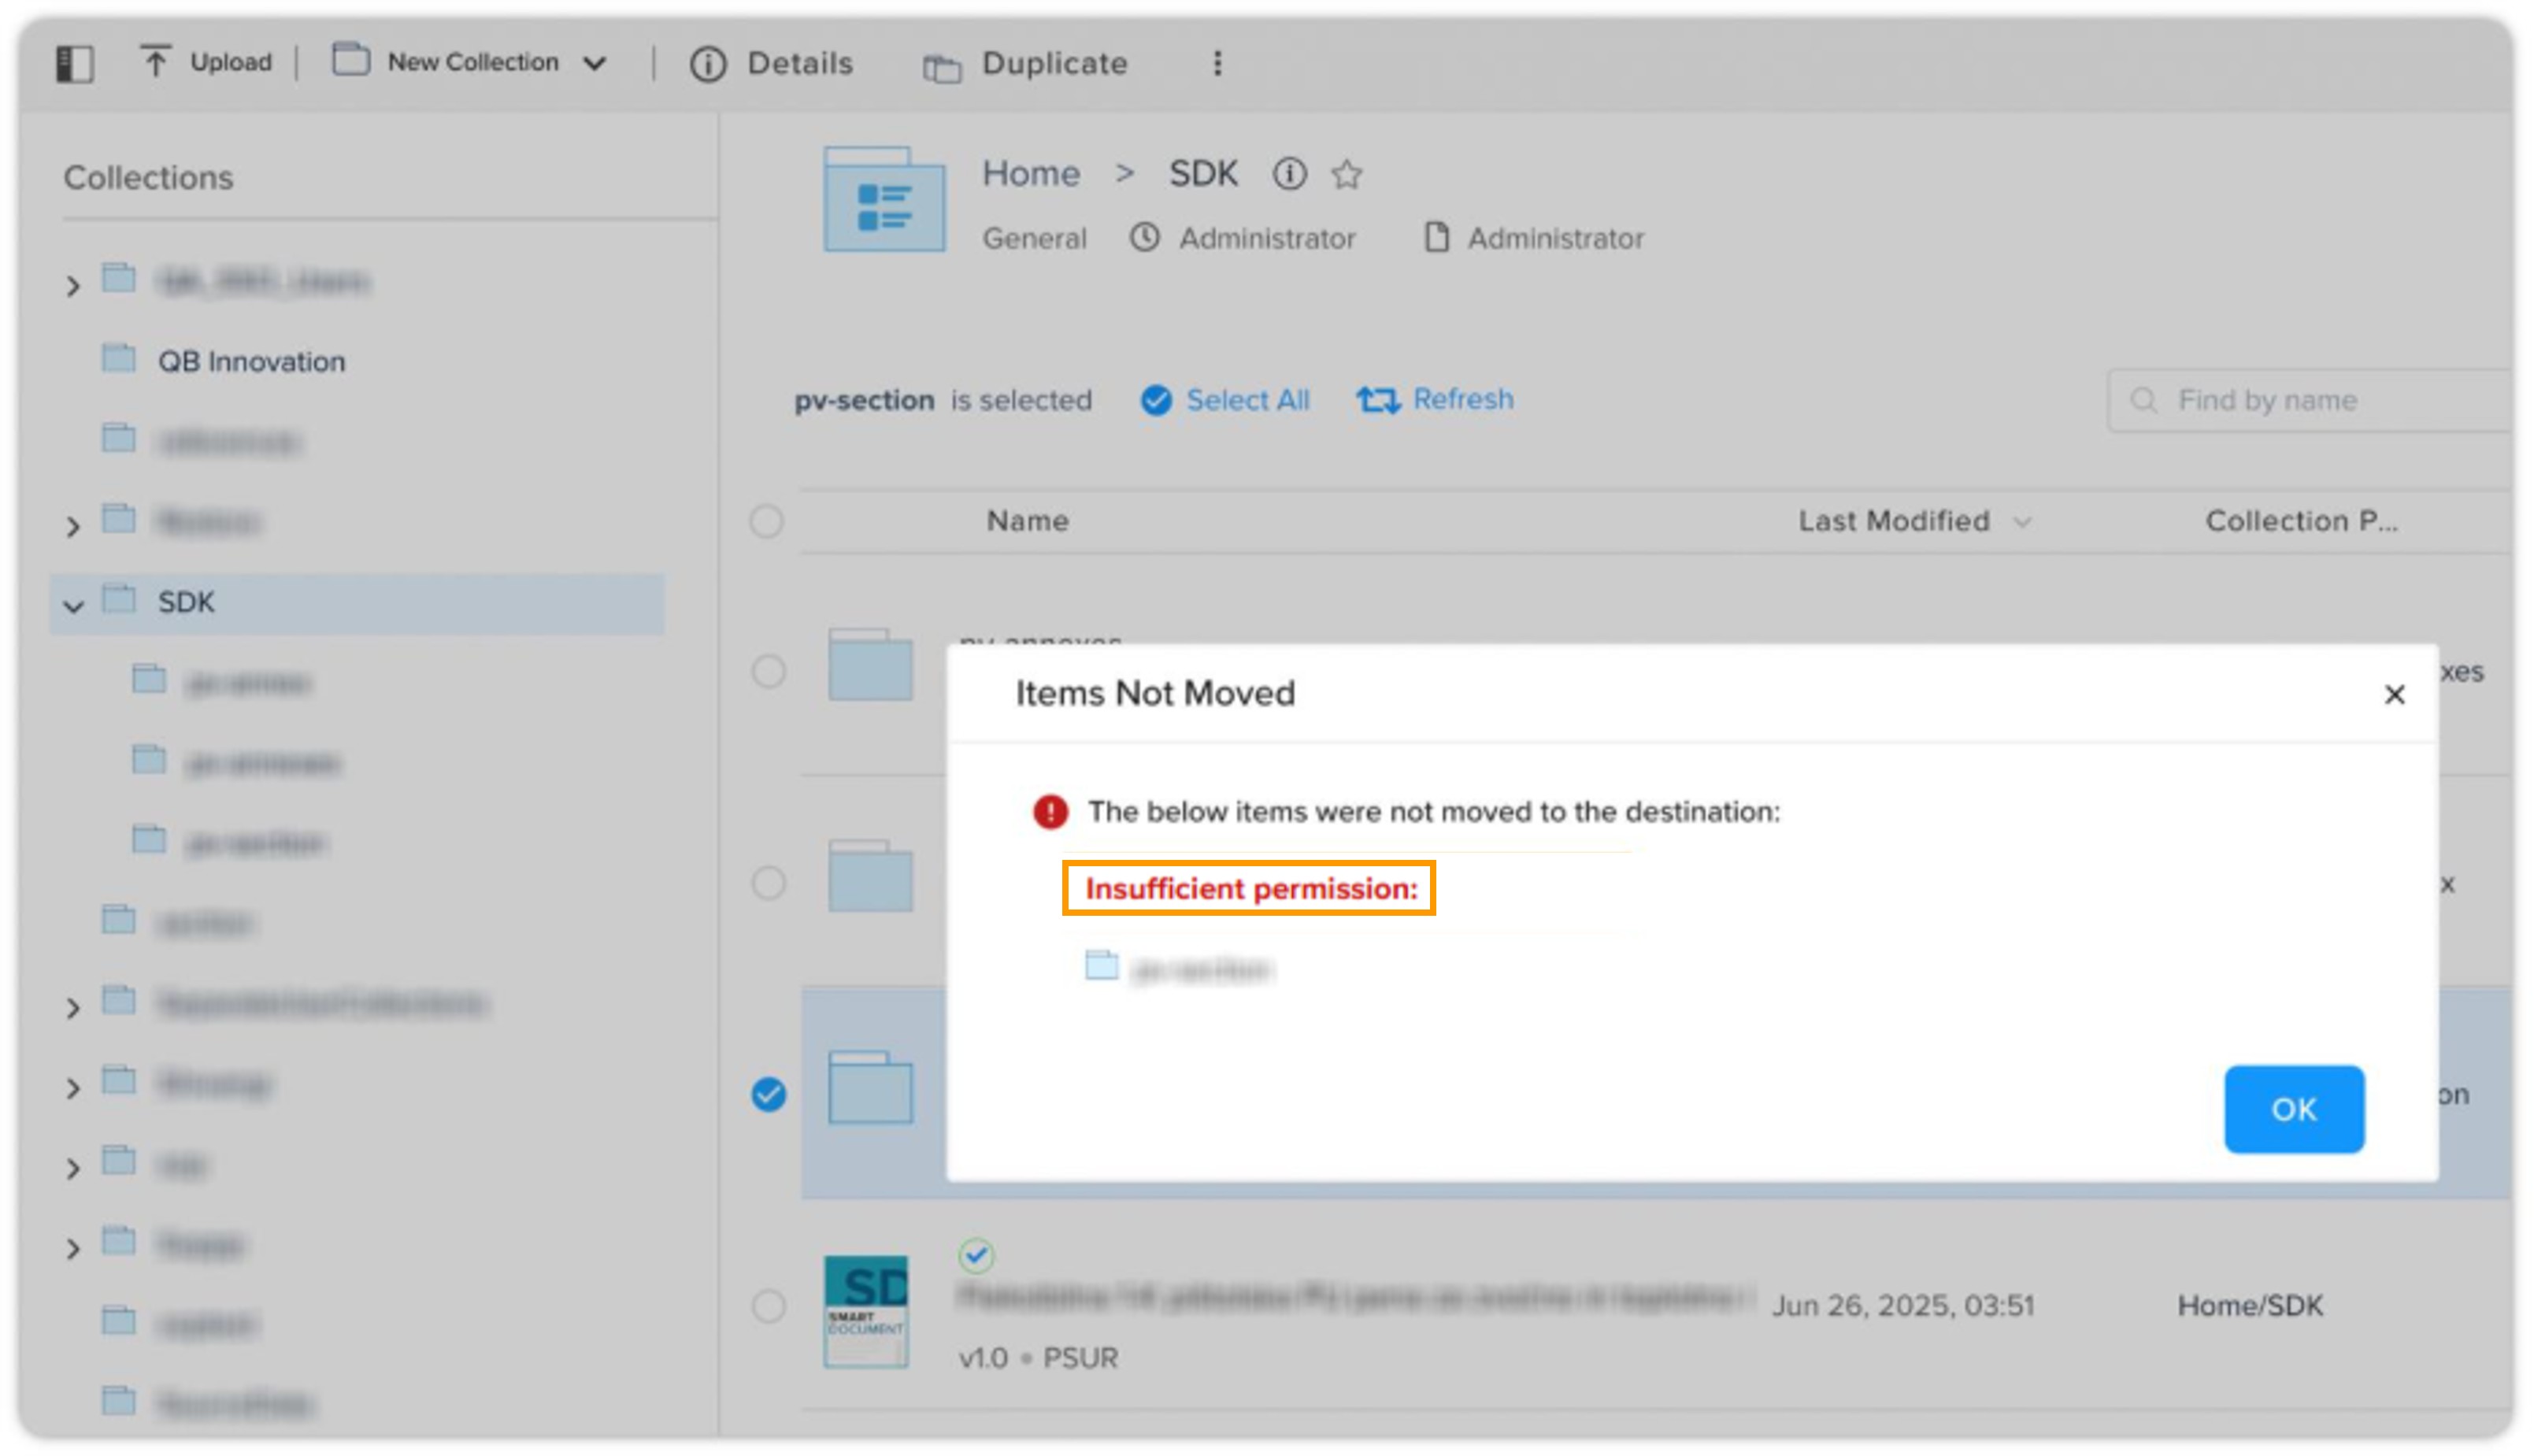
Privilege Requirement Notification
The ability to move assets or collections using drag & drop is controlled by the "Change Collection of Checked in Asset" privilege. If you do not have this privilege, you will see an on-screen message: Insufficient privilege.
-
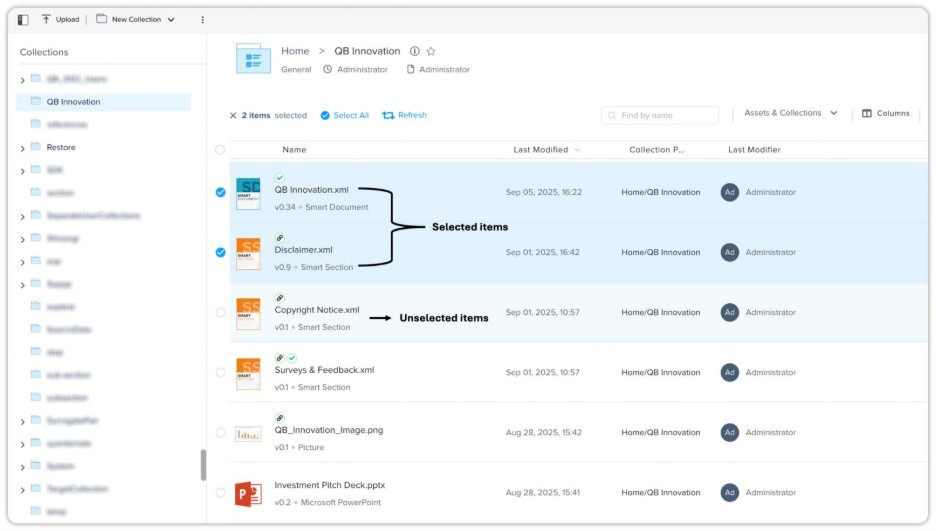
Selected vs. Dragged Items
If you select multiple items in a collection, but you proceed to drag an unselected item, only the item you actually drag and drop will be moved—not the selected items. Always ensure you are dragging the correct item(s), as only the dragged items are moved.
-
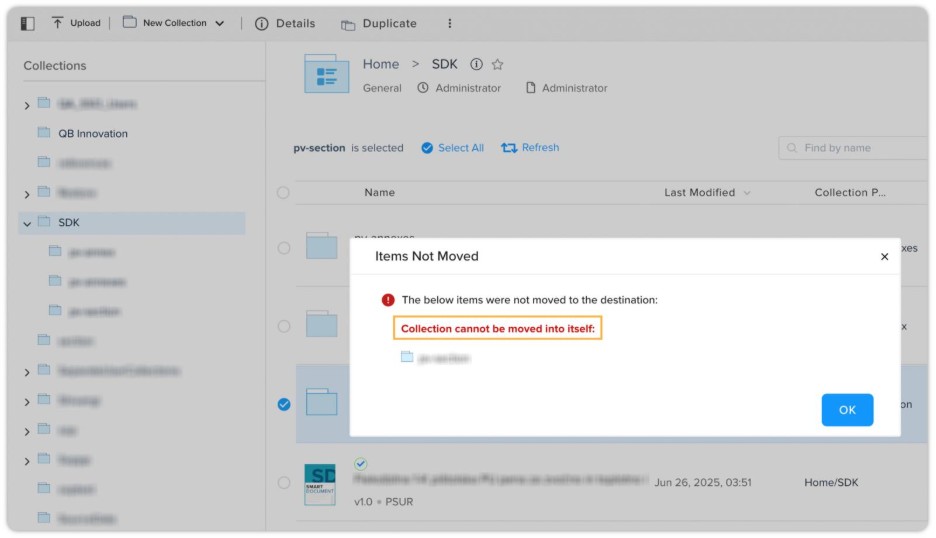
Restriction on Moving Collections into Themselves
Collections cannot be moved into themselves. For instance, if you select assets along with a sub-collection named "September 2025" and try to move all selected items into the "September 2025" sub-collection, only the assets will be moved. The system will display an error message: Collection cannot be moved into itself.