Page Layout
This section provides information on all the page layout-related features and capabilities that Quark Publishing Platform Adapter for Quark XML Author offers.
Page Break
QPP Adapter for Quark XML Author inserts an automatic page break when a page is filled with content and shifts the overflowing content to a new page. You can also insert a page break based on your requirements. For example, if you want a graphic or section to start at the beginning of a page, you can insert a page break manually.
You can exert some control over where automatic page breaks are inserted by using the Keep With Next and Widow / Orphan features.
Insert a Page Break
To insert a page break:
-
Position the cursor at the right end of the element after which you want to insert a page break (or at the left end of the element before which you want to insert a page break).
-
In the header ribbon, under the tab Insert, select Page Break.
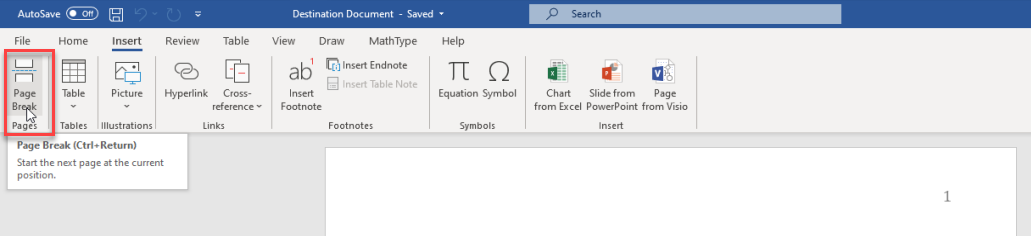
QPP Adapter for Quark XML Author shifts the cursor to the beginning of the next page.
Delete a Page Break
To delete a page break:
-
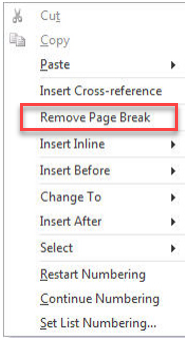
Position the cursor before the first element on the page following a page break.
-
Right-click and in the context menu, select Remove Page break.
Set Page Orientation
Quark Publishing Platform Adapter for Quark XML Author allows you to apply page orientation (portrait or landscape) to all pages in a document.
To set page orientation:
-
In the header ribbon, select the tab View.
-
Under the tool group Document Views, select:
-
Print Layout for portrait orientation
-
Draft for landscape orientation

-
Document-sections
The Section Break feature is similar to the Section Break feature in Microsoft® Word. These sections are Word-specific sections rather than schema-specific sections. Inserting or deleting a Word-specific section has no effect on schema-specific Sections.
Insert Document-section Break
To insert a document-section break:
-
Position the cursor in the section after which you want to add a section break.
-
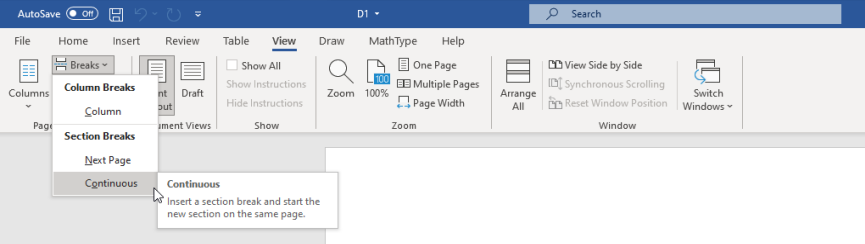
In the header ribbon, under the tab View, select Breaks and then select one of the options under Section Breaks.
Delete a Section Break
To delete a section break:
-
Position the cursor on the first element on the page following a section break.
-
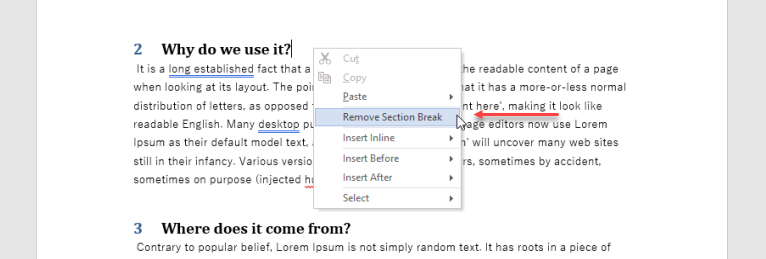
Right-click and in the context menu, select Remove Section Break.
Keep with Next
When you want to prevent Microsoft® Word from inserting an automatic page break between two content elements, you can tie them together using the Quark Publishing Platform Adapter for Quark XML Author function Keep with Next.
You can use this function on two paragraphs, two lists, or a list and a paragraph. Within tables, you can apply this function to table rows only.
To apply the function Keep with Next:
-
Select the elements that you want to keep together.
-
In the header ribbon, under the tab View, select Keep with Next.

Widow and Orphan Lines
-
Widow Line: When a paragraph extends past the end of a page such that the last line of the paragraph is the only line displayed on the next page, then that line is known as a "widow" line.
-
Orphan Line: When a paragraph extends past the end of a page such that the first line of the paragraph is the only line displayed at the bottom of the page, then that line is known as an “orphan” line.
You can prevent Quark Publishing Platform Adapter for Quark XML Author from creating widow and orphan lines through the function Widow Orphan.
To apply the function Widow Orphan:
-
Select the elements that you want to keep together.
-
In the header ribbon, under the tab View, select Widow Orphan.

Columns
The Columns feature allows each section in a document to have a different column specification and arrangement. The document section owns the columns. Therefore, if you want a location that is in the middle of a section to have a different number of columns or column characteristics, then a new section is needed. QPP Adapter for Quark XML Author inserts the new section automatically.
Insert a Column
To insert a column section:
-
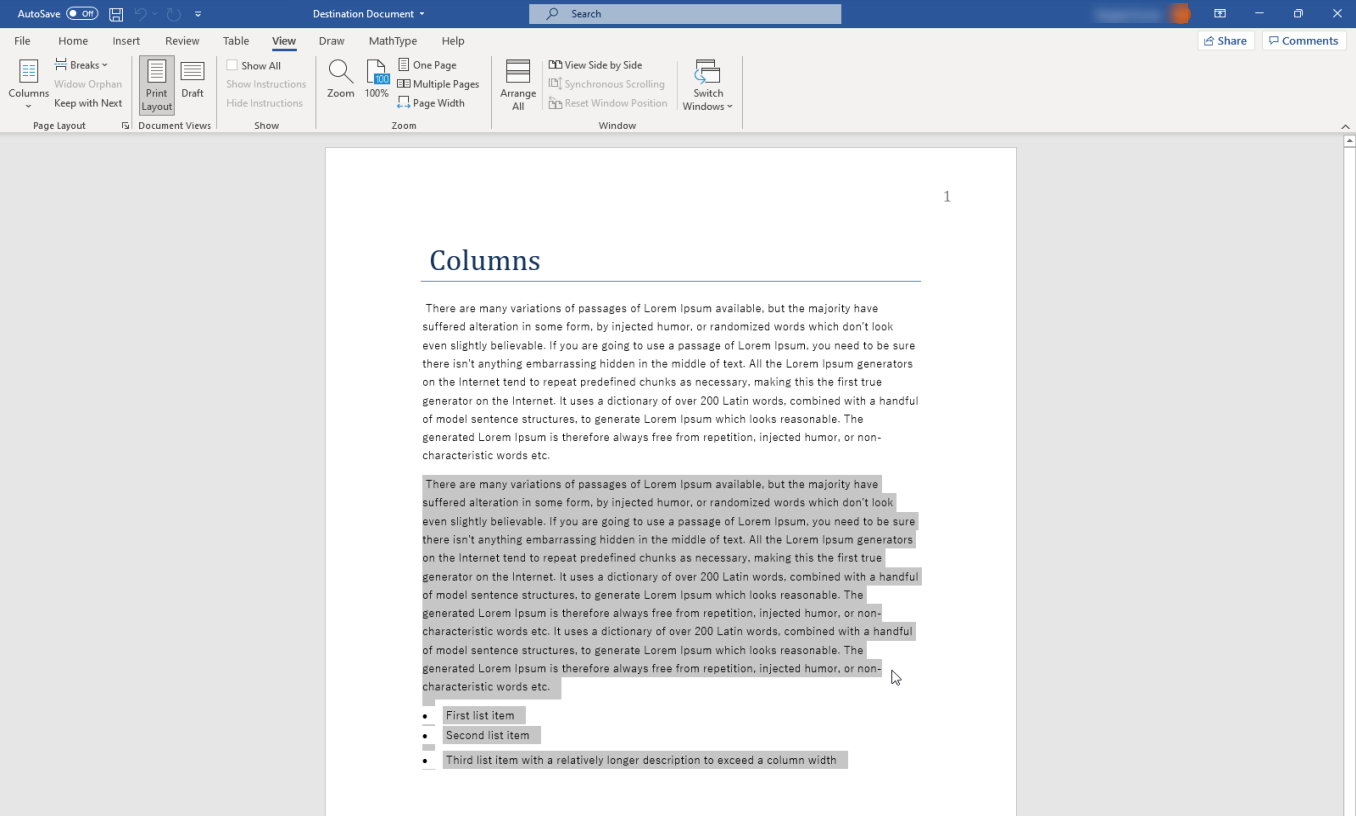
Select the elements that you want to represent in columns or position the cursor before the text that you want to represent in columns.
-
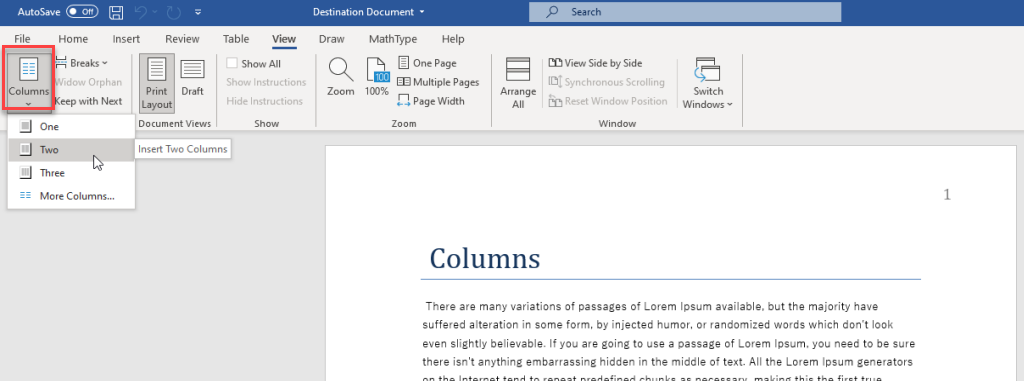
In the header ribbon, under the tab View, select the drop-down menu Columns.
-
In the Columns drop-down menu, select the number of columns you want to divide the selected elements into.
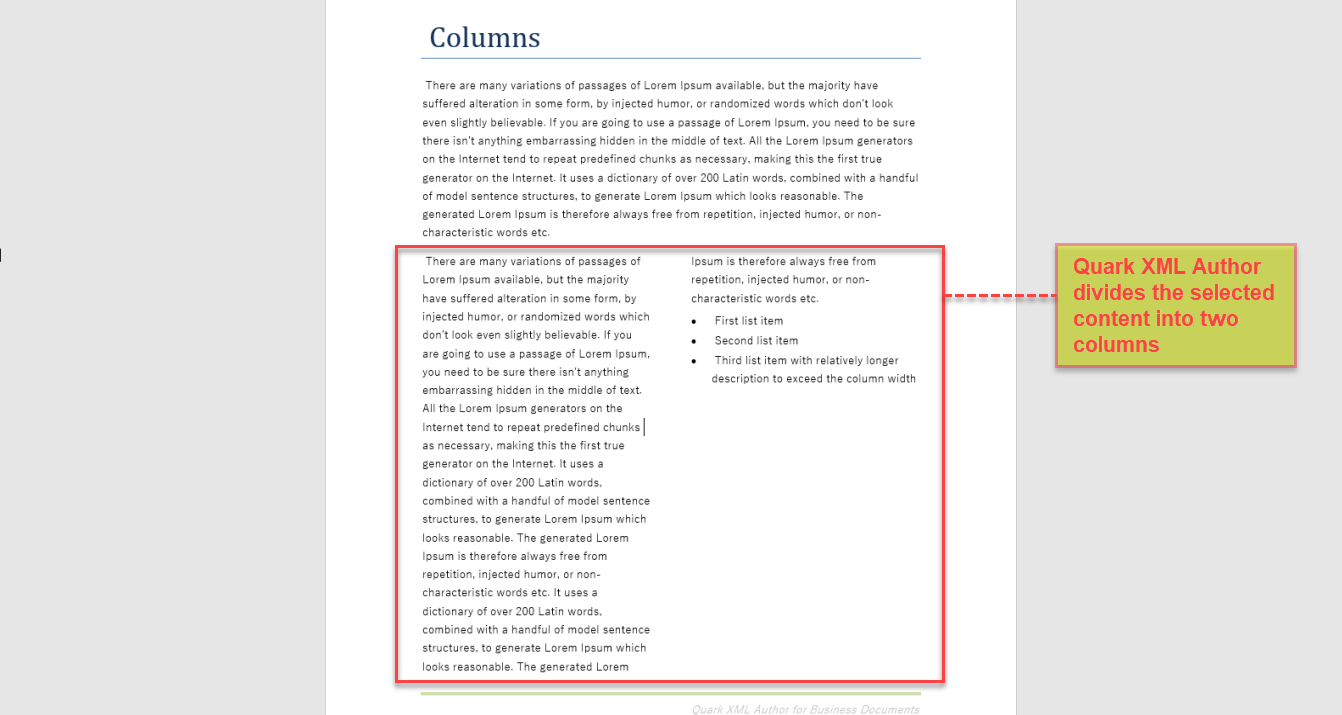
QPP Adapter for Quark XML Author divides the selected text or the text after the cursor position into the number of columns you selected.
Modify a Column
You can modify your column preferences and specifications such as column numbers and column dimensions.
To modify a column:
-
Select the elements you want to modify the columns settings for.
-
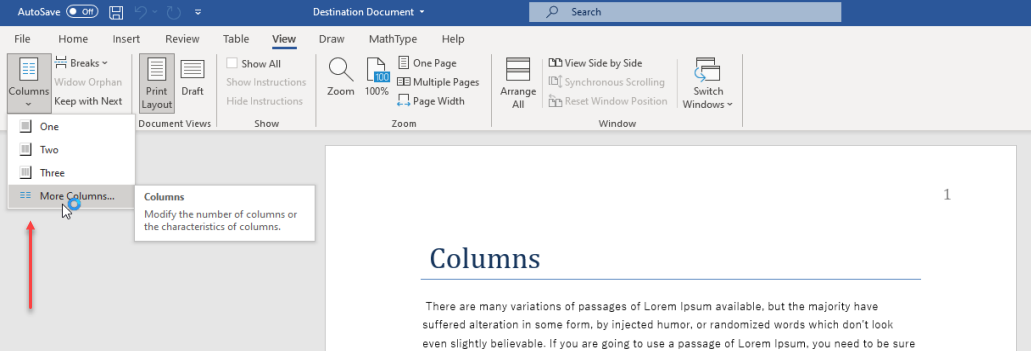
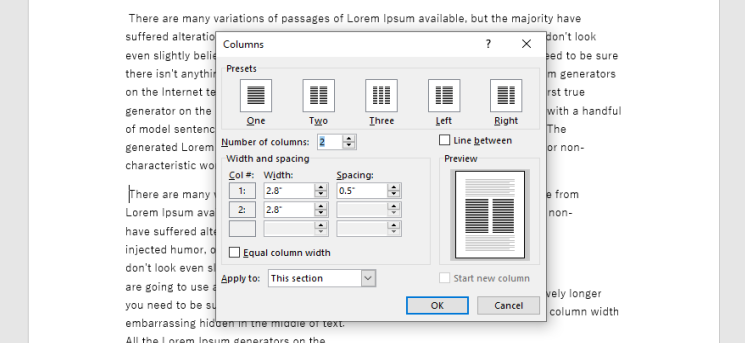
In the header ribbon, under the tab View, select Columns > More Columns to open the dialog box Columns.
-
Make the following selections:
-
Presets: Apply one of the preset configurations to the selected elements.
-
Number of Columns
-
Line between: Add a vertical line between columns.
-
Width and Spacing: Set the width and spacing between columns.
-
Equal Column Width: Set the same width for all the columns.
-
Apply to: You can also modify your element selection through the Columns dialog box. Make selections such as - This section, This point forward, or Whole document.
-
-
Select the button OK.
Insert Column Breaks
Column breaks work similarly to a page break but within the scope of columns. For example, there are three columns, inserting a column break in the middle of column two will move the remainder of column two to the beginning of column three. Any content in column three may be pushed onto the next page.
To insert a column break:
-
Position the cursor before the element where you want to insert a column break.
-
In the header ribbon, under the tab View, select Breaks > Column.
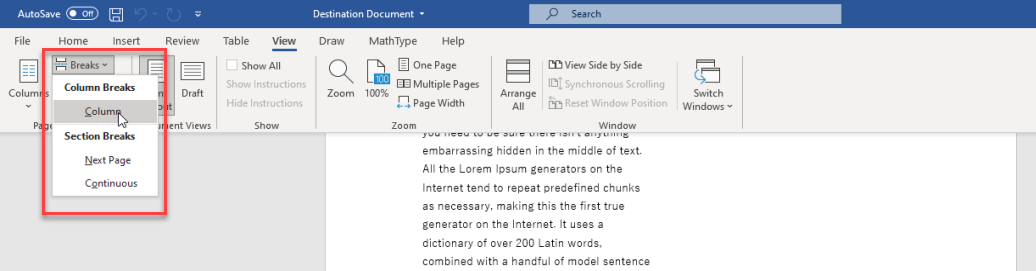
QPP Adapter for Quark XML Author moves the content in the column after the cursor position in the next column.
Delete a Column Break
To delete a column break:
-
Position the cursor before the first element on the page following a column break.
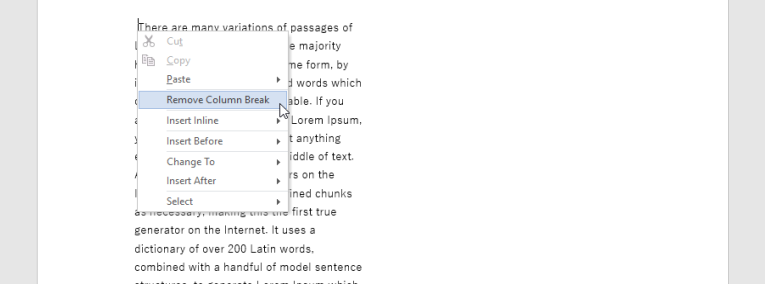
-
Right-click and in the context menu, select Remove Column Break.