
Conversion Process
The DOCX Converter tool performs conversion in two ways:
-
Convert DOCX files into XML file format and save the output XML file into your local system
-
Convert DOCX files into XML file format and upload them directly to your QPP NextGen repository
Convert DOCX files into XML files
Once you have successfully set up the DOCX Converter tool, you can start conversion of your DOCX files into XML. To do that, follow the steps shown below –
-
In the field Content Type, select the content type (corresponding to the content model you want to add support for) from the content types available on the connected server.
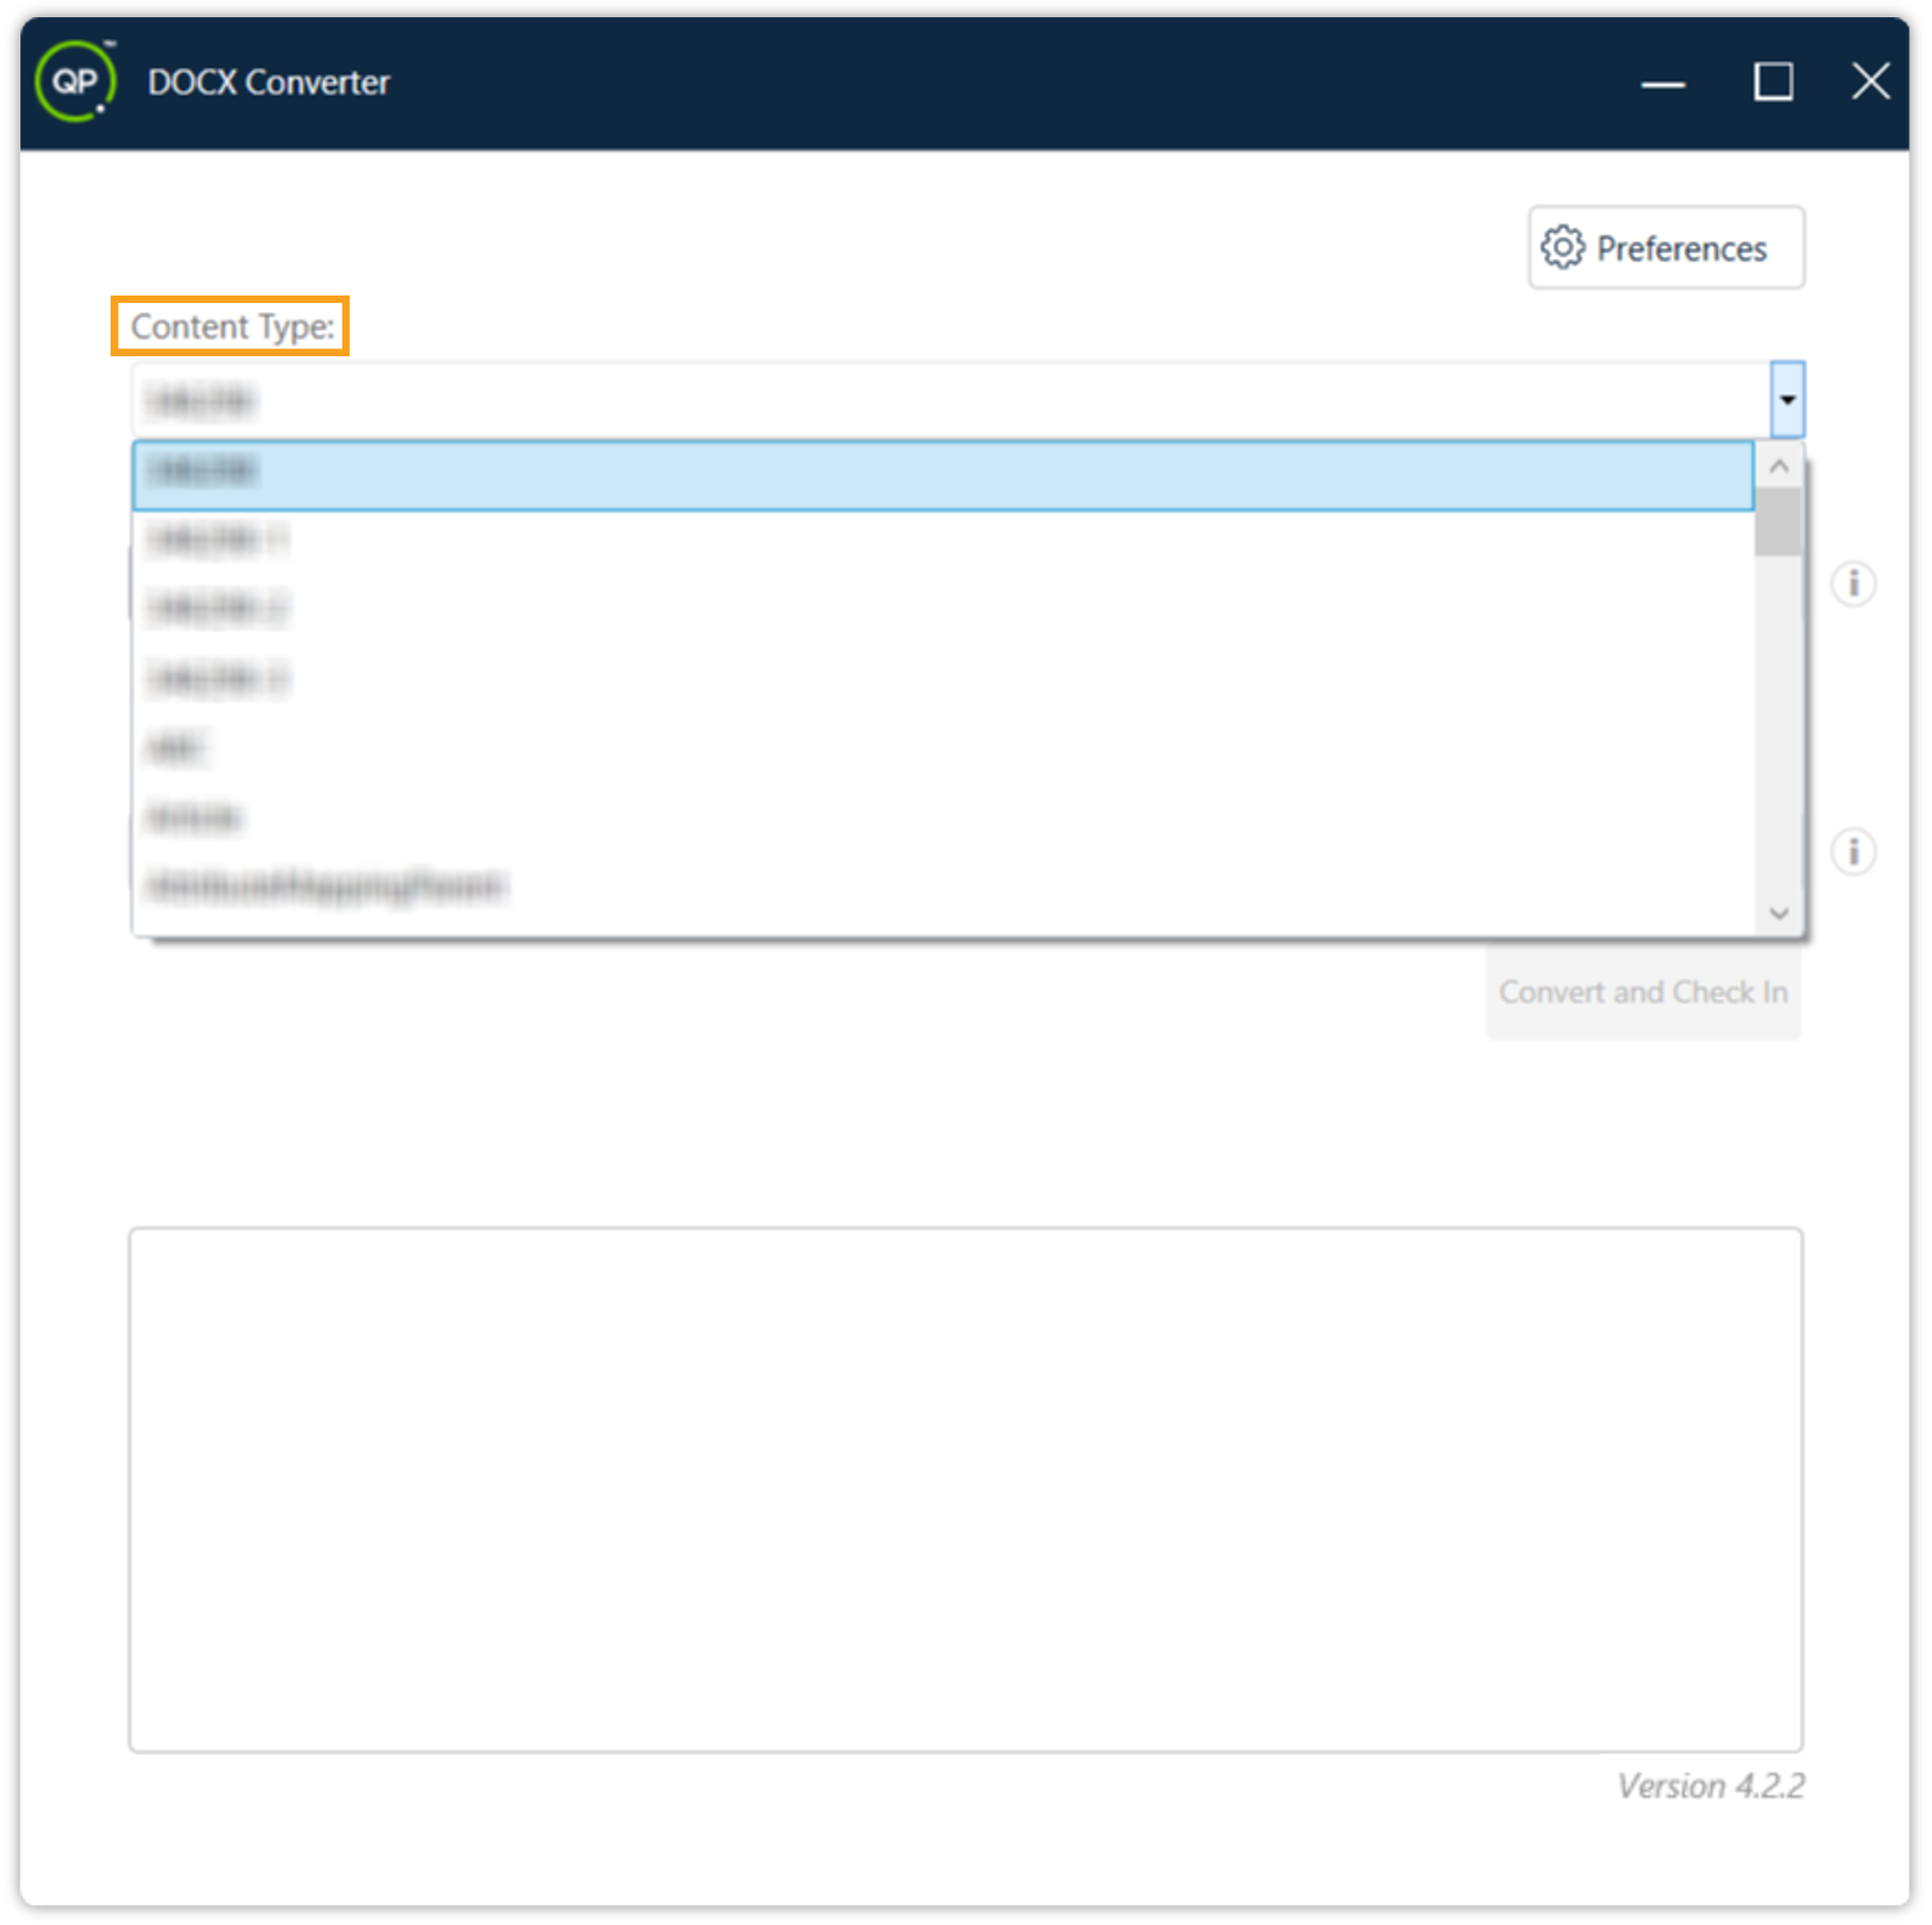 If a content model corresponding to your DOCX files is not available, you must create one. For more information, see how to create a content model in QPP NextGen.
-
In the field Source Folder, set the path to the folder on your local machine where DOCX files are stored for conversion.
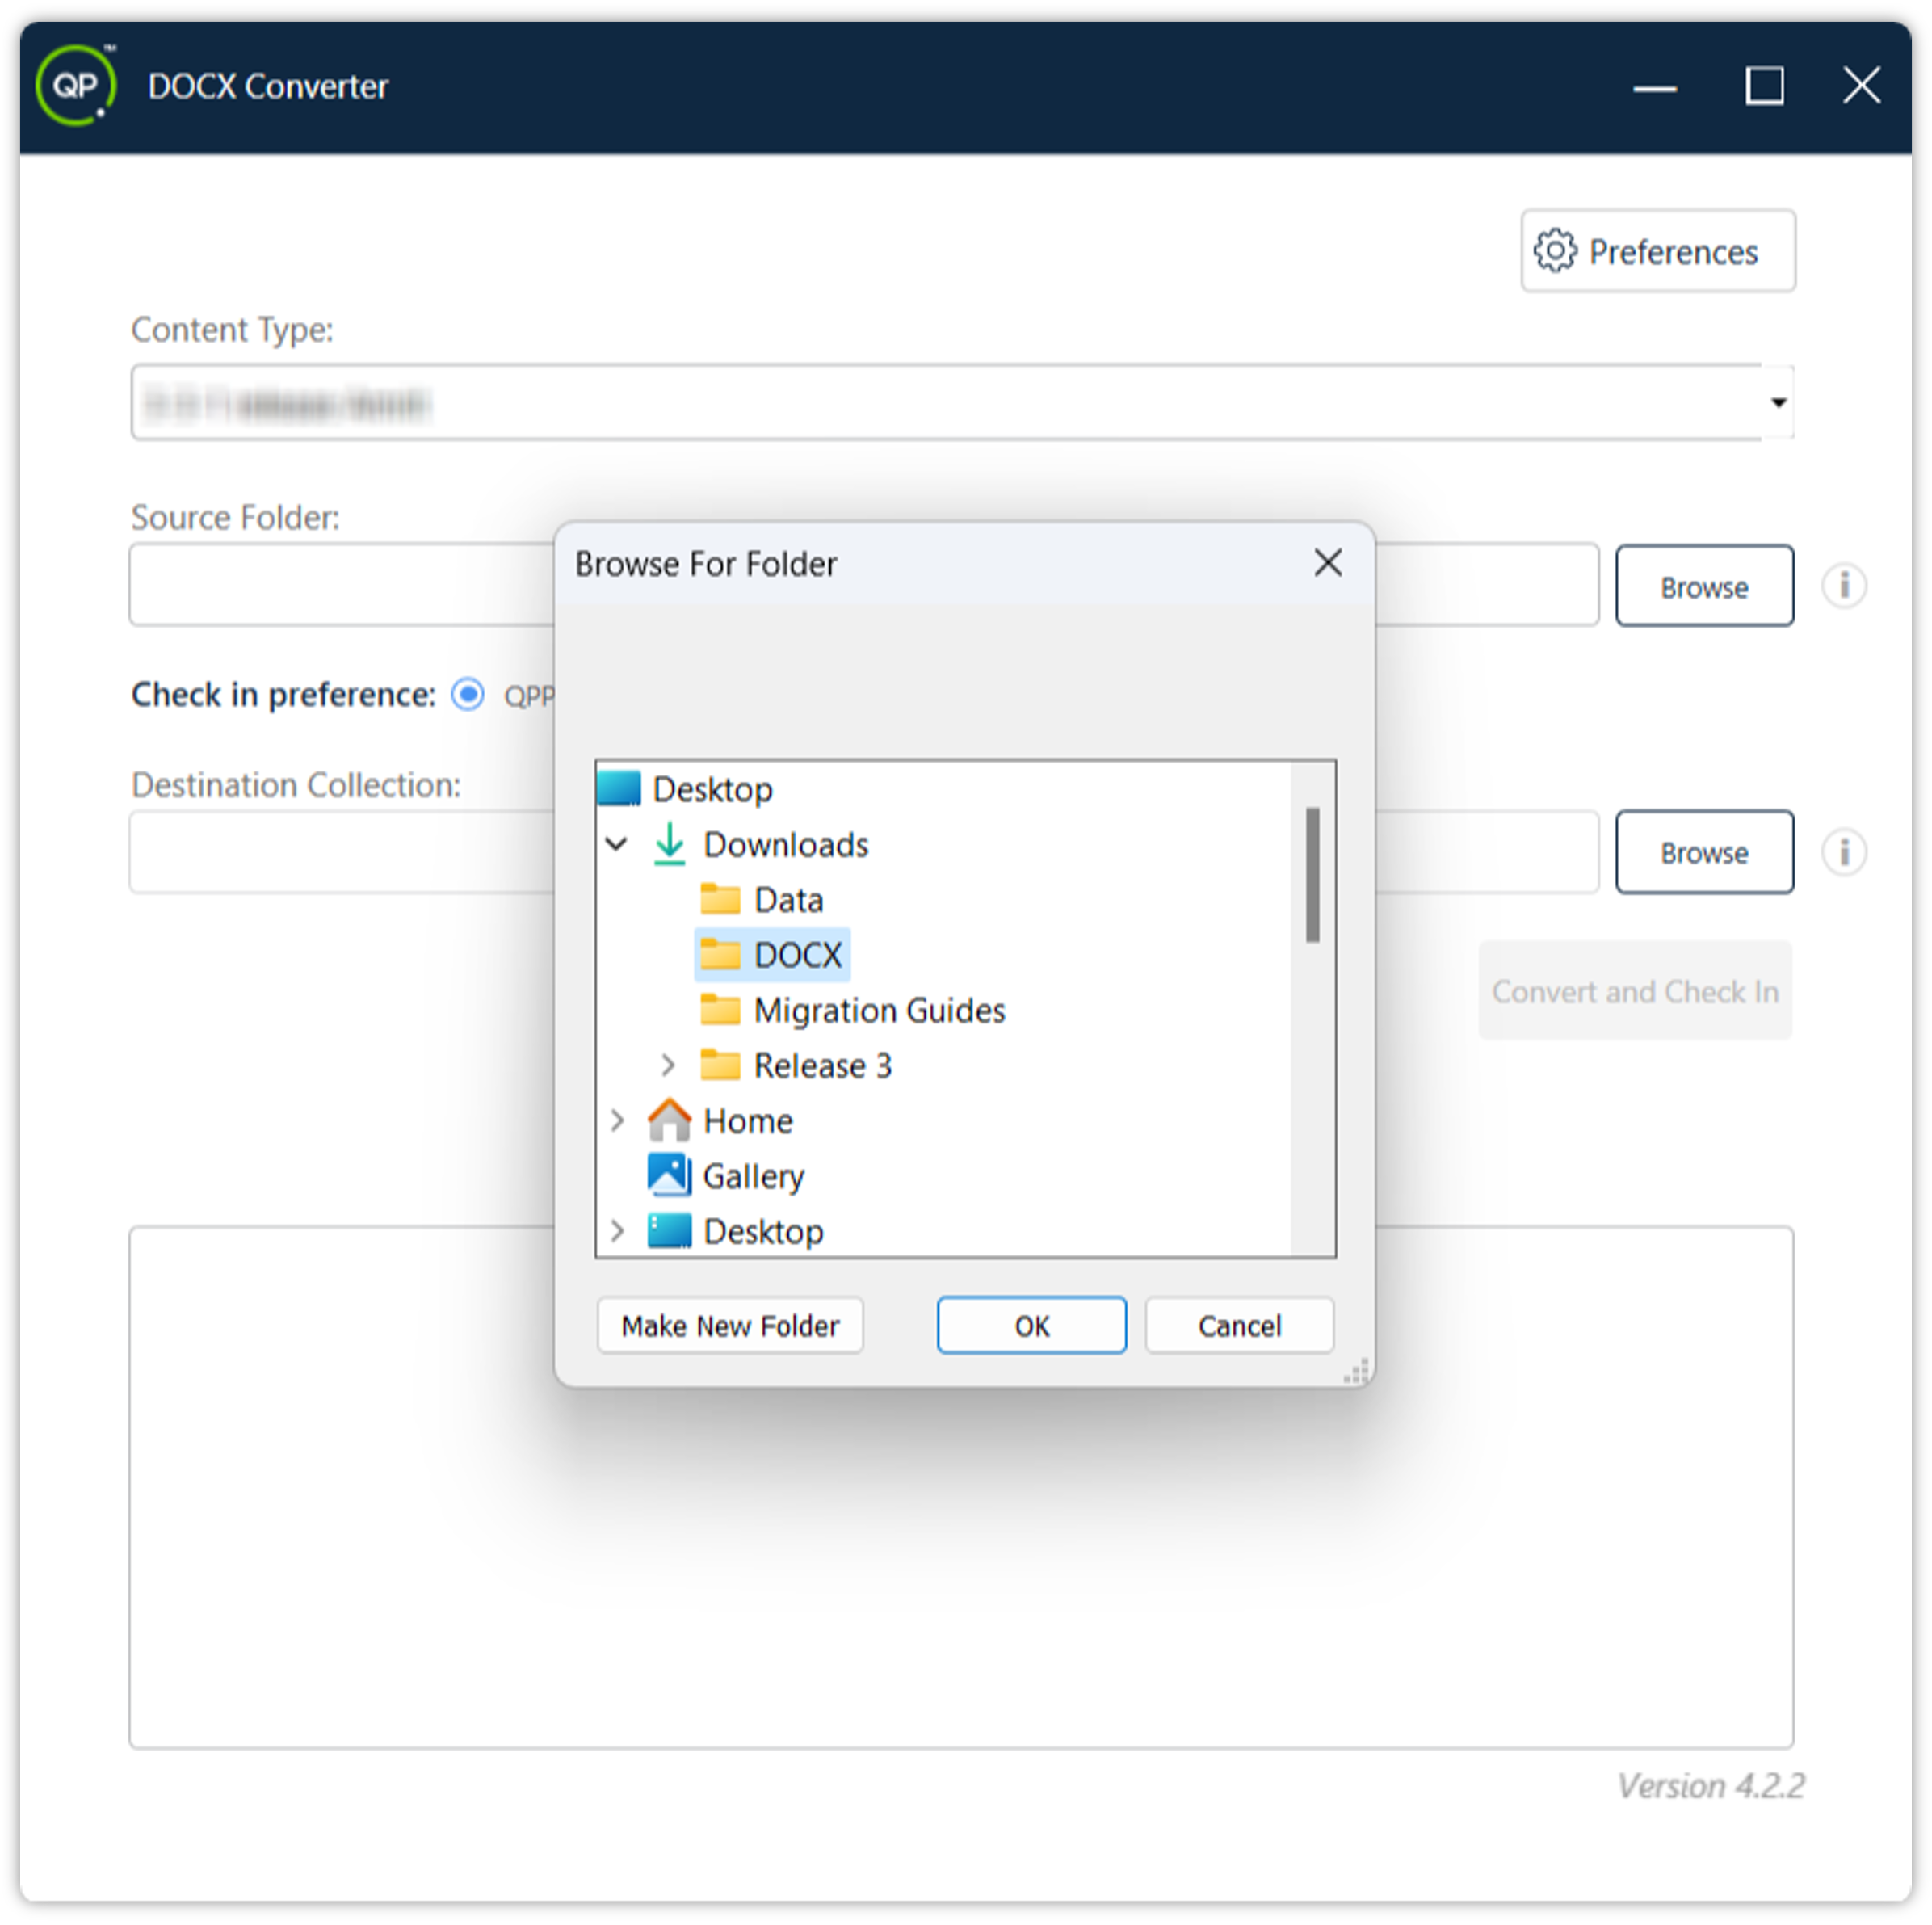 Important: Make sure that all the DOCX files in the source folder are based on the selected content type beforehand. Otherwise, QPP NextGen would not allow you to open the converted XML files.
-
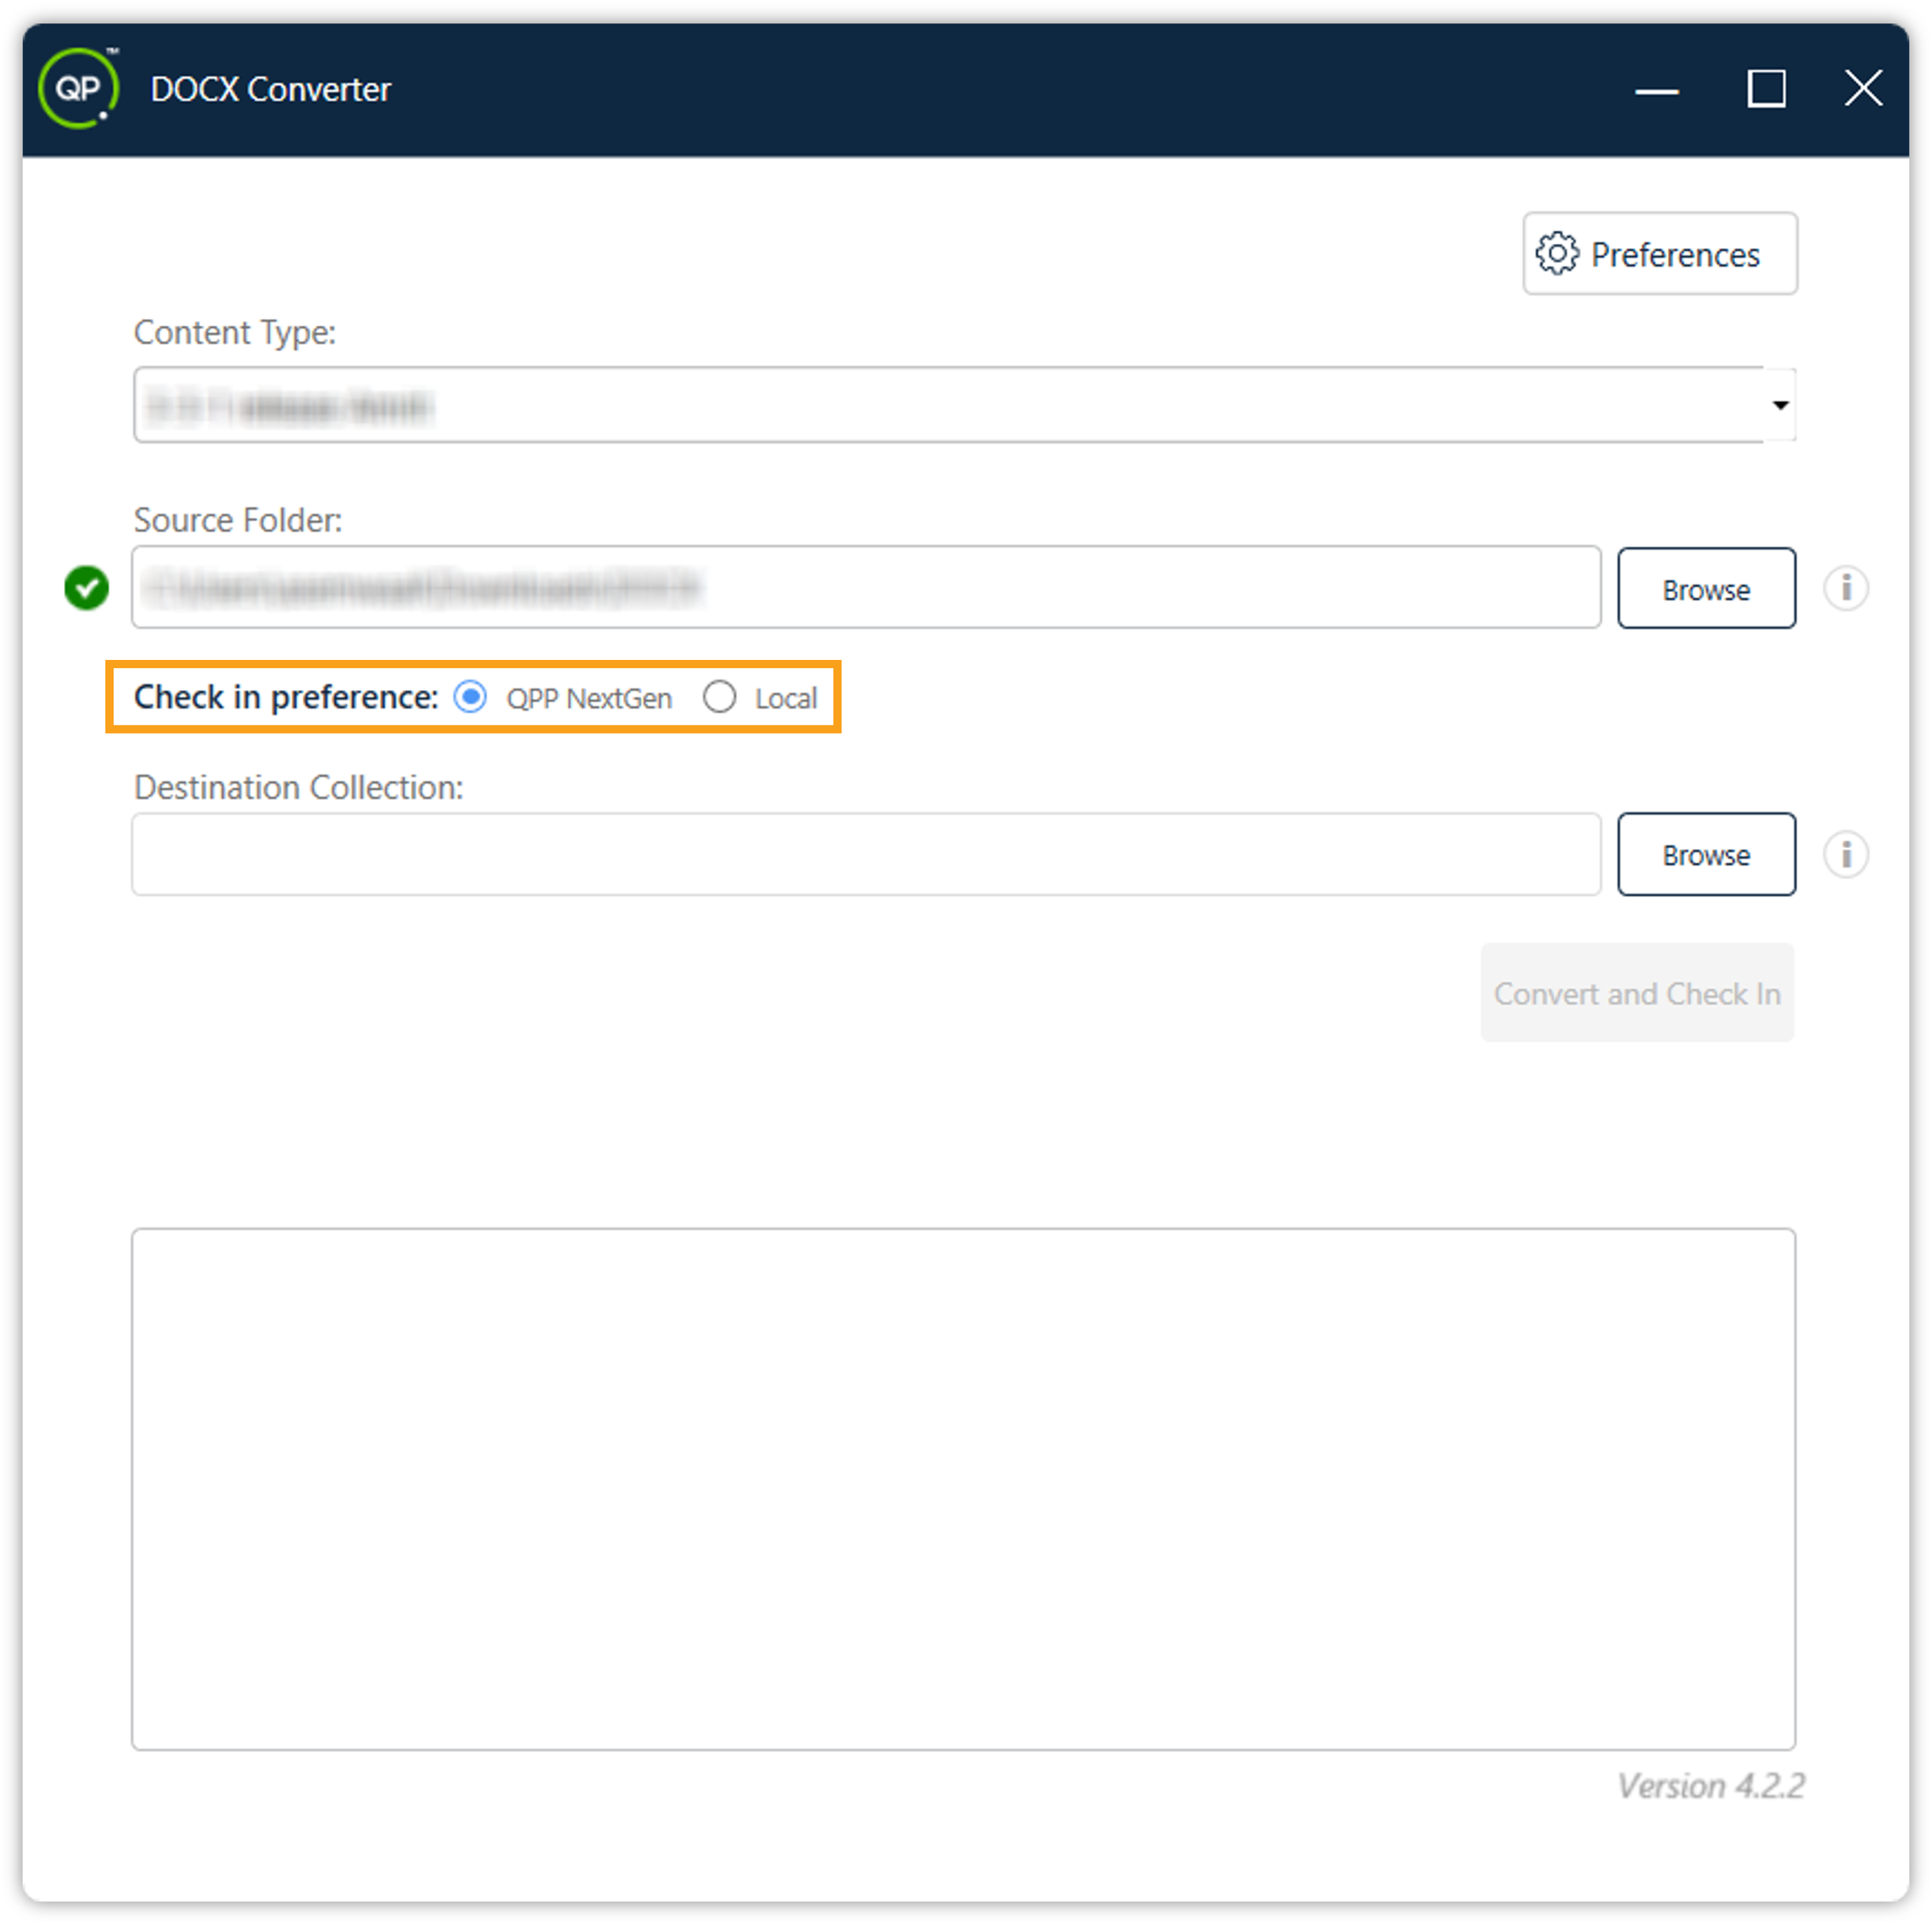
After selecting the source folder, you need to select the check-in preference –
-
QPP NextGen: This will upload the converted files to QPP NextGen repository
-
Local: This will save the converted files to your local system
-
-
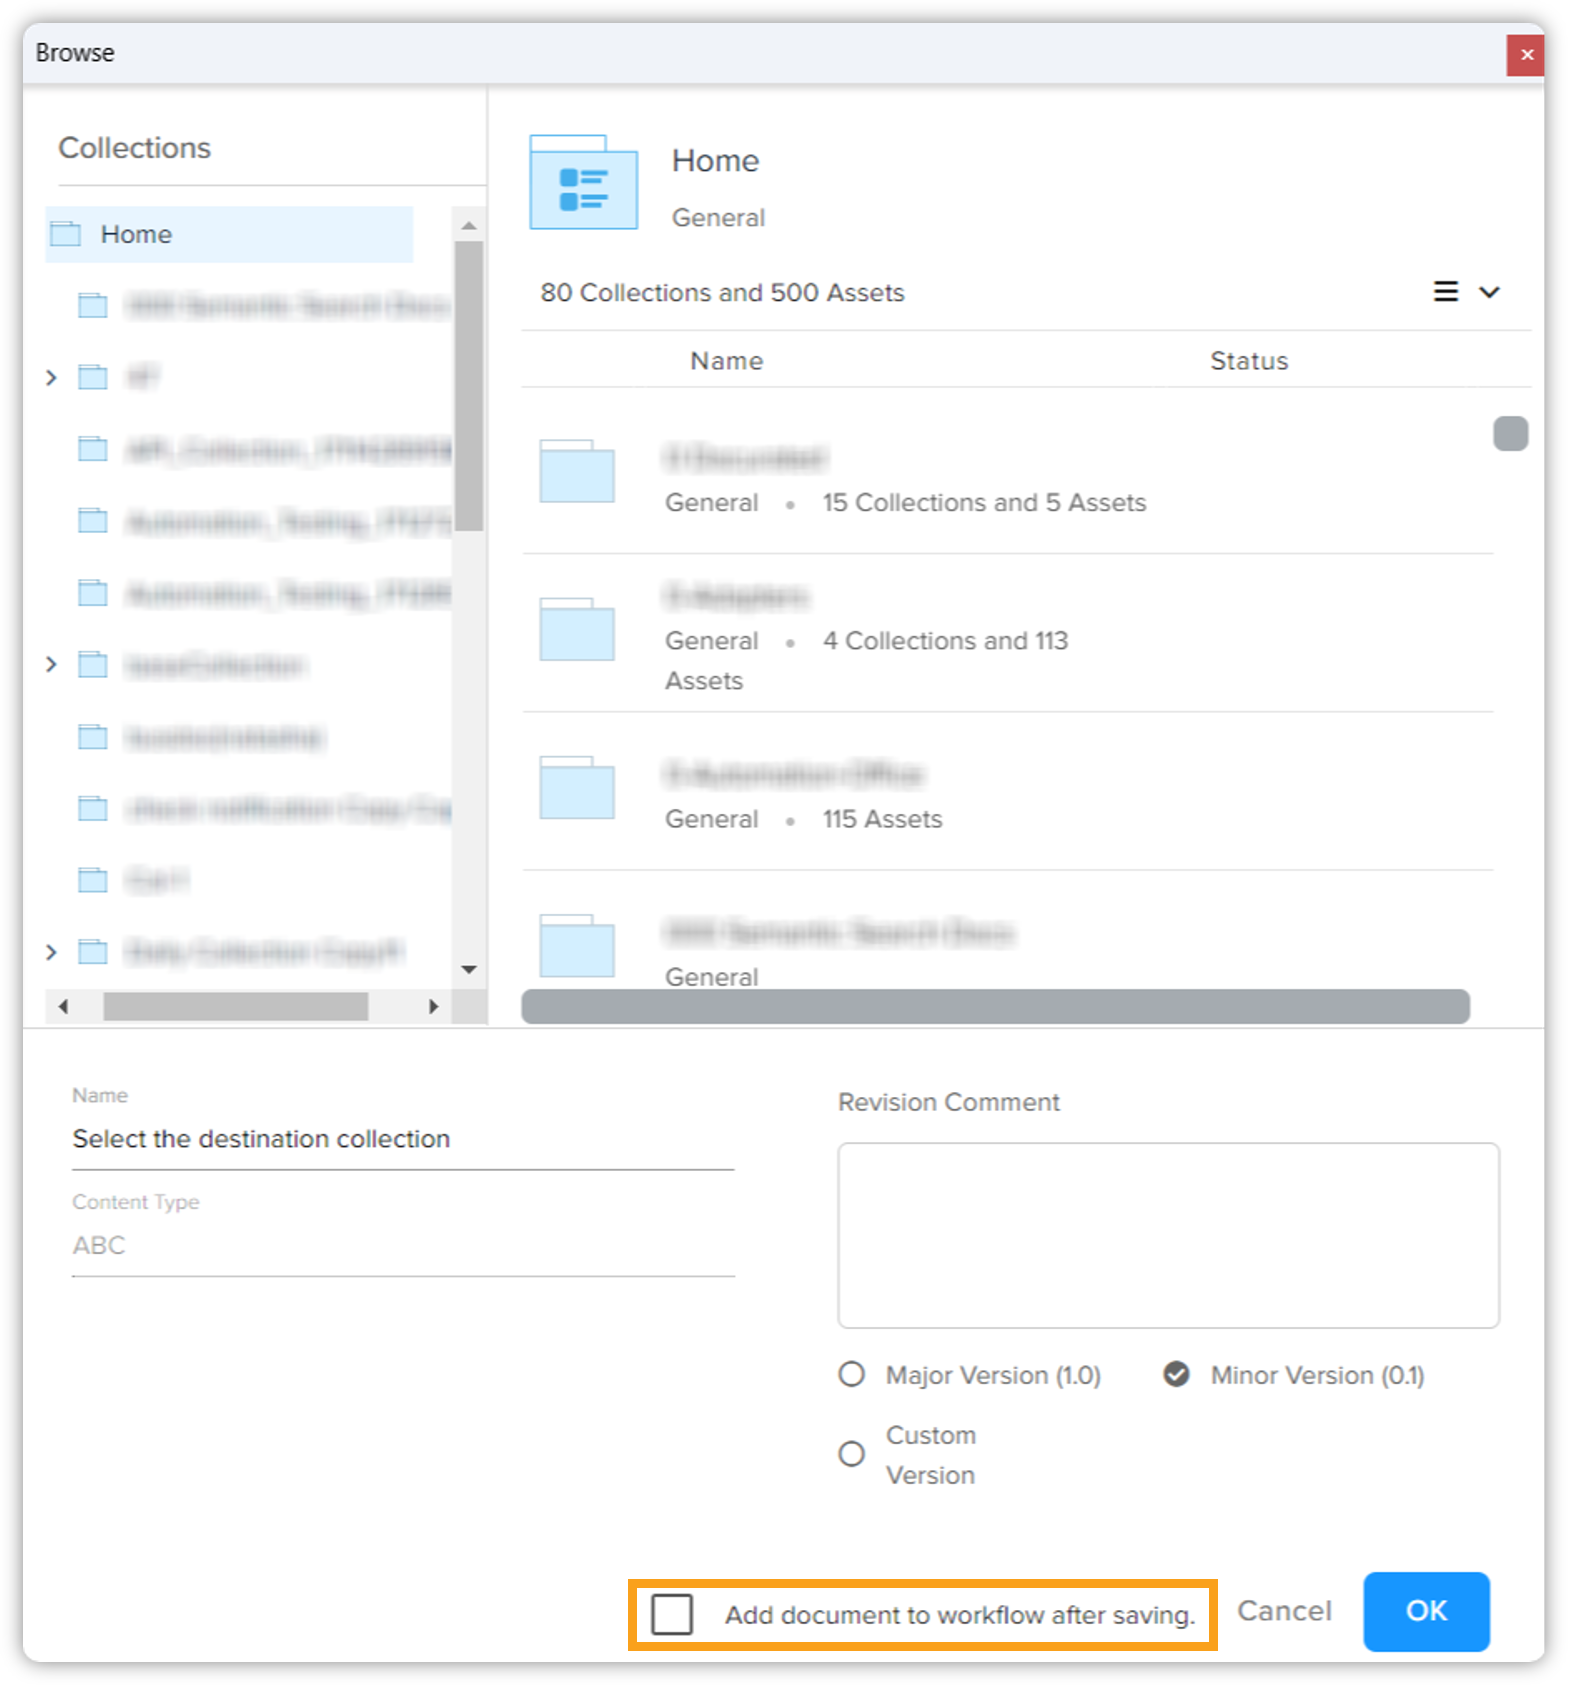
Upon selecting QPP NextGen as your check-in preference, the destination collection option will appear. Here you need to select the collection within your QPP NextGen Server where you want to upload the output XML files.
-
There's an option to add the document to workflow after saving. Click on the checkbox to enable this option, and then click on OK.
-
Now you need to select the workflow to begin. Click the dropdown arrow and select the desired workflow.
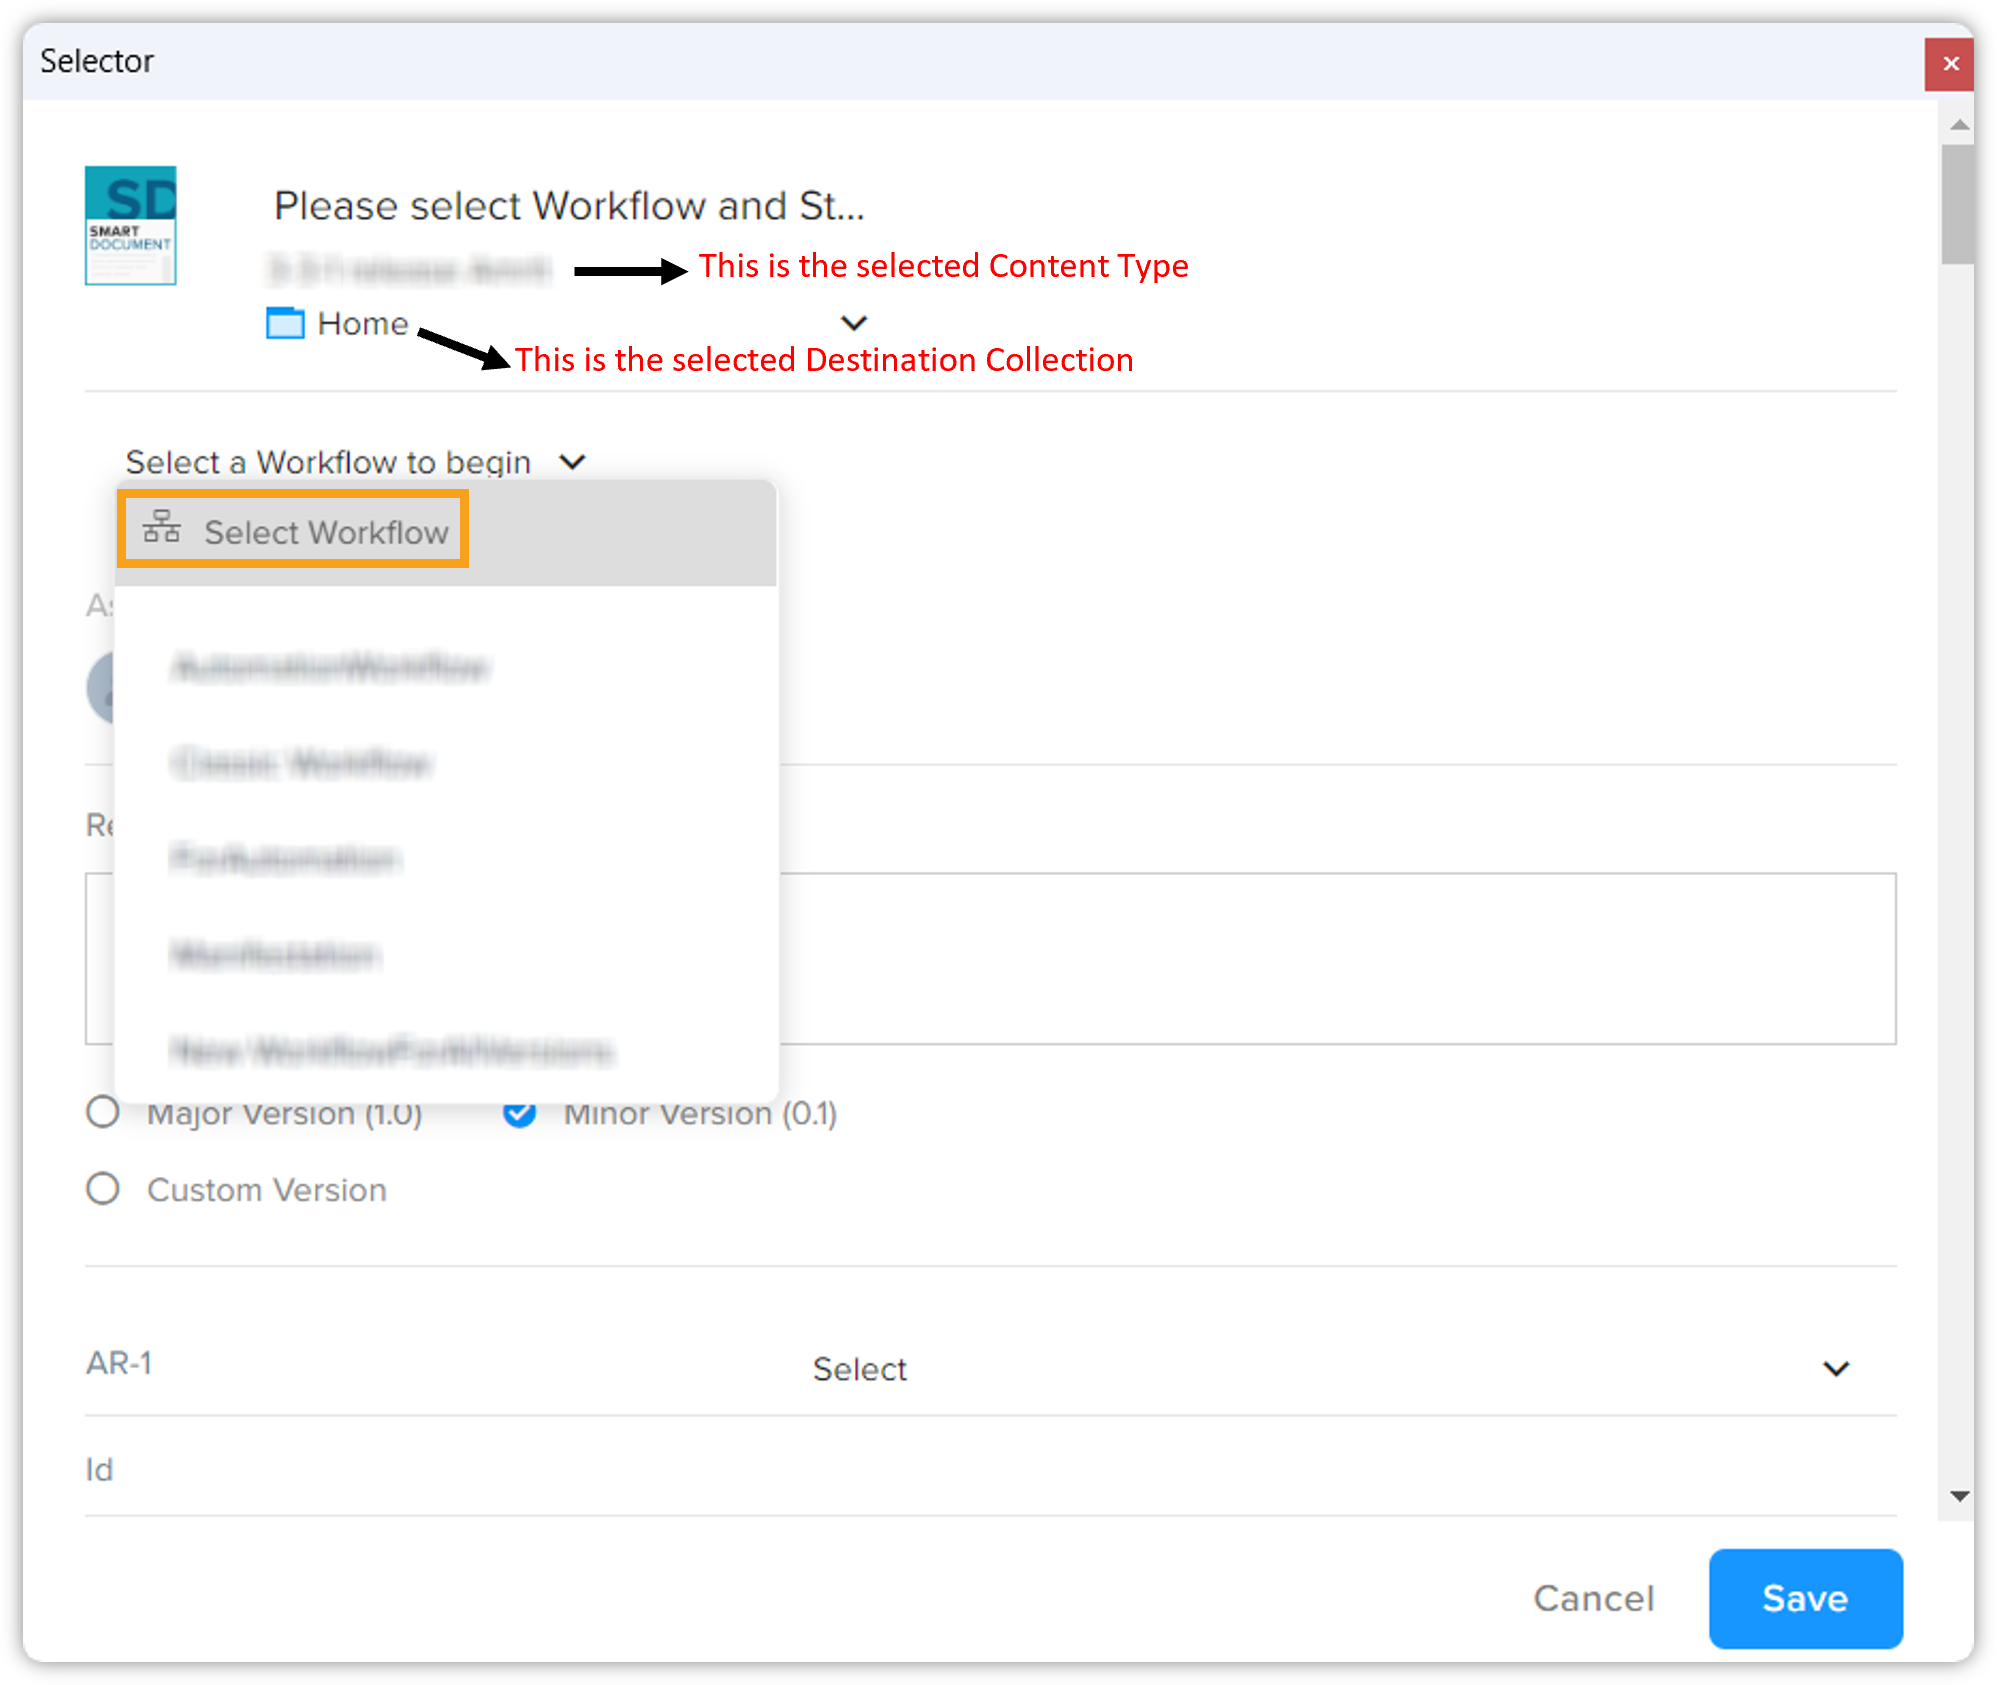 This new enhancement empowers you to fine-tune your content management process, ensuring a more streamlined and customizable experience within the DOCX Converter tool.
-
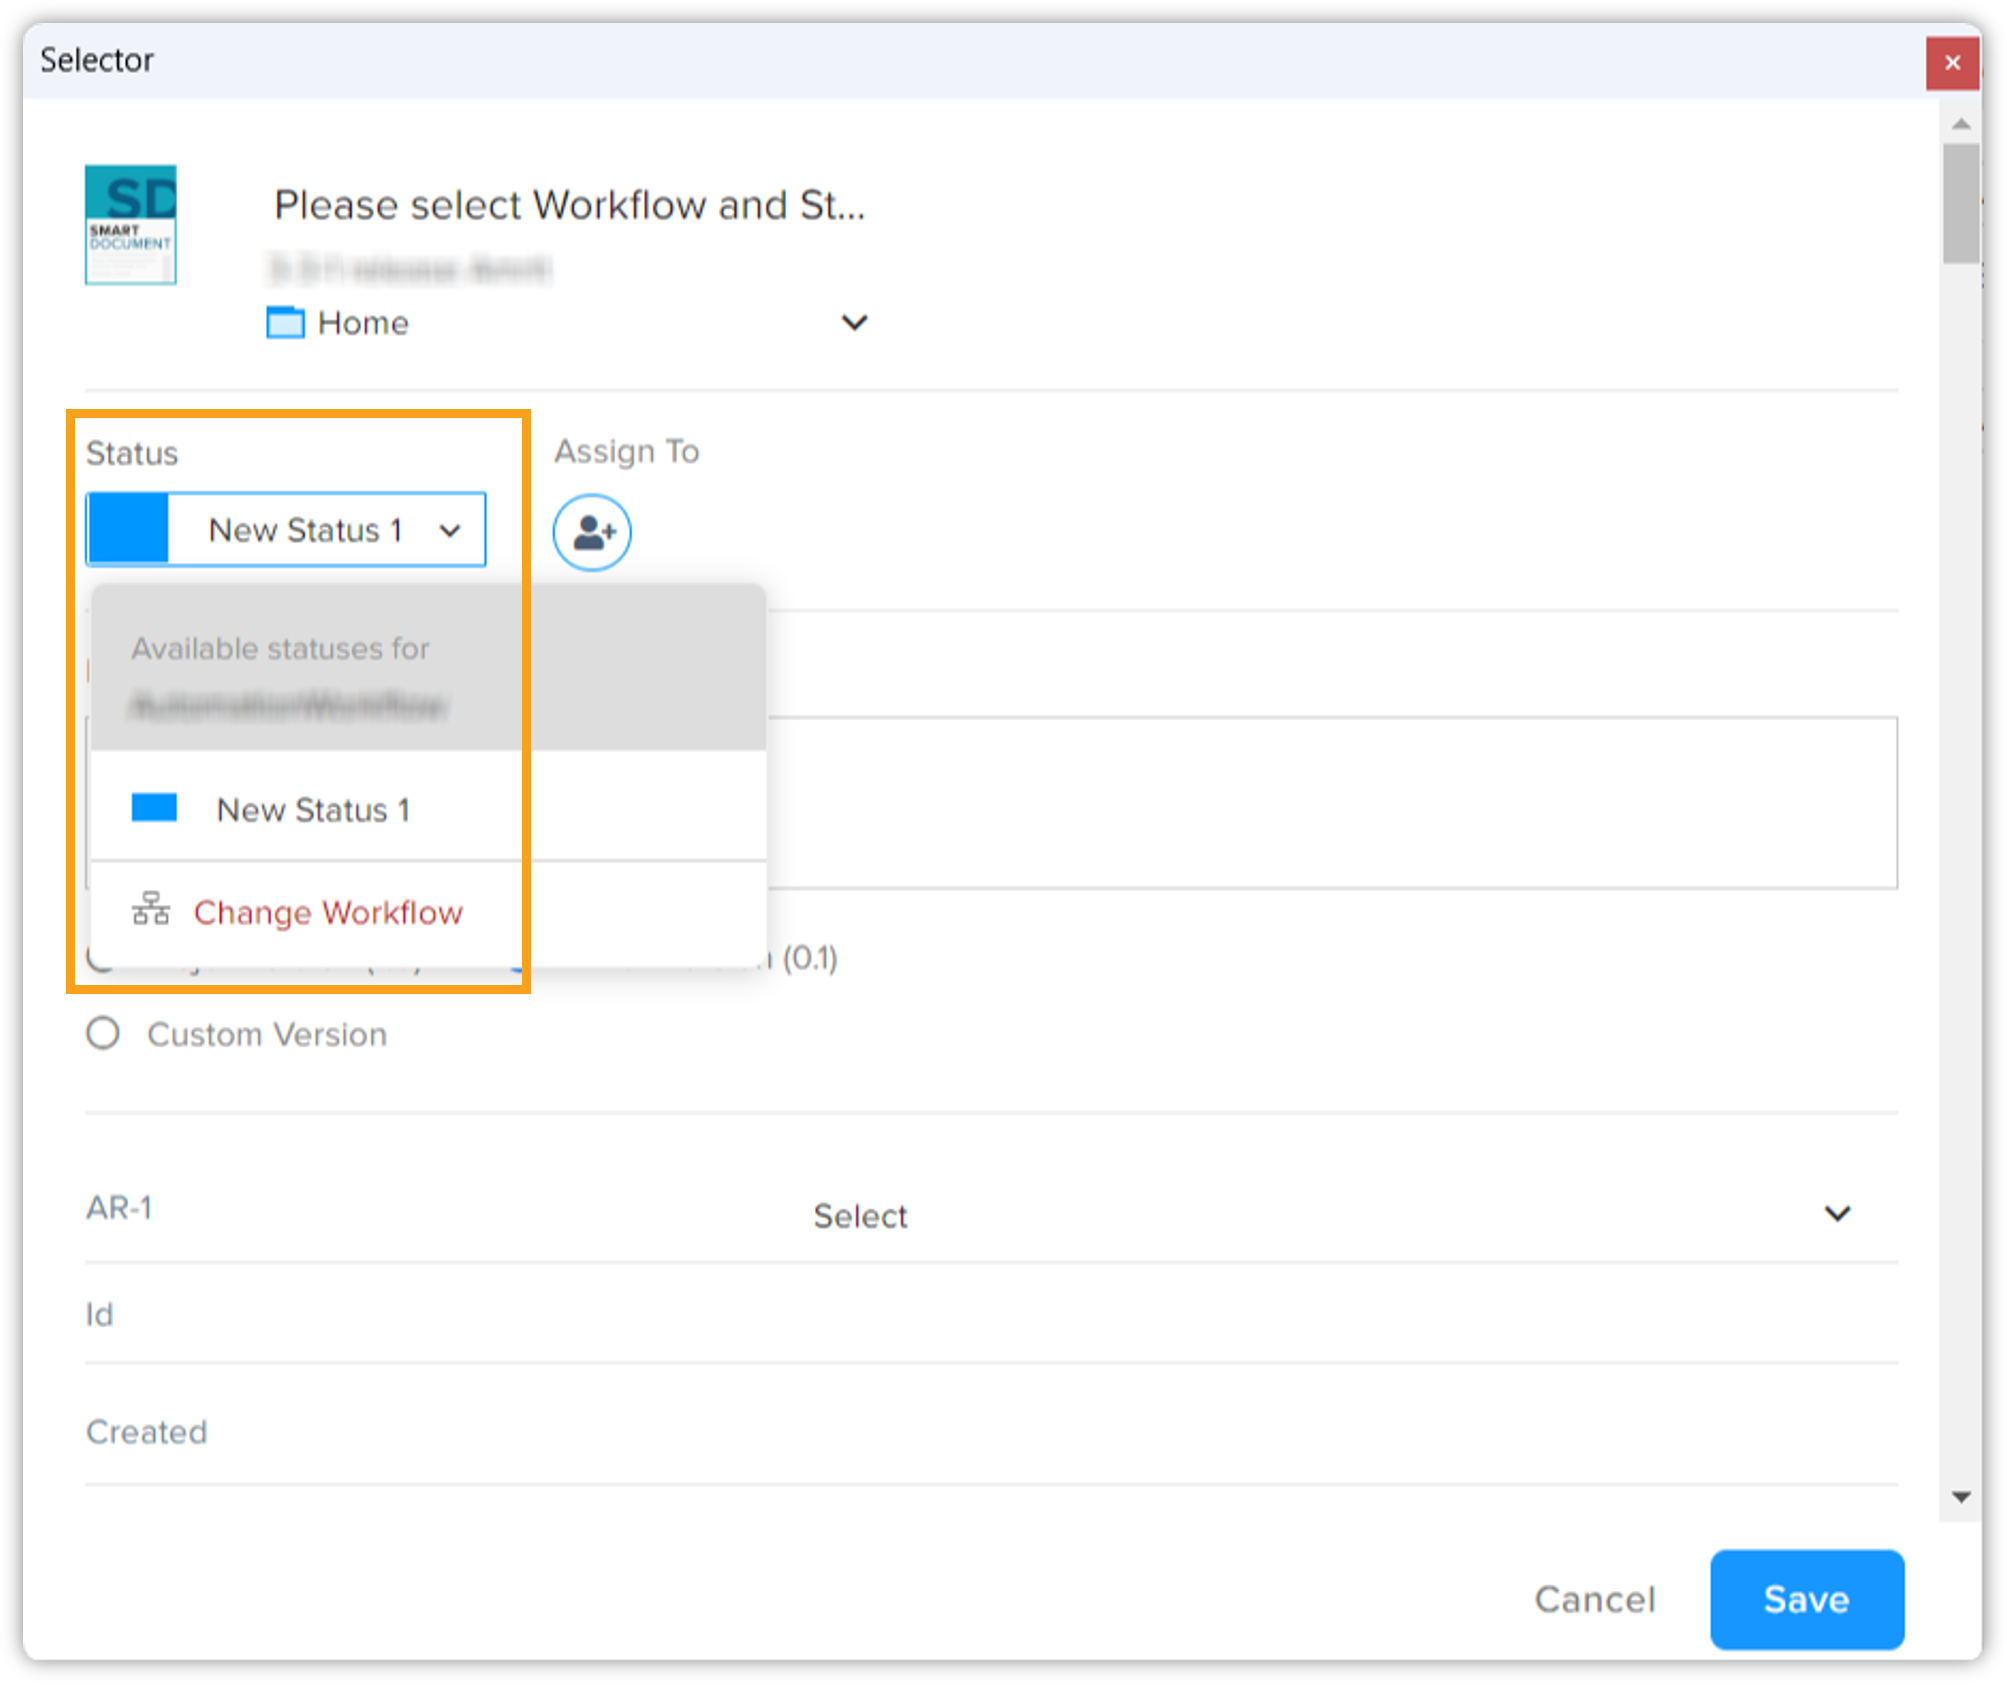
After selecting the workflow, you need to select the Status. Then click on Save.
-
Upon selecting Local as your check-in preference, the destination folder option will appear. Here you need to select the folder on your local system where you want to store the output XML files.
-
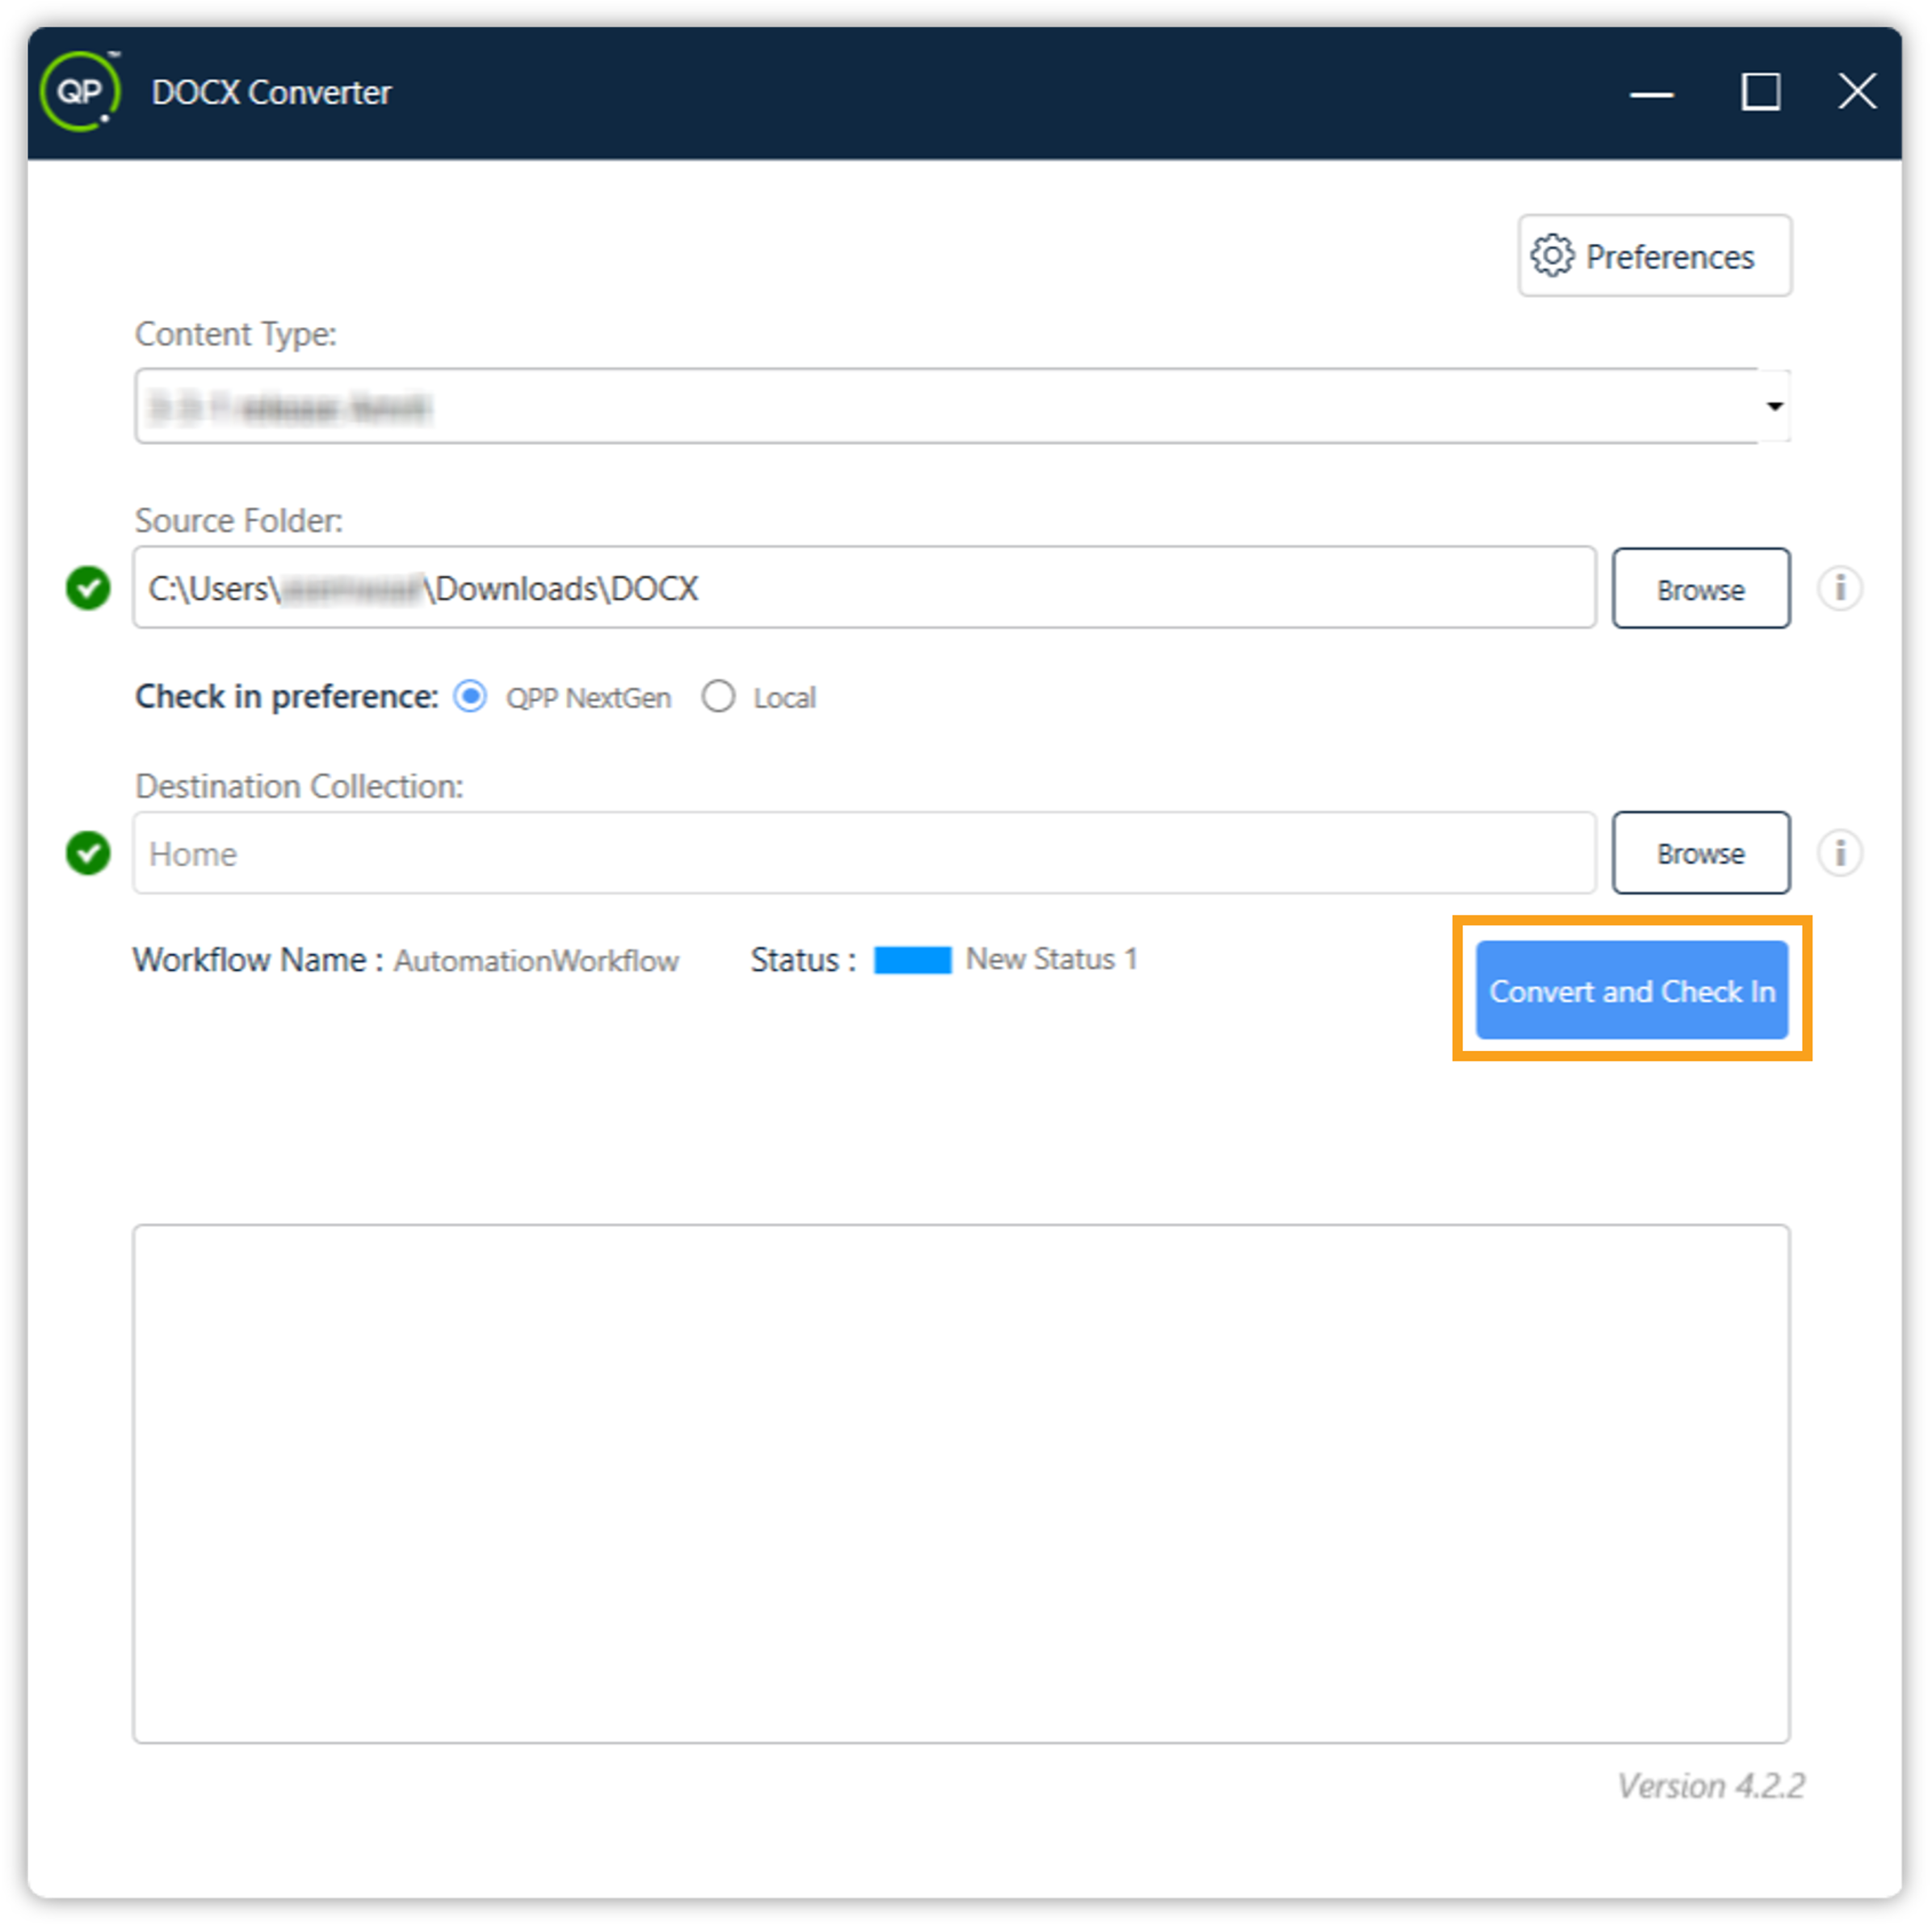
Finally, click on the Convert and Check-in button to start the conversion process.
-
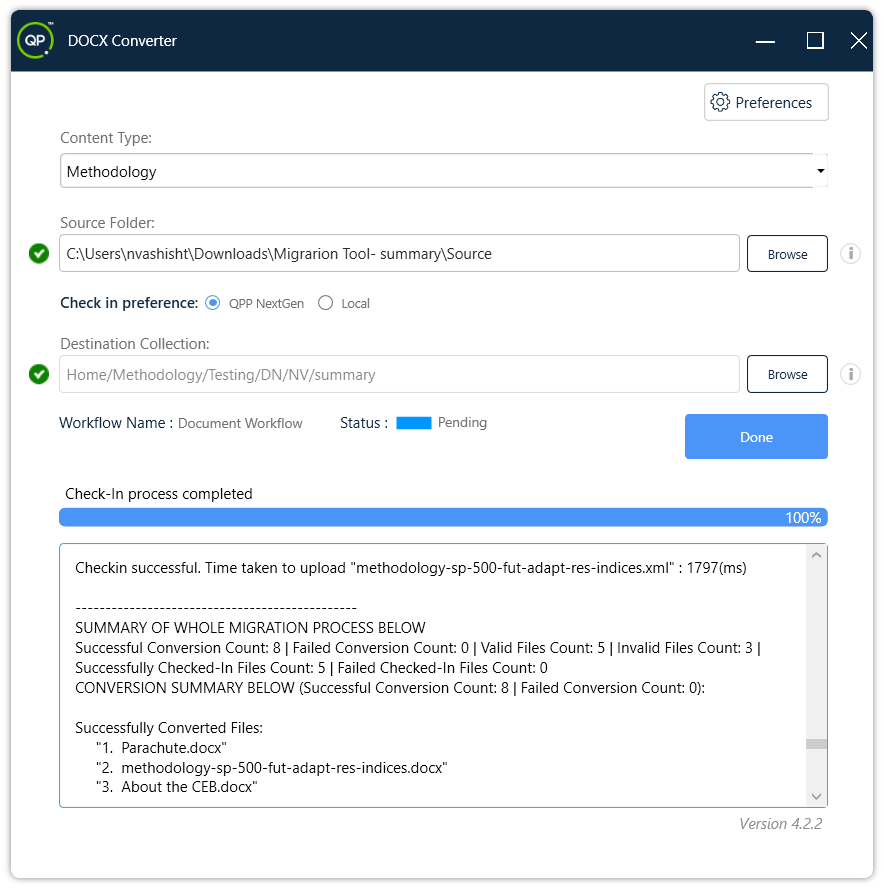
The DOCX Converter window displays the progress of the conversion by generating logs in the lower part of the window. The logs also display any errors that may occur during the conversion.
-
Once the conversion process is completed, the log will display a summary section at the top of the log files. The summary will include: total number of files processes, number of successful conversions, and number of failed conversions, along with a brief description of the errors encountered.
After successfully converting DOCX files into XML format and uploading them directly to your QPP NextGen Server, you can easily open and edit them like a native asset you create on the server.
DOCX Converter also creates a folder Images inside the content model folder to store any image files in the source DOCX files. The images associated with the uploaded XML files are stored separately in a collection (which can be the same as the XML files). You can set the collection path to store images in the file AppConfig.xml, which is described ahead in the section Configurations.
Automatic log file rolling
The DOCX Converter tool monitors the size of the migration log file and initiate a rolling process when it reaches 1 MB, ensuring that historical logs are preserved while maintaining an optimal file size for easier management and analysis. This will streamline the migration process and provide users with a more reliable and efficient logging mechanism.
Enhanced logging details
The logging mechanism has been upgraded to provide more comprehensive and detailed information during the conversion process. You can access detailed logs that include timestamps, file-specific information, and conversion statuses.
Accessing DOCX Migration Log
To check the DOCX migration log, follow the steps shown below:
-
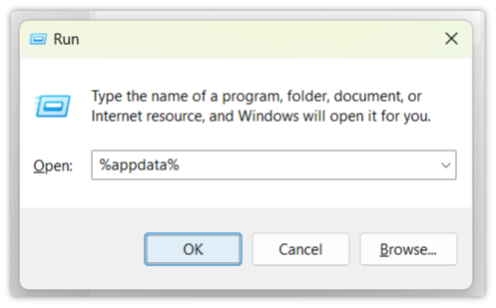
Open the Run application (Win+R), type %appdata% and press Enter.
-
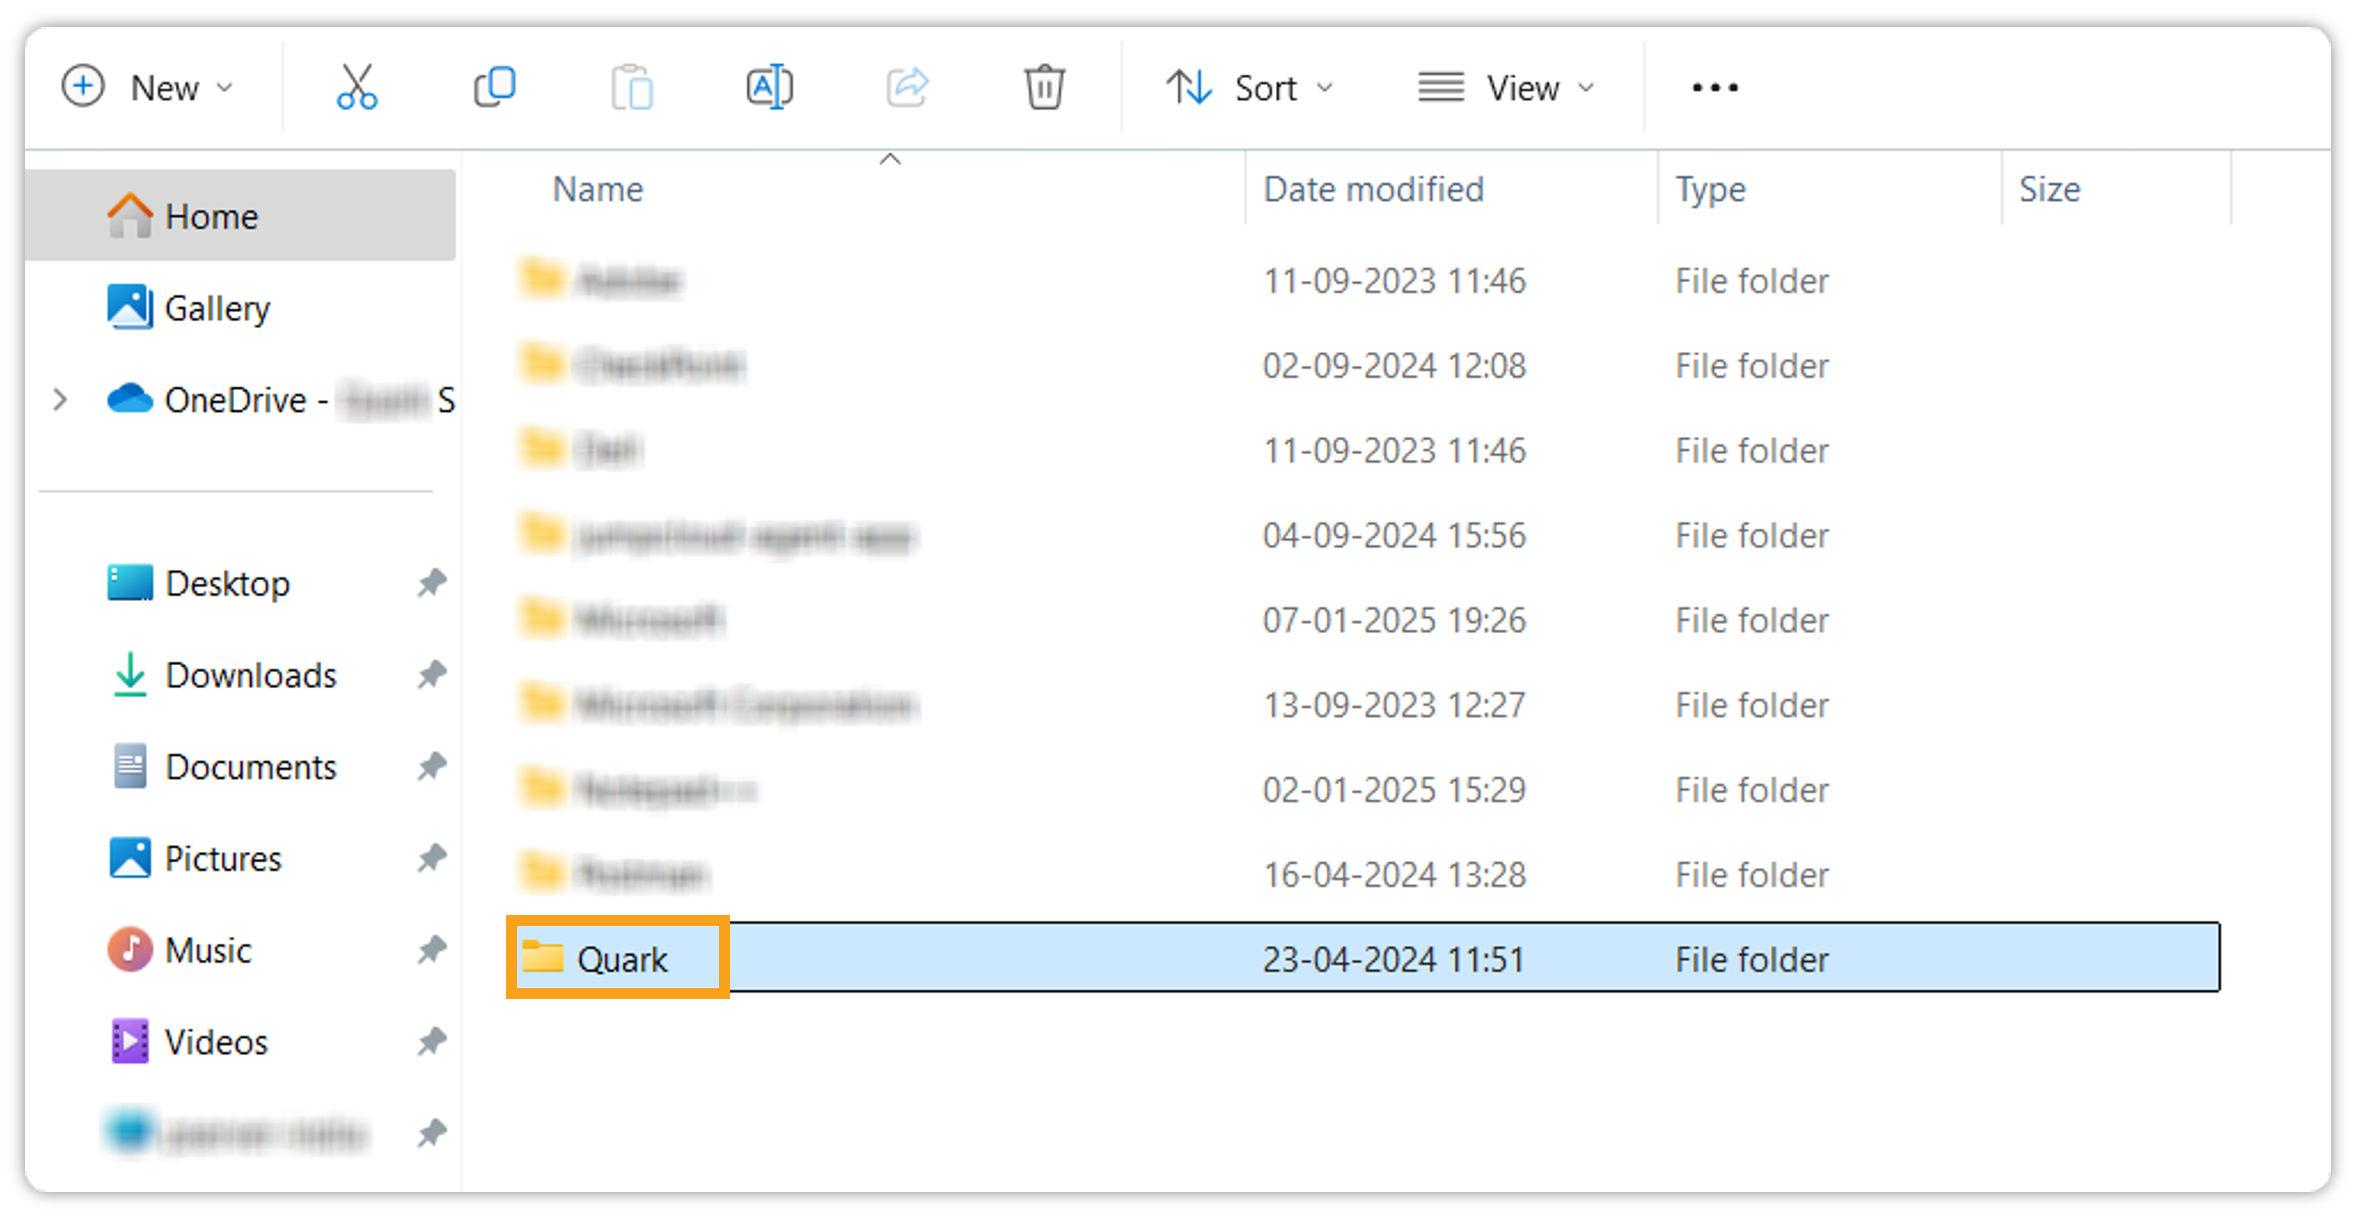
This will open the "Roaming" file explorer. Click on the Quark folder.
-
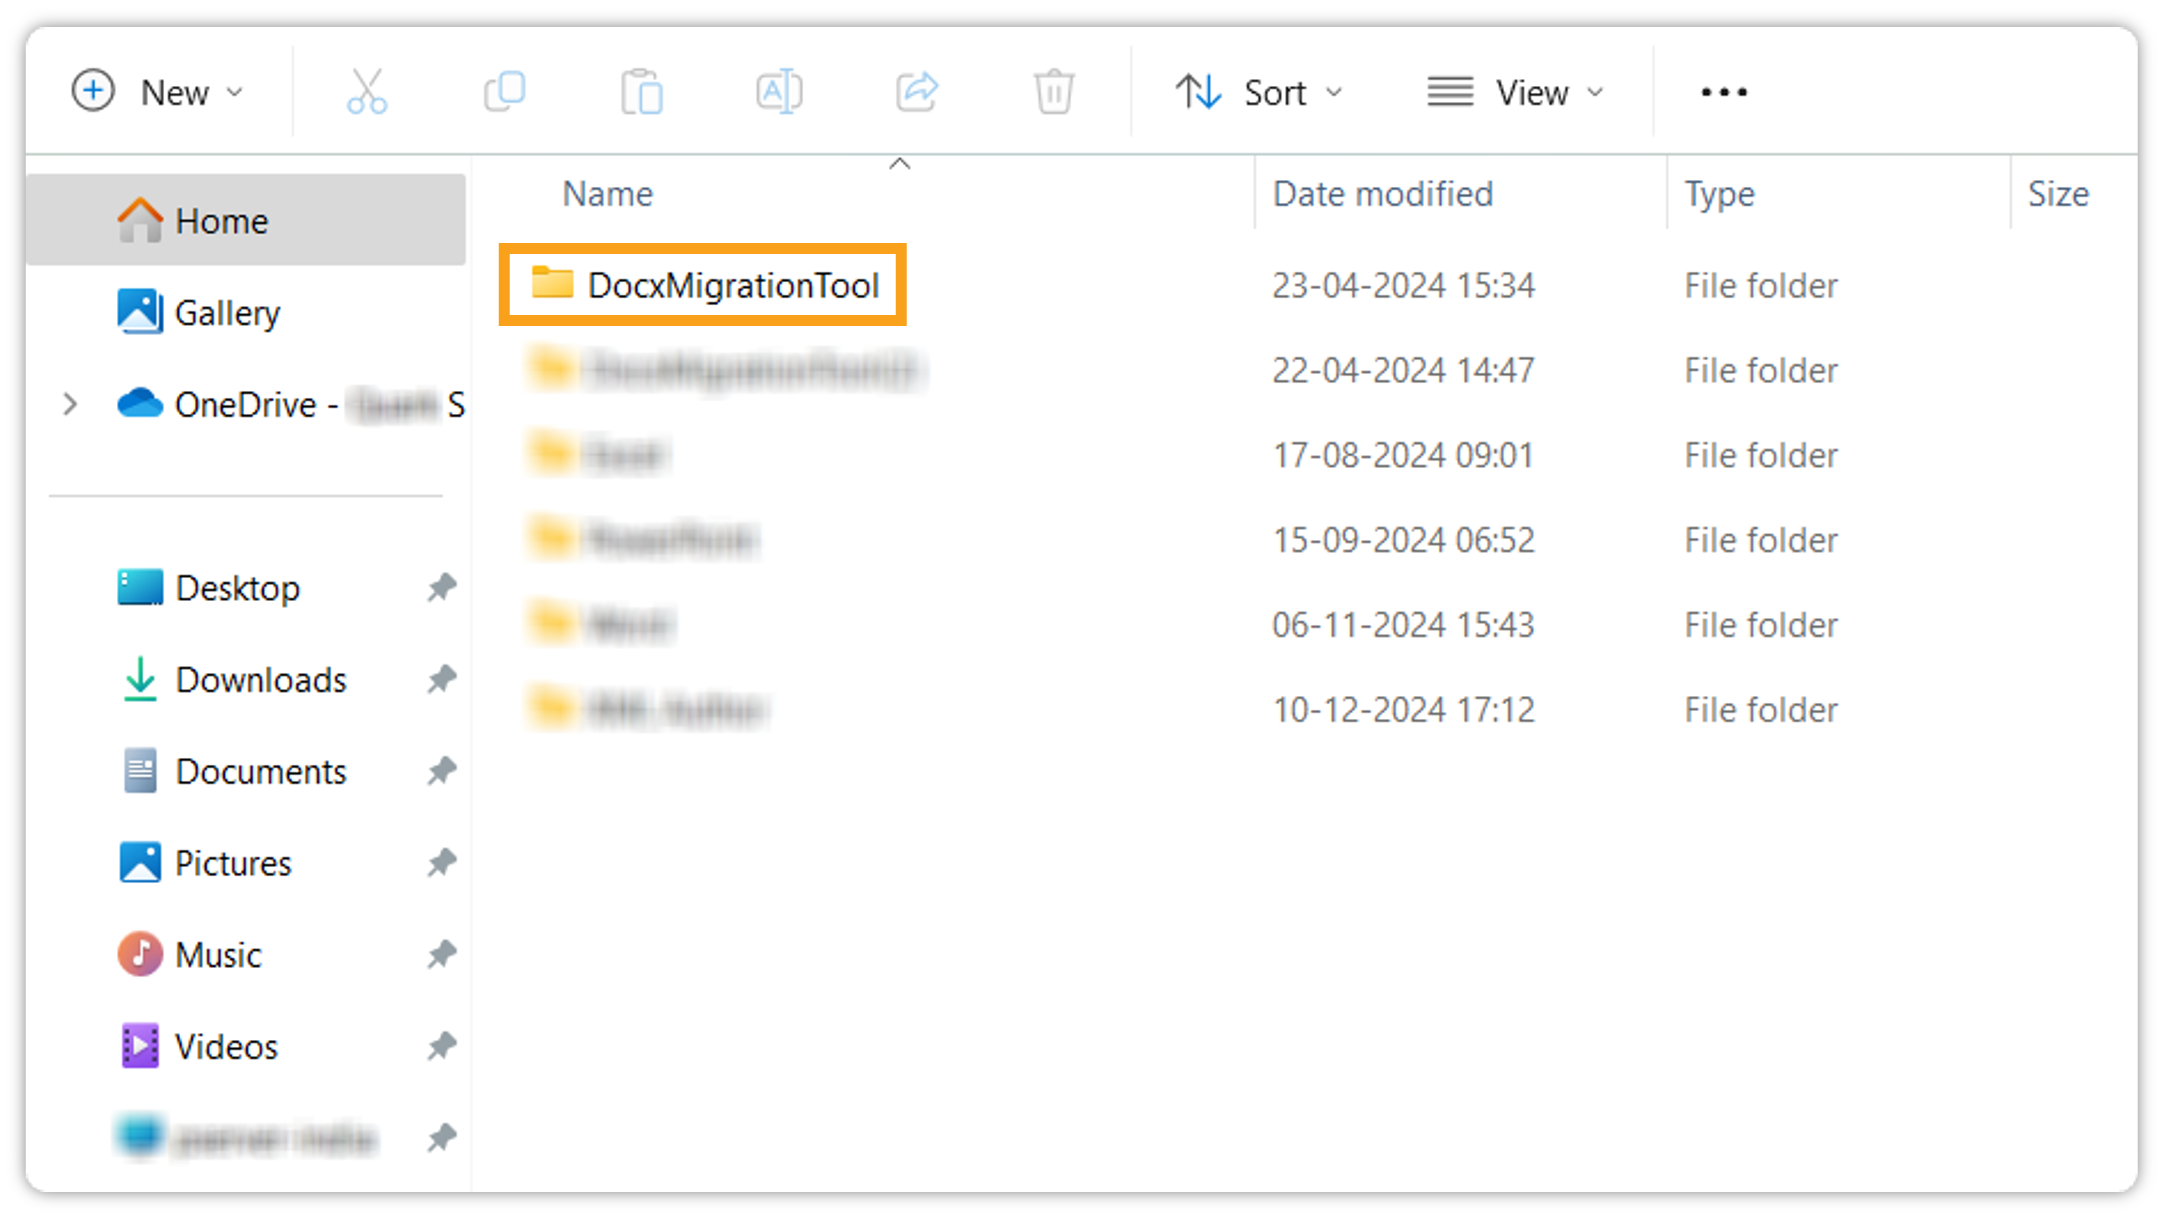
Click on the DOCXMigrationTool folder.
-
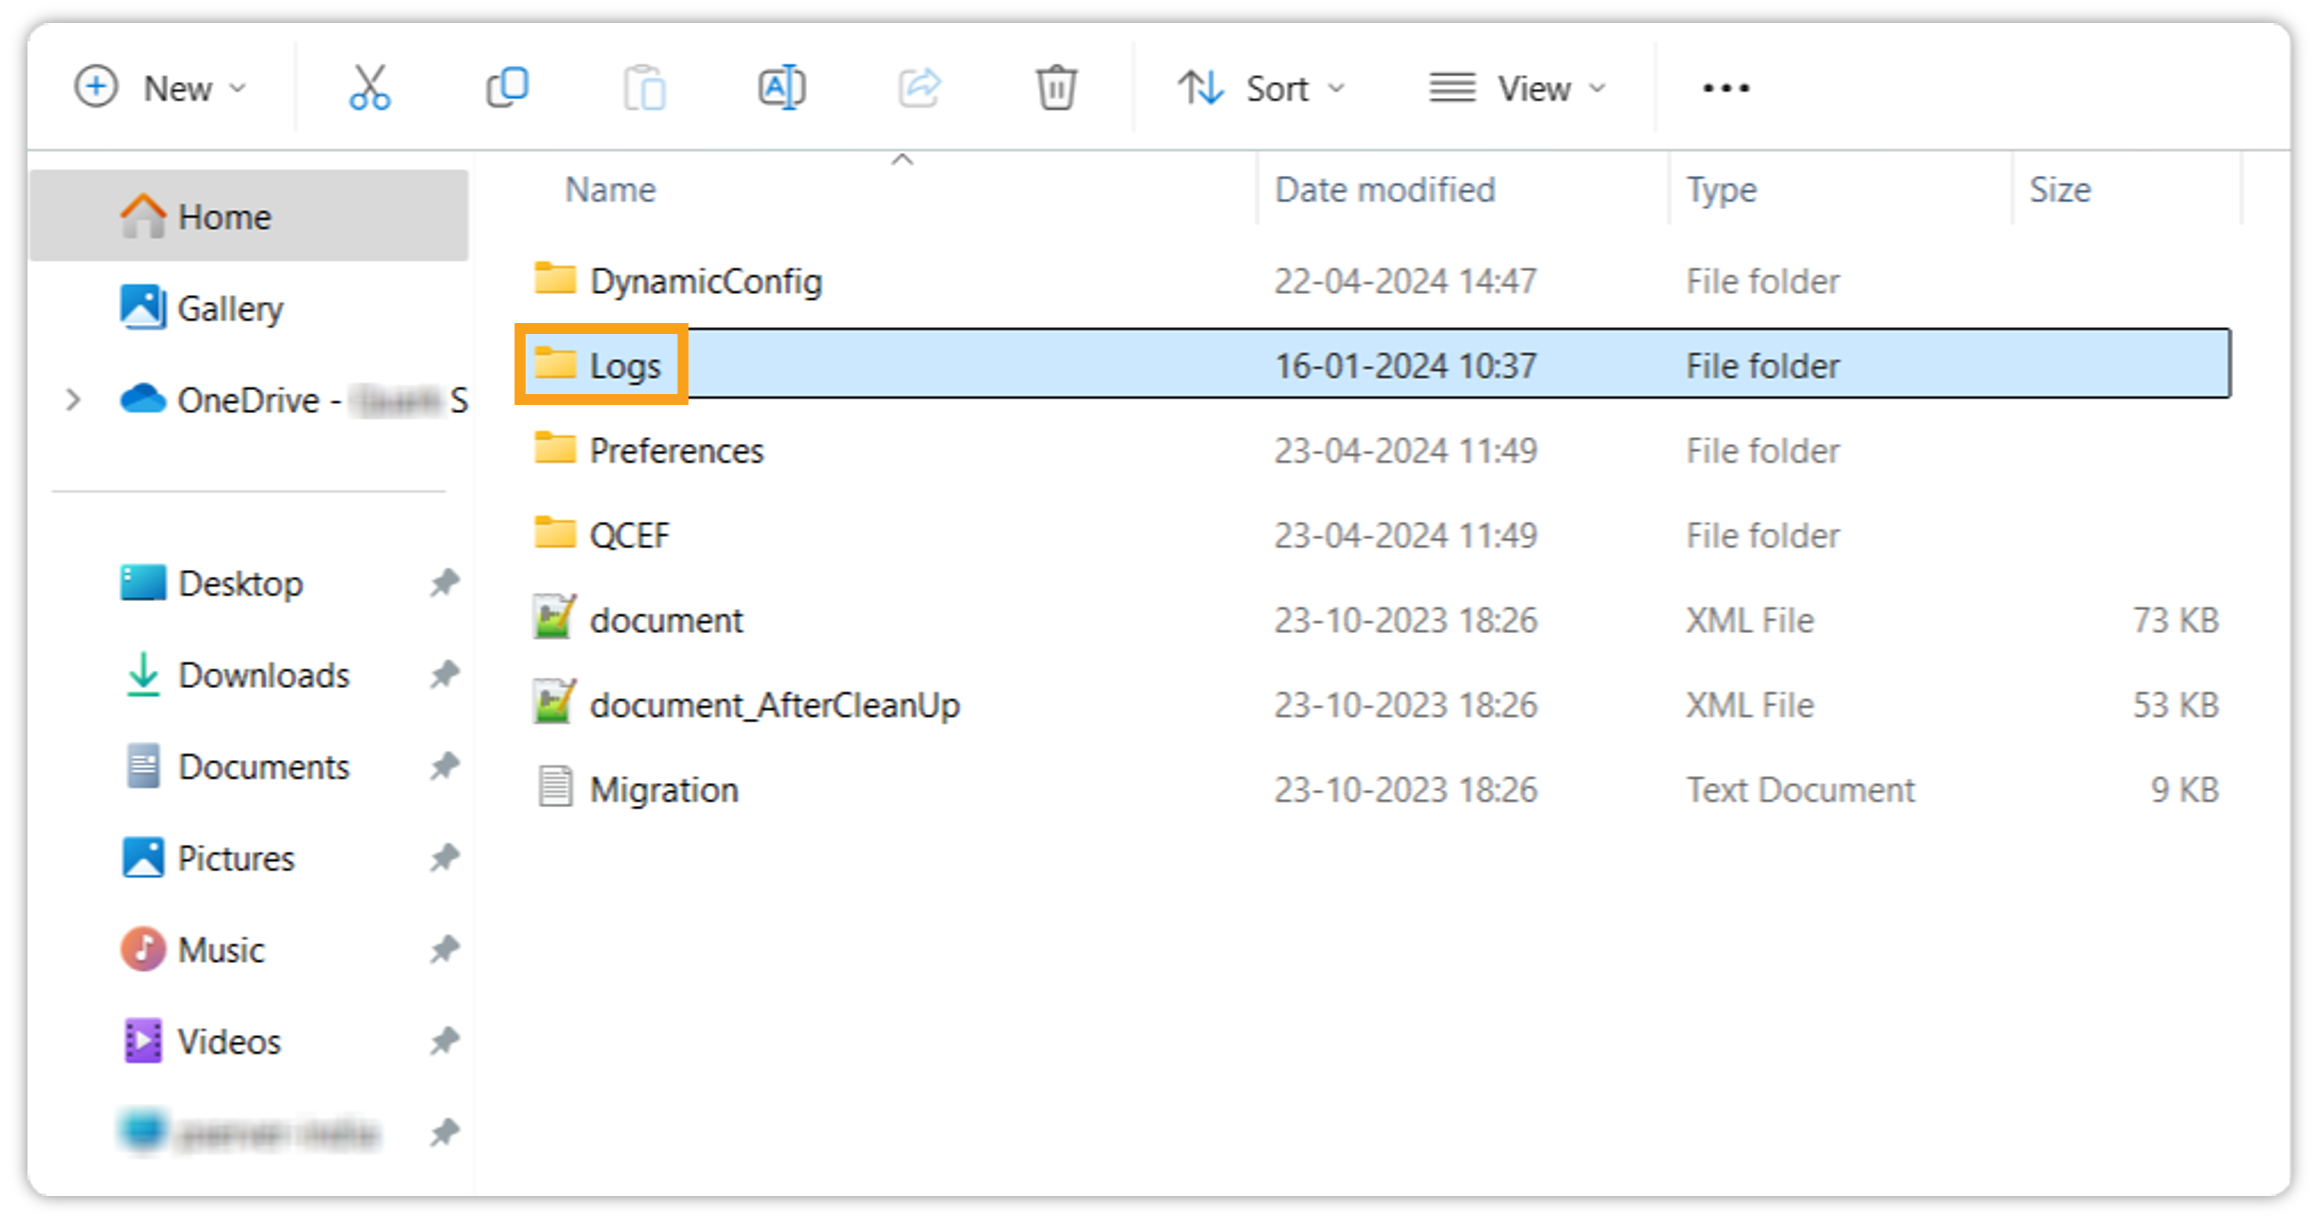
Then click on the Logs folder.
-
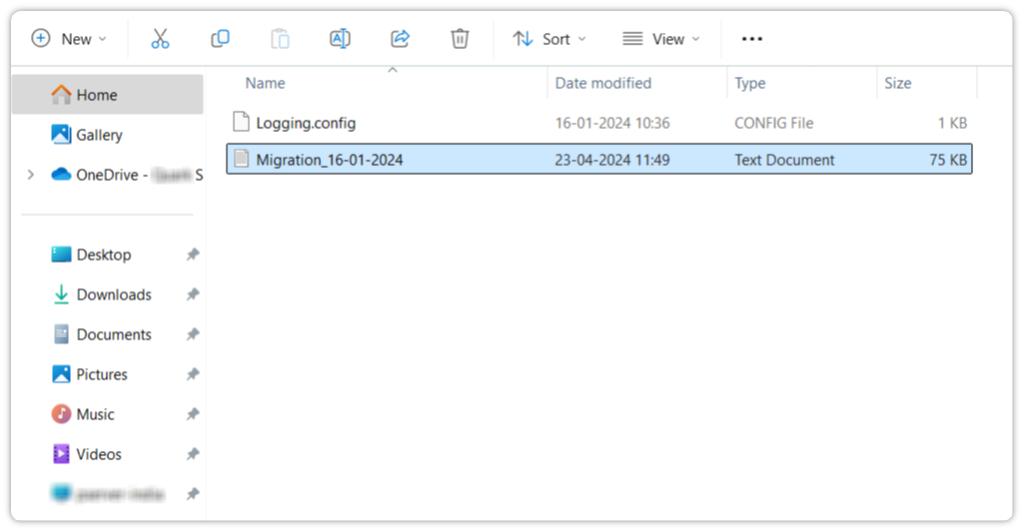
In the Logs folder, you will find the required information.
Some known data loss fixes during conversion
We've fixed some reported data loss issues that were identified during conversion. This improvement represents our steadfast commitment to data integrity and user satisfaction. Currently, only unsupported content like shapes, citations, OLE (Object Linking & Embedding), embedded images, and clip arts will not be converted.