
Working with Output Styles
Output styles let you capture settings for output in print, PDF, ePub, App Studio, HTML5 Publications and EPS formats. You can use output styles when using the File > Print, File > Export as > PDF, File > Export as > iOS App, File > Export as > Android App, File > Export as > HTML5 Publication, File > Export as > EPS, File > Export as > ePub. QuarkXPress includes default settings for all output options, which can serve as a basis for you to customize according to need. Or, you can create output styles from scratch.
To create an output style:
-
Choose Edit > Output Styles. The Output Styles dialog displays.
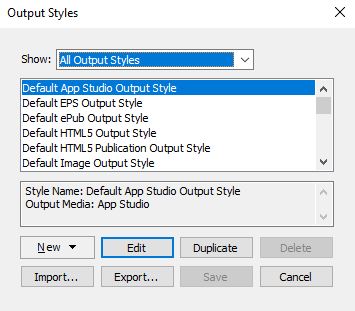
Use the Output Styles dialog to create, import, export, edit, and remove output styles. -
Choose an option from the New drop-down menu.
-
Enter a name for your style in the Name field.
-
Specify settings in the panes.
For information about EPS and PDF publication options, see "A Guide to QuarkXPress". For more information about ePub options, see "Exporting for ePub". -
Click OK.
-
Click Save.
App Studio output styles
To specify the settings for App Studio output styles:
-
Choose Edit > Output Styles. The Output Styles dialog displays.
Output Styles dialog -
To edit an App Studio output style, choose the output style and click Edit. To add a new output style, select App Studio from the New drop-down menu. The Edit App Studio Style dialog displays.
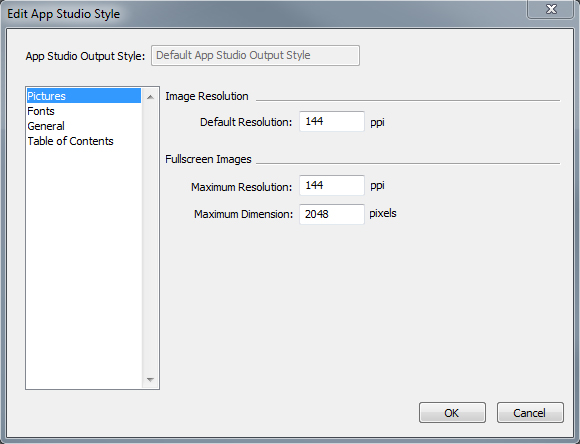
Edit App Studio Style dialog
-
-
Enter a name for your style in the App Studio Output Style field.
-
Use the Pictures pane to set default resolution for images exported for App. Choose the maximum resolution and/or dimensions for converted/down sampled images (only applies to images used in HTML5 interactivity).
-
Use the Fonts pane to enable/disable packaging referenced fonts in the App. If disabled, the fonts will NOT be collected and the output may not be WYSIWYG.
If enabled, users will get an alert about font licensing.
-
Use the General pane to enable/disable converting QuarkXPress Layout Sections to Page Stacks in the App. Enable/disable "Continuous Page Stacks" to create a single continuous page of all pages in a section.
-
Use the Table of Contents pane to select a named section from the list. All the pages in that section will be exported as TOC pages. You may also choose to Include Pages in Publication, otherwise these pages will not be added to content pages. Specify a title for the TOC.
-
-
Click OK.
HTML5 Publication output styles
To specify the settings for HTML5 Publication output styles:
-
Choose Edit > Output Styles. The Output Styles dialog displays.
Output Styles dialog -
To edit an HTML Publication output style, choose the output style and click Edit. To add a new output style, select HTML Publication from the New drop-down menu. The Edit HTML5 Publication Style dialog displays.
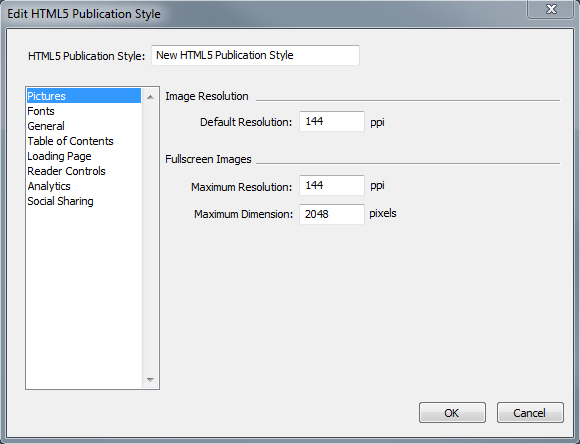
Edit HTML5 Publication Style dialog
-
-
Enter a name for your style in the HTML5 Publication Style field.
-
Use the Pictures pane to set default resolution for images exported for App. Choose maximum resolution and/or dimensions for converted/down sampled images (only applies to images used in HTML5 interactivity).
-
Use the Fonts pane to enable/disable packaging referenced fonts in the App. If disabled, the fonts will NOT be collected and the output may not be WYSIWYG.
If enabled, users will get an alert about font licensing.
-
Use the General pane to enable/disable converting QuarkXPress Layout Sections to Page Stacks. Enable/disable "Continuous Page Stacks" to create a single continuous page of all pages in a section. You can also set the Lock Orientation for Desktop and Mobile devices from this tab.
-
Use the Table of Contents pane to set options for the table of contents in the HTML5 Publication file.
-
Use the Loading Page pane to specify the appearance and behaviours of the loading page in a web reader.
-
Use the Reader Controls pane to specify the appearance and behaviours of the layout in a web reader.
-
Use the Analytics pane to enable/disable Google analytics and define a Google maps API key for geolocation.
-
Use the Social Sharing pane to define the settings for social medium platforms.
-
-
Click OK.