
Connect a Publishing Channel with Content Type
To connect a publishing channel with specific content type, you need to ensure that the correct settings and references are in place. Below are the steps to guide through this process:
Setting Up a Publishing Channel
Duplicating an Existing Publishing Channel
-
First, locate the Existing Publishing Channel:
-
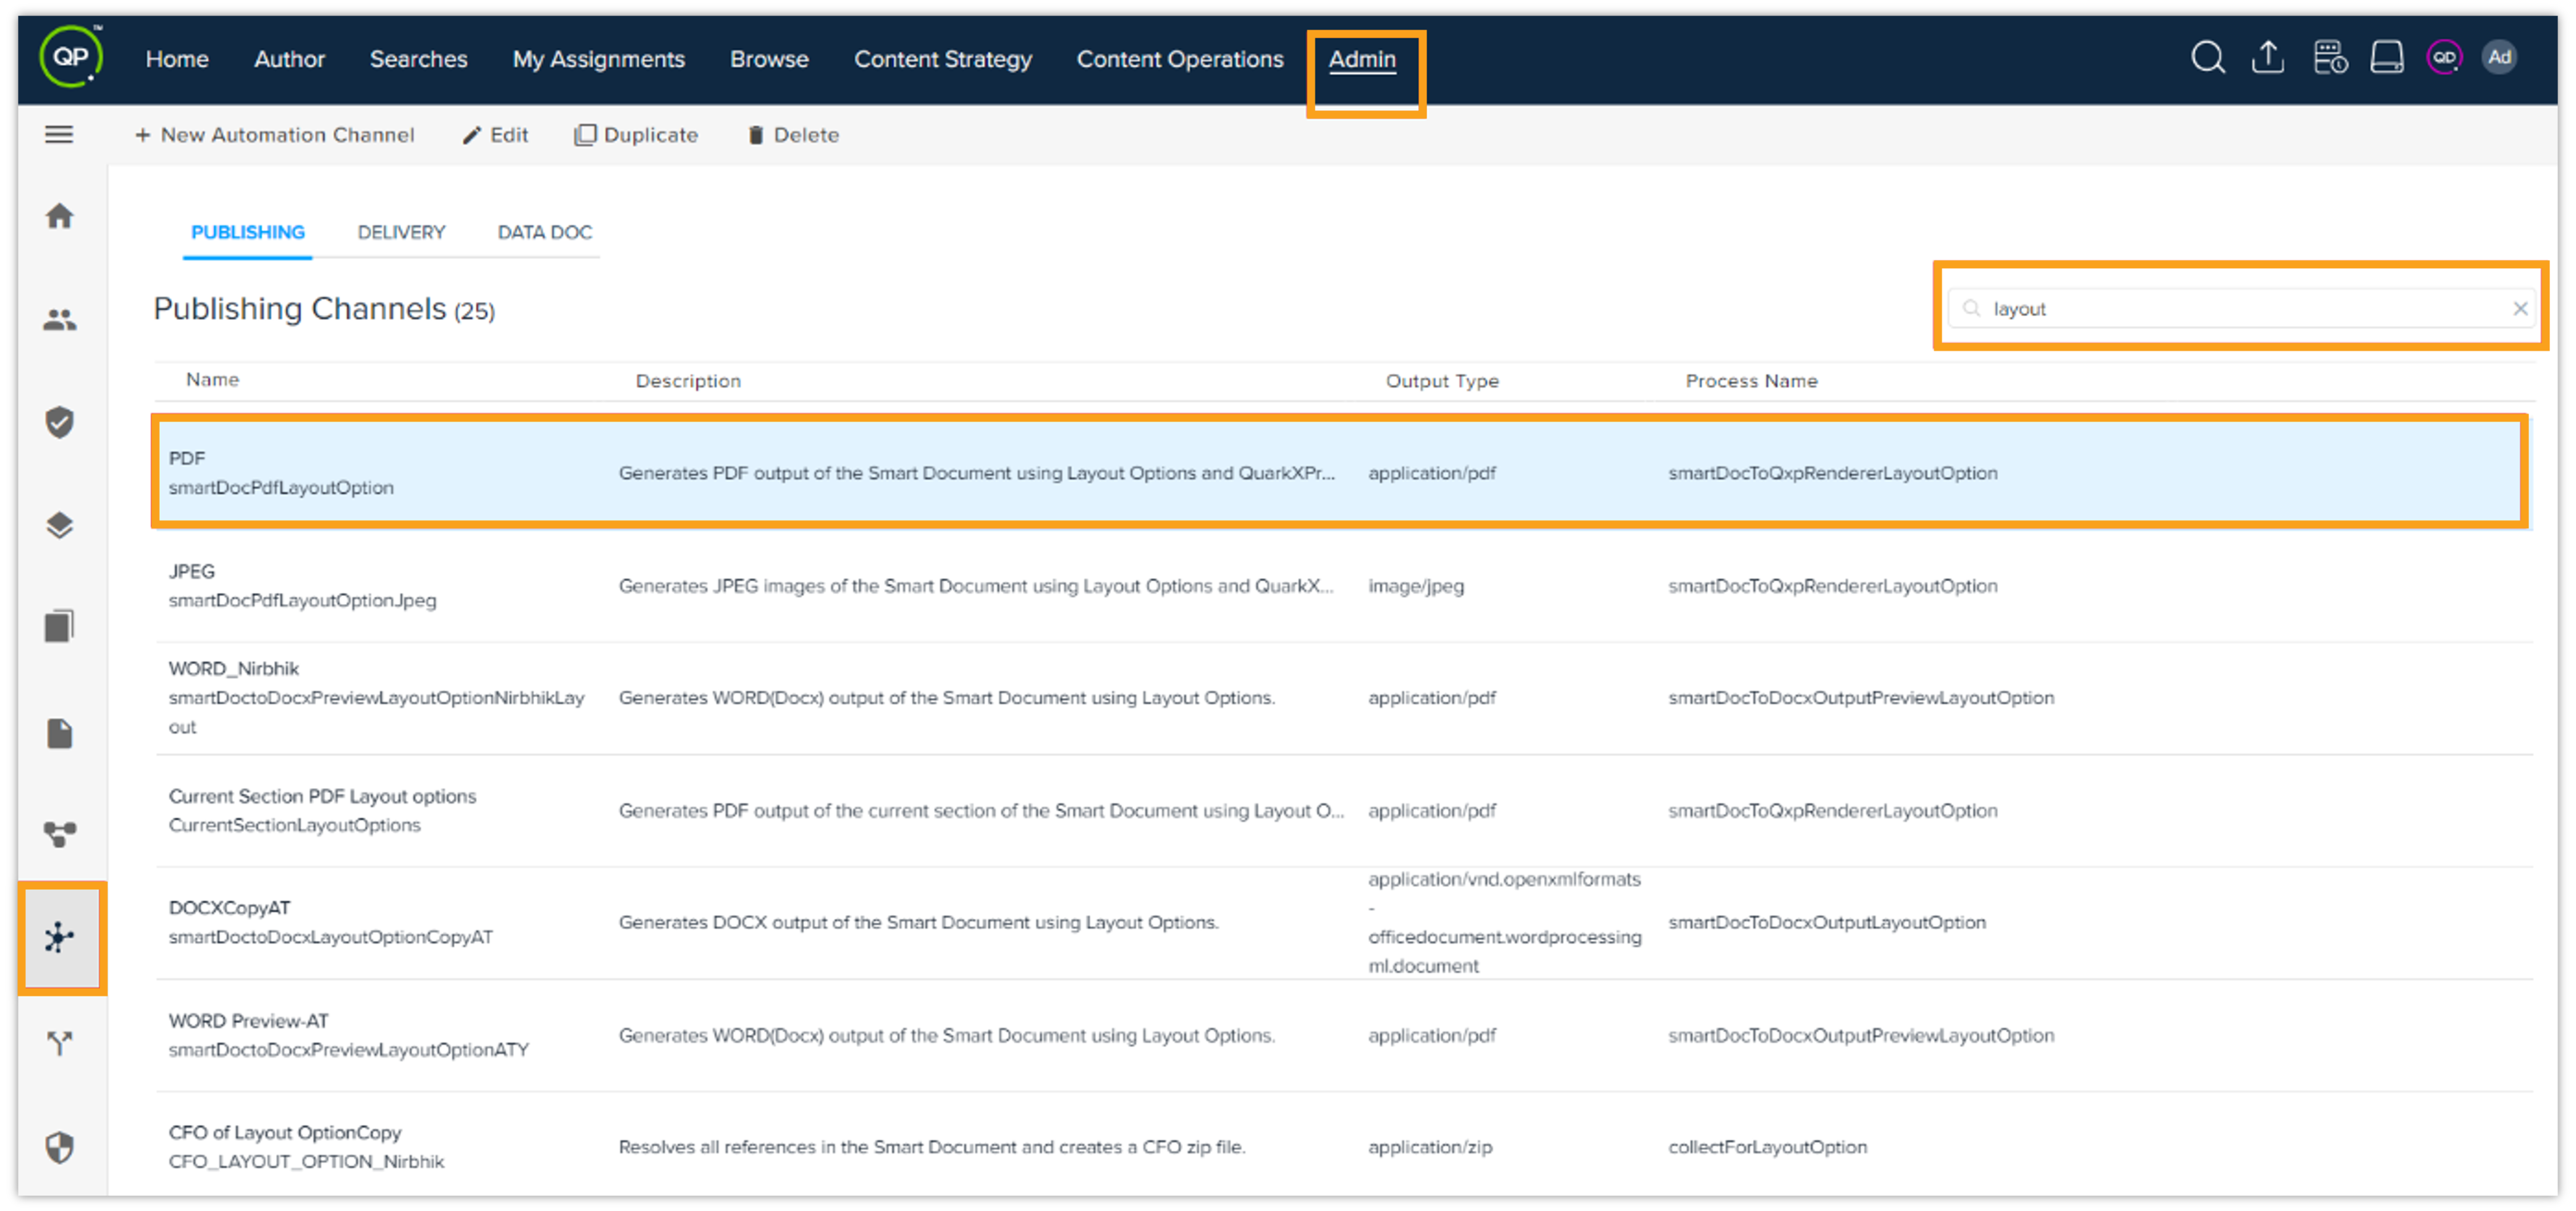
Log in to the Admin panel.
-
Navigate to Automation Channels.
-
In the list of publishing channels, locate and click on the channel named PDF with the channel ID smartDocPdfLayoutOption.
-
-
Then, duplicate the channel:
-
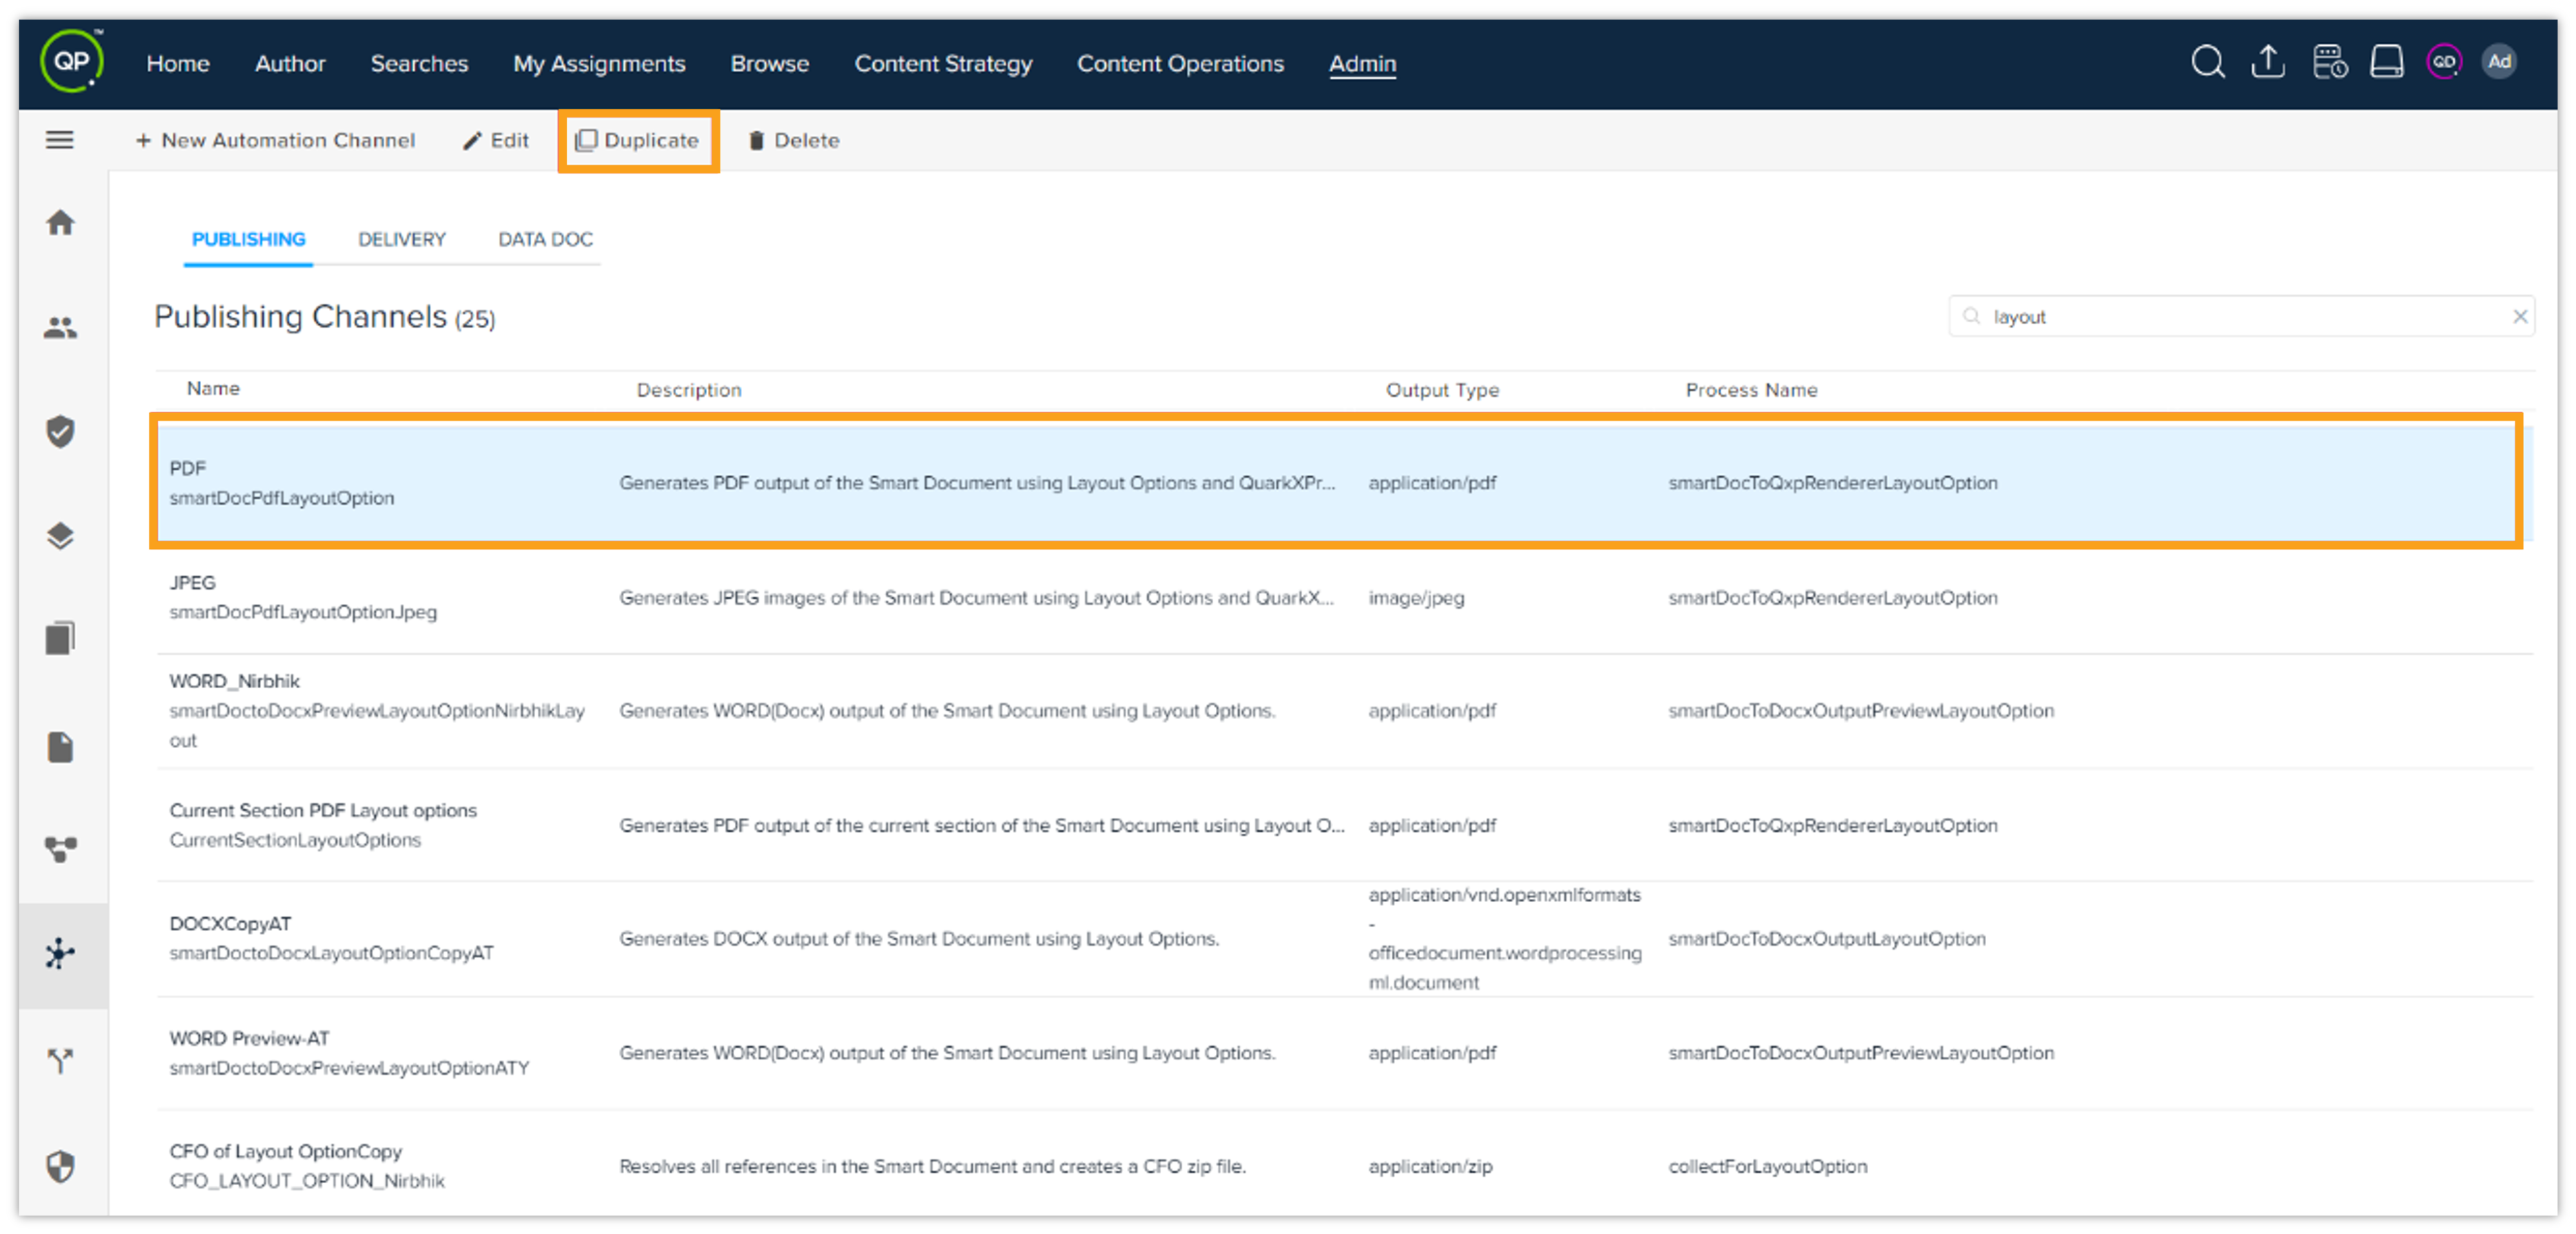
Click on the Duplicate button to create a copy of the selected channel.
-
A new channel will be created as a duplicate of the PDF channel. You'll need to modify this copy.
-
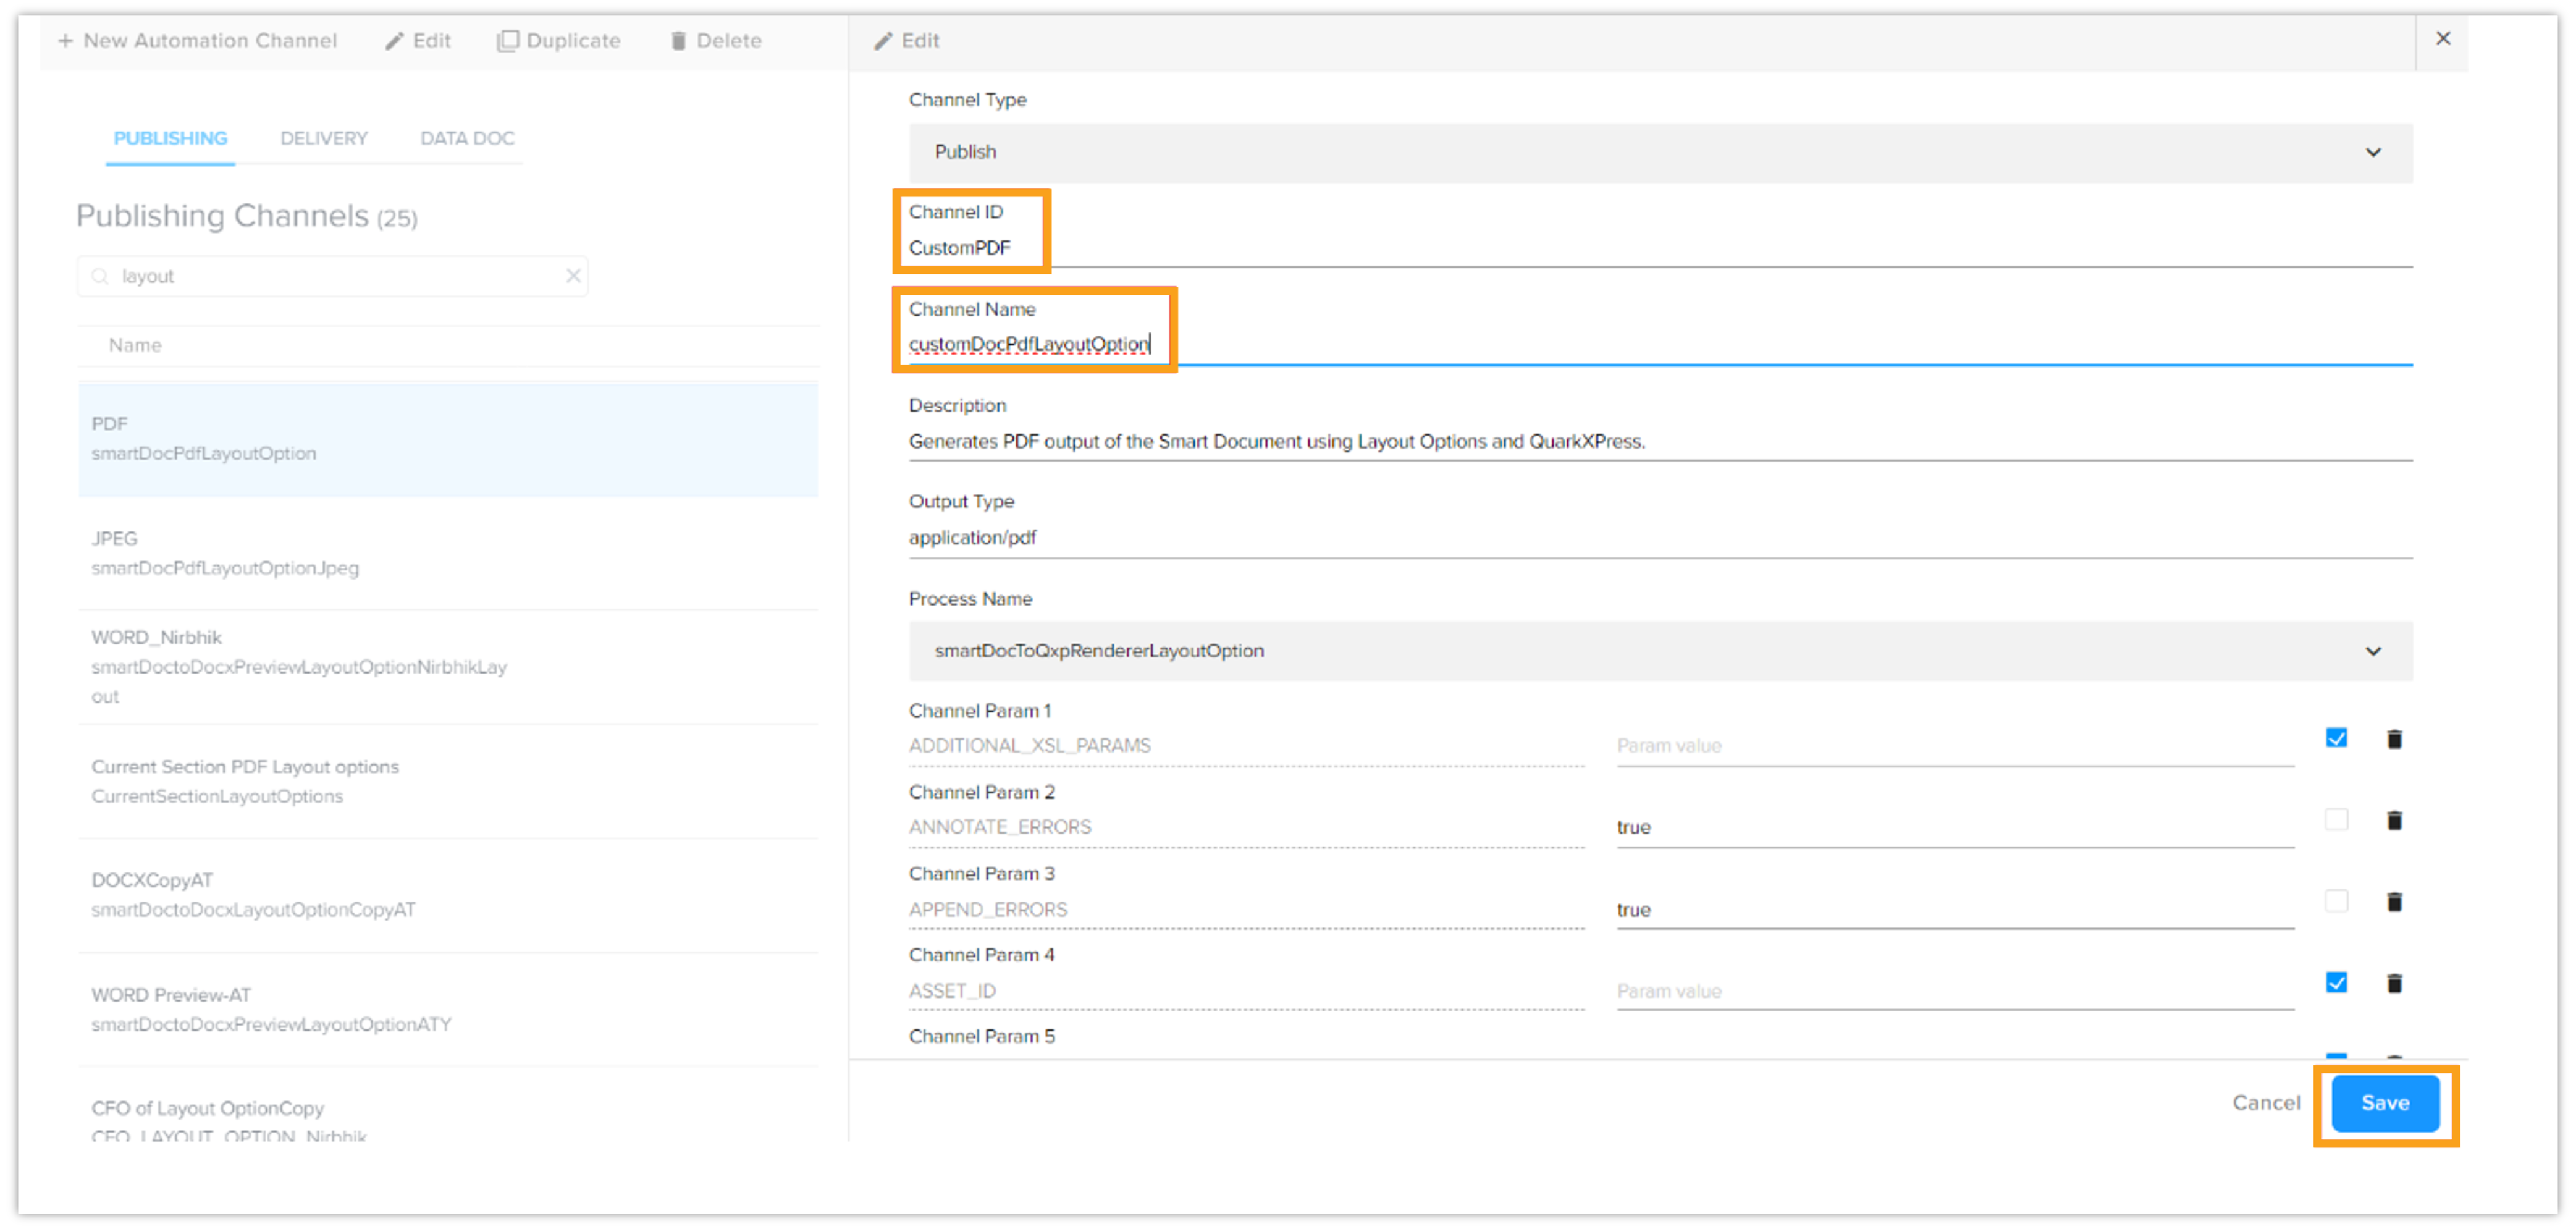
Change the Channel Name and Channel ID according to user’s preferences.
-
Ensure the Channel Name and Channel ID are unique.
-
In the below example, duplicated channel name is kept as CustomPDF and channel Id as customDocPdfLayoutOption.
-
After making the necessary changes to the Channel Name and Channel ID, save the new channel configuration.
-
Defining a Channel-Level Authoring Template
Once you have duplicated and renamed your publishing channel, you have the ability to define a centralized Authoring Template. This ensures that all documents published through this specific channel follow a consistent layout, overriding any templates linked to individual documents.
Steps to configure the template path:
-
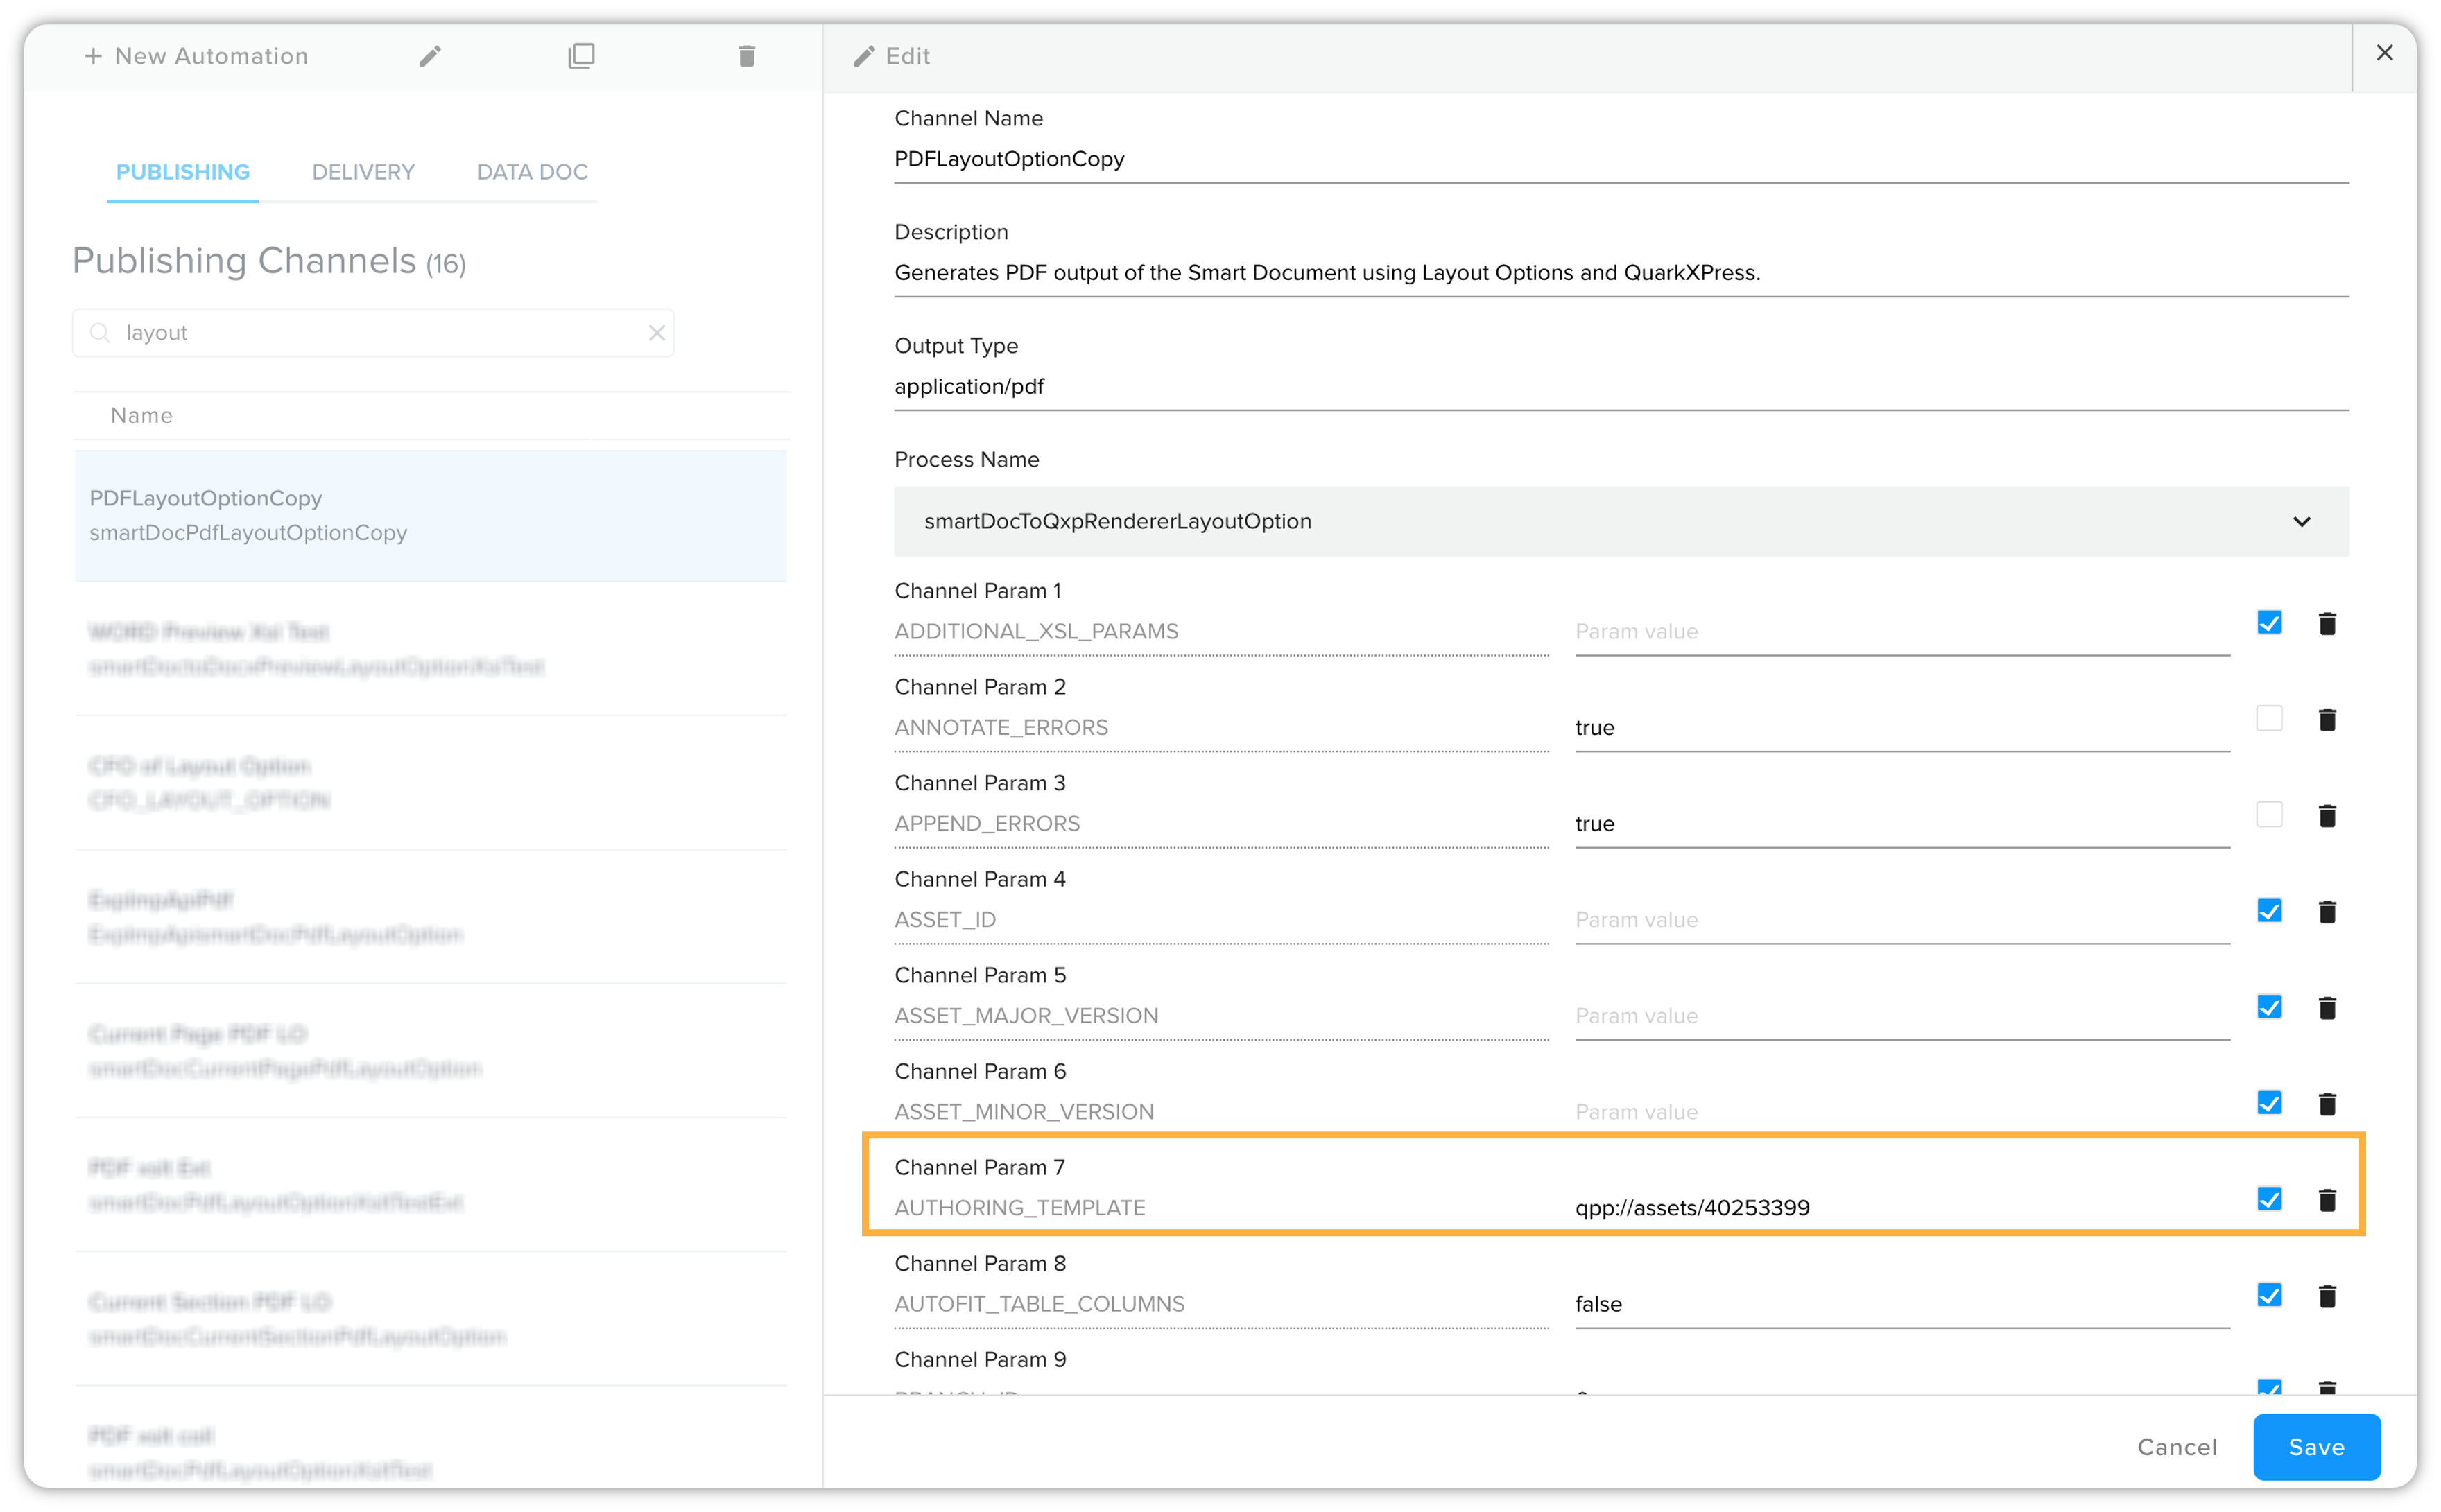
While editing the duplicated publishing channel, scroll down the Channel Parameters section and look for the parameter labeled AUTHORING_TEMPLATE. This is available by default in all duplicated channels of Layout Options.
-
In the Value field, enter the path to the specific Authoring Template you wish to use. The system supports three flexible formats to ensure backward compatibility and ease of use:
-
Direct Asset Path: Home/CollectionName/AuthoringTemplateName.xml
-
QPP Asset URI: qpp://assetsbypath/Home/Templates/AuthoringTemplate.xml
-
Unique Asset ID: qpp://assets/40253399
-
How the Publishing Algorithm Resolves Layouts
By providing a value in this field, you change the hierarchy of how Layout Options are applied during the publishing process:
-
Priority Rule: The publishing channel resolves Layout Options using the channel-level template defined here, even if the document being created or linked to a different authoring template.
-
Automatic Fallback: If you leave the AUTHORING_TEMPLATE param value blank, the system will automatically fall back to the document-linked template. This ensures your existing workflows remain functional without manual updates.
-
Asset Support: The algorithm is fully backward compatible, supporting both standard qpp://asseassetsbypath references and full asset path.
Connecting the Publishing Channel with Corresponding Content Type
-
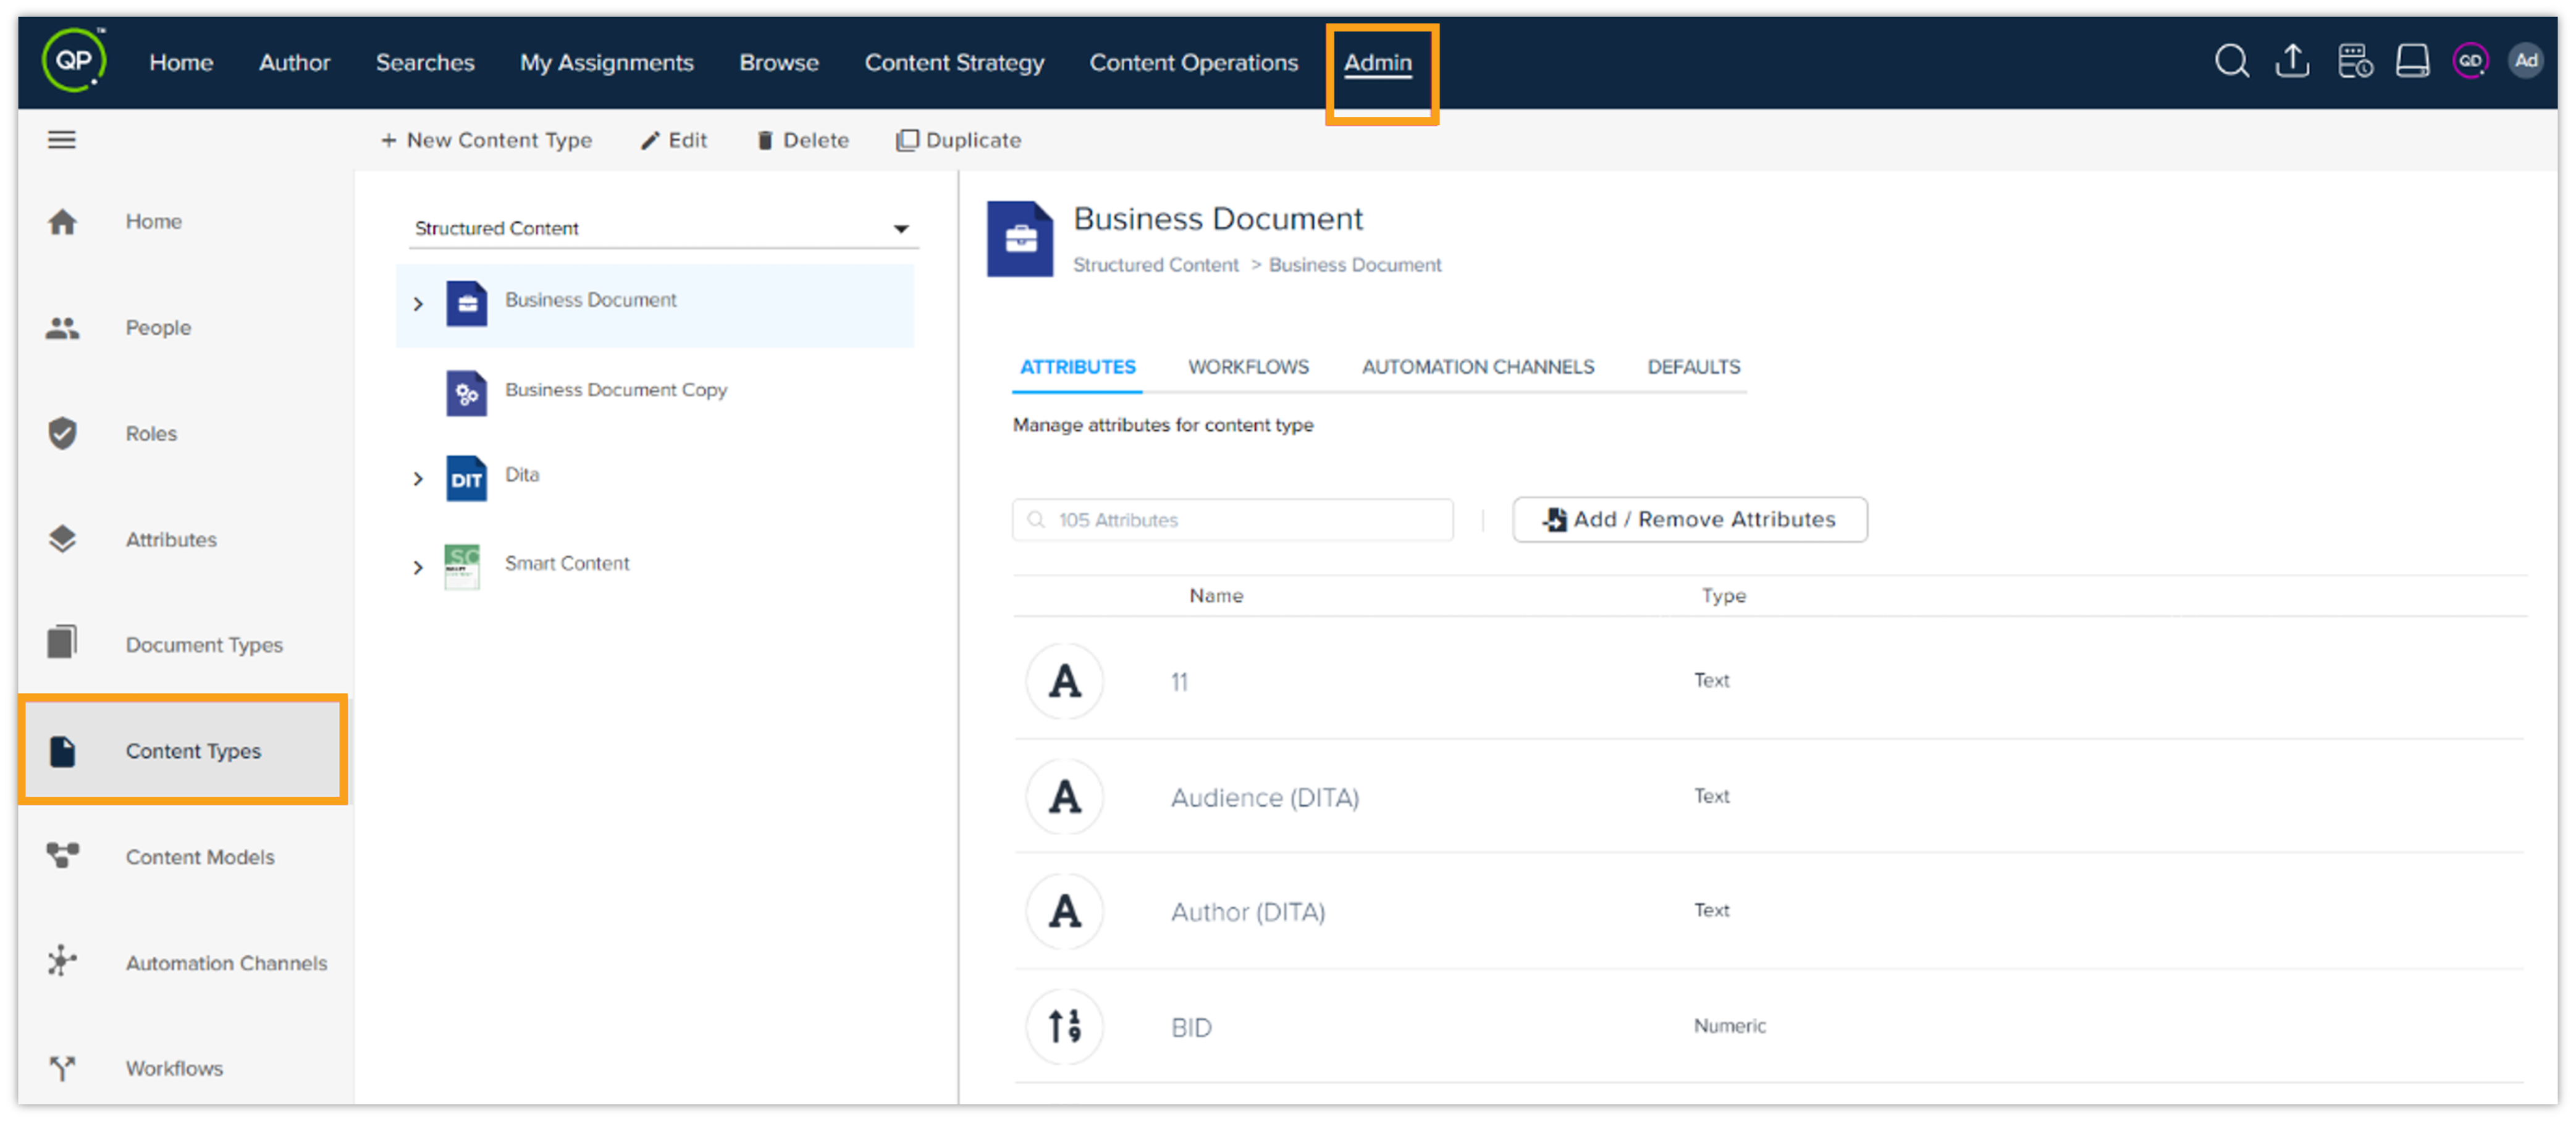
Navigate to Content Types
-
In the admin panel, go to Content Types. Here you can see a list of all available content types.
-
-
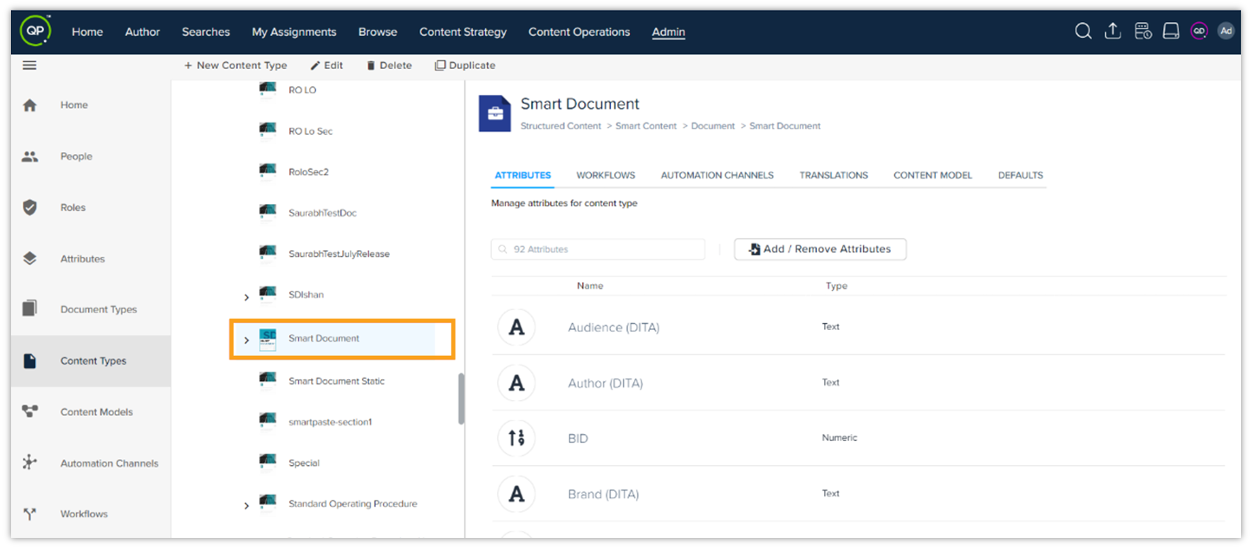
Select the Content Type
-
Choose the content type, for example "Smart Document" that to be associated with the publishing channel and click on it.
-
-
Link the Publishing Channel
-
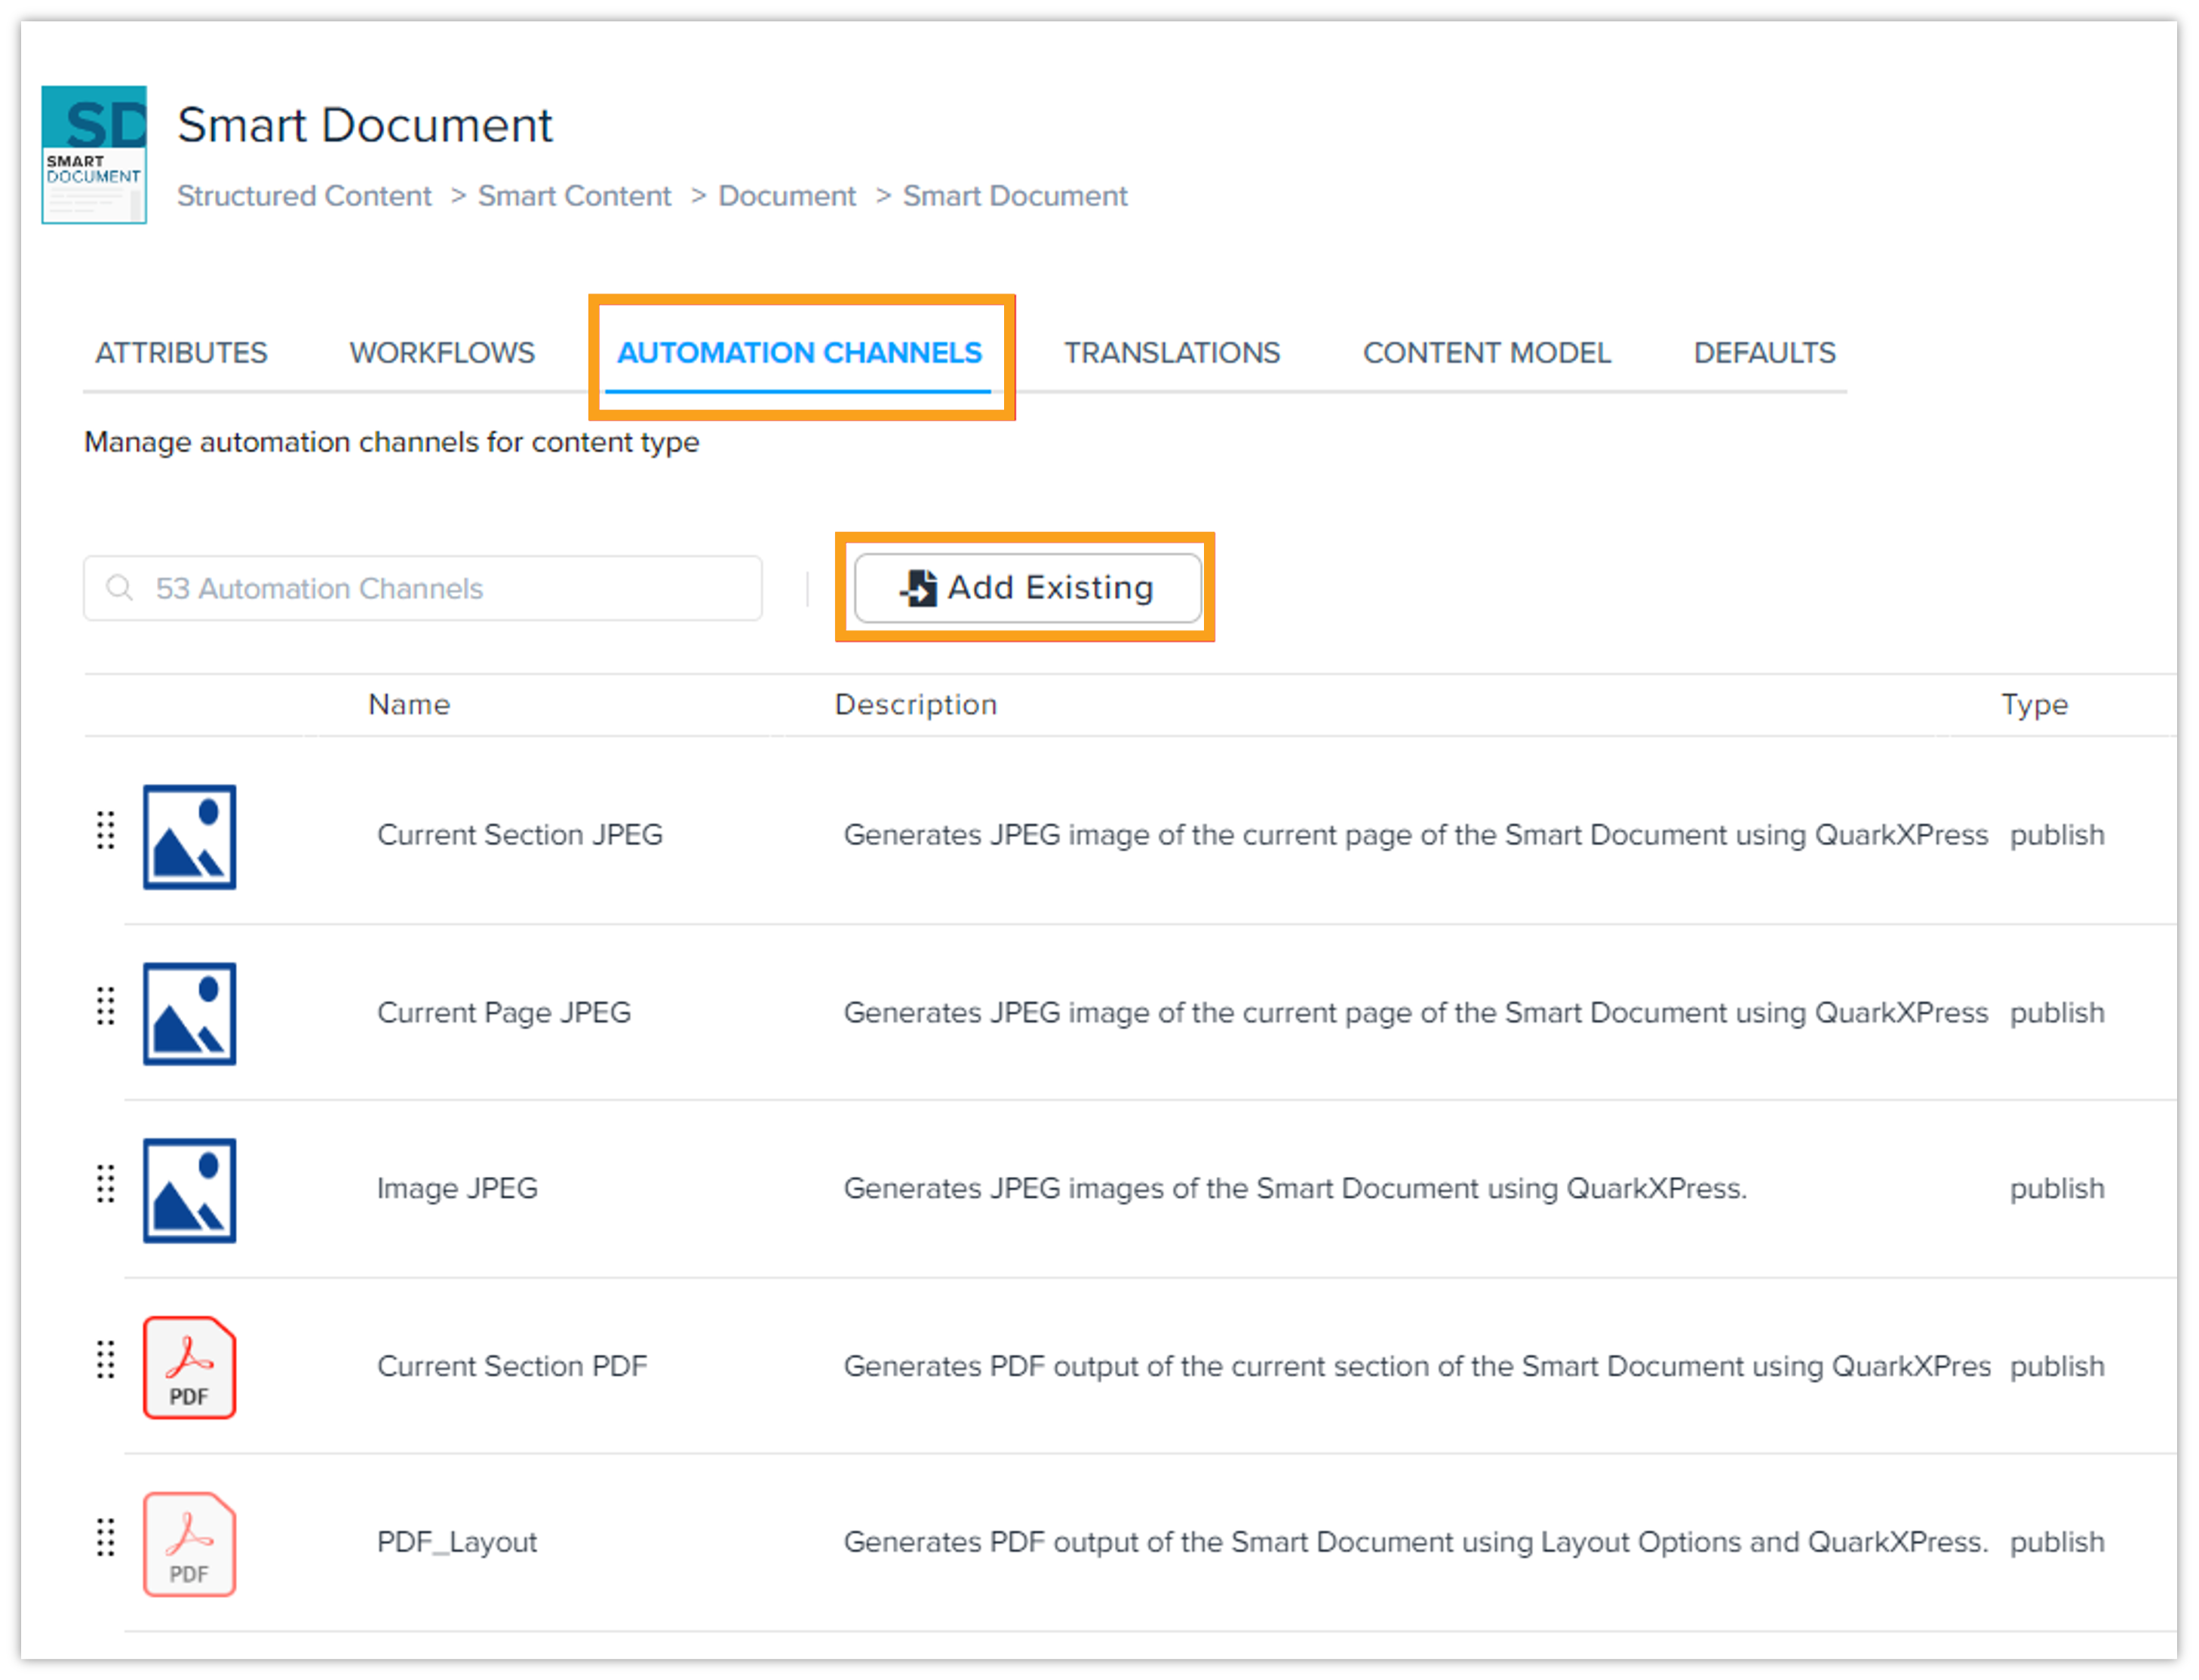
Navigate to automation channel tab under the selected content type and click the "Add Existing" button.
-
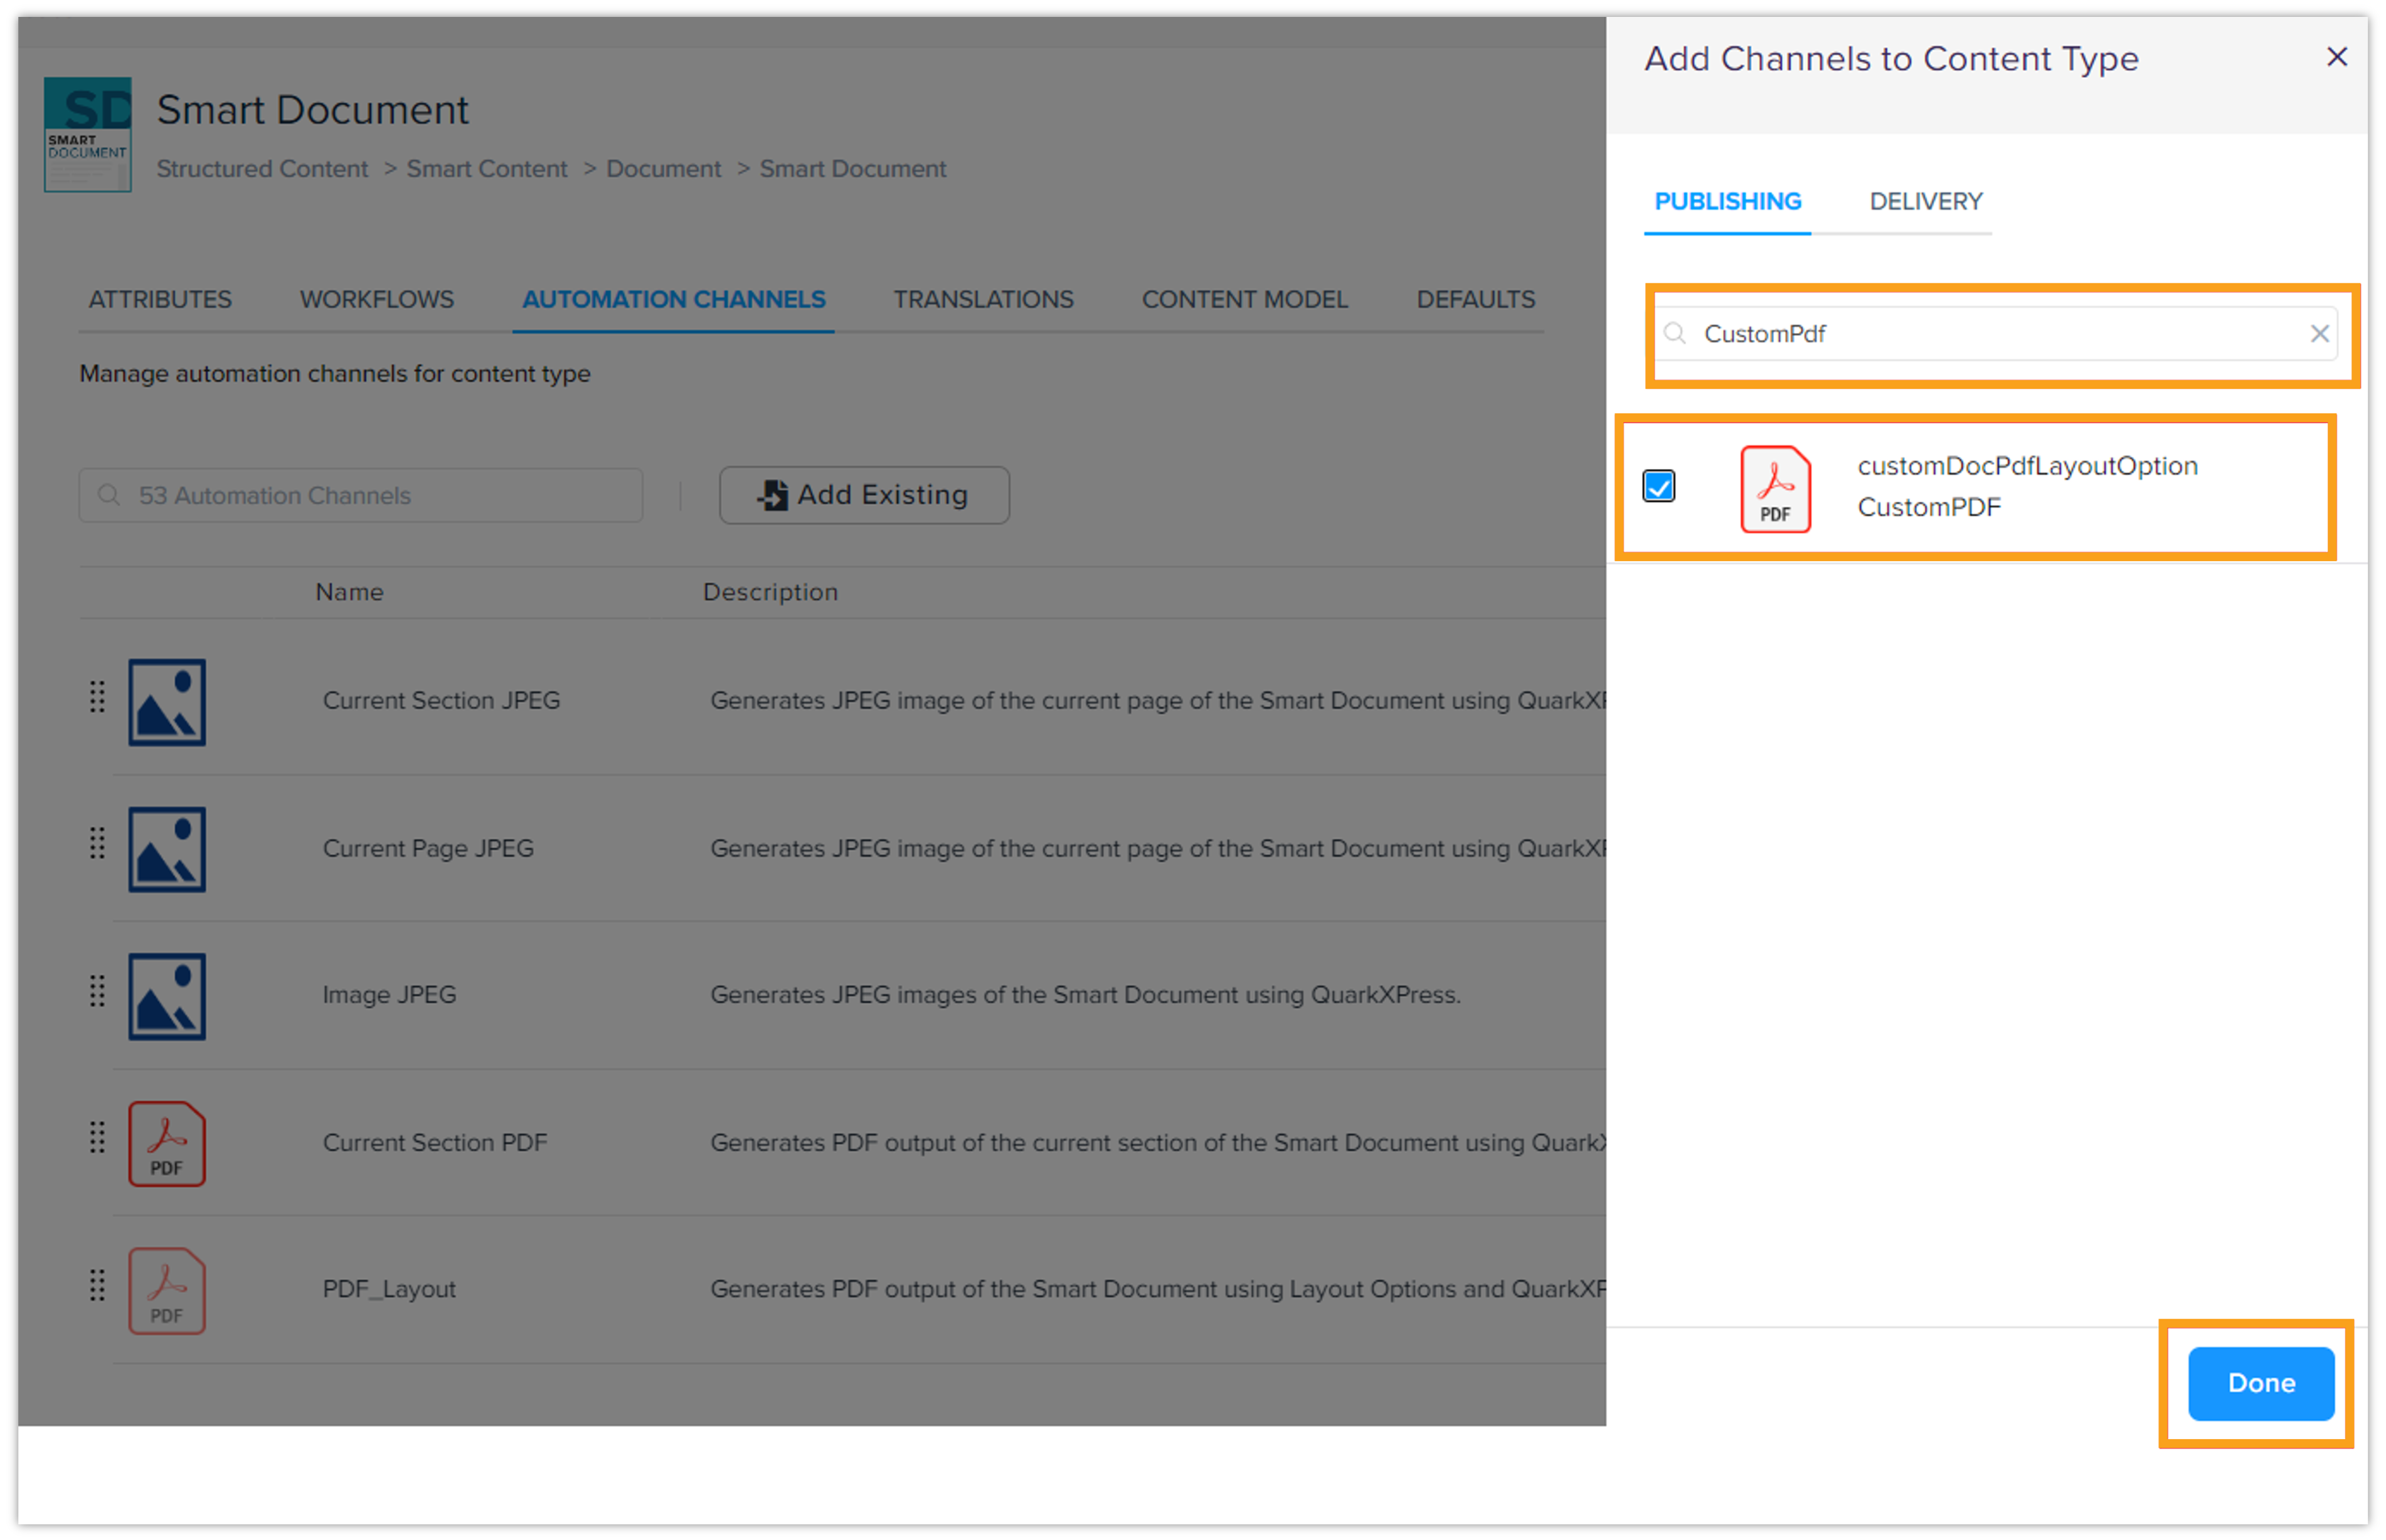
Use the search functionality to locate the duplicated publishing channel by its name. Enable the channel by selecting the checkbox next to it and click Done to save the changes.
-
After adding the channel, navigate back to the Automation Channels tab.
-
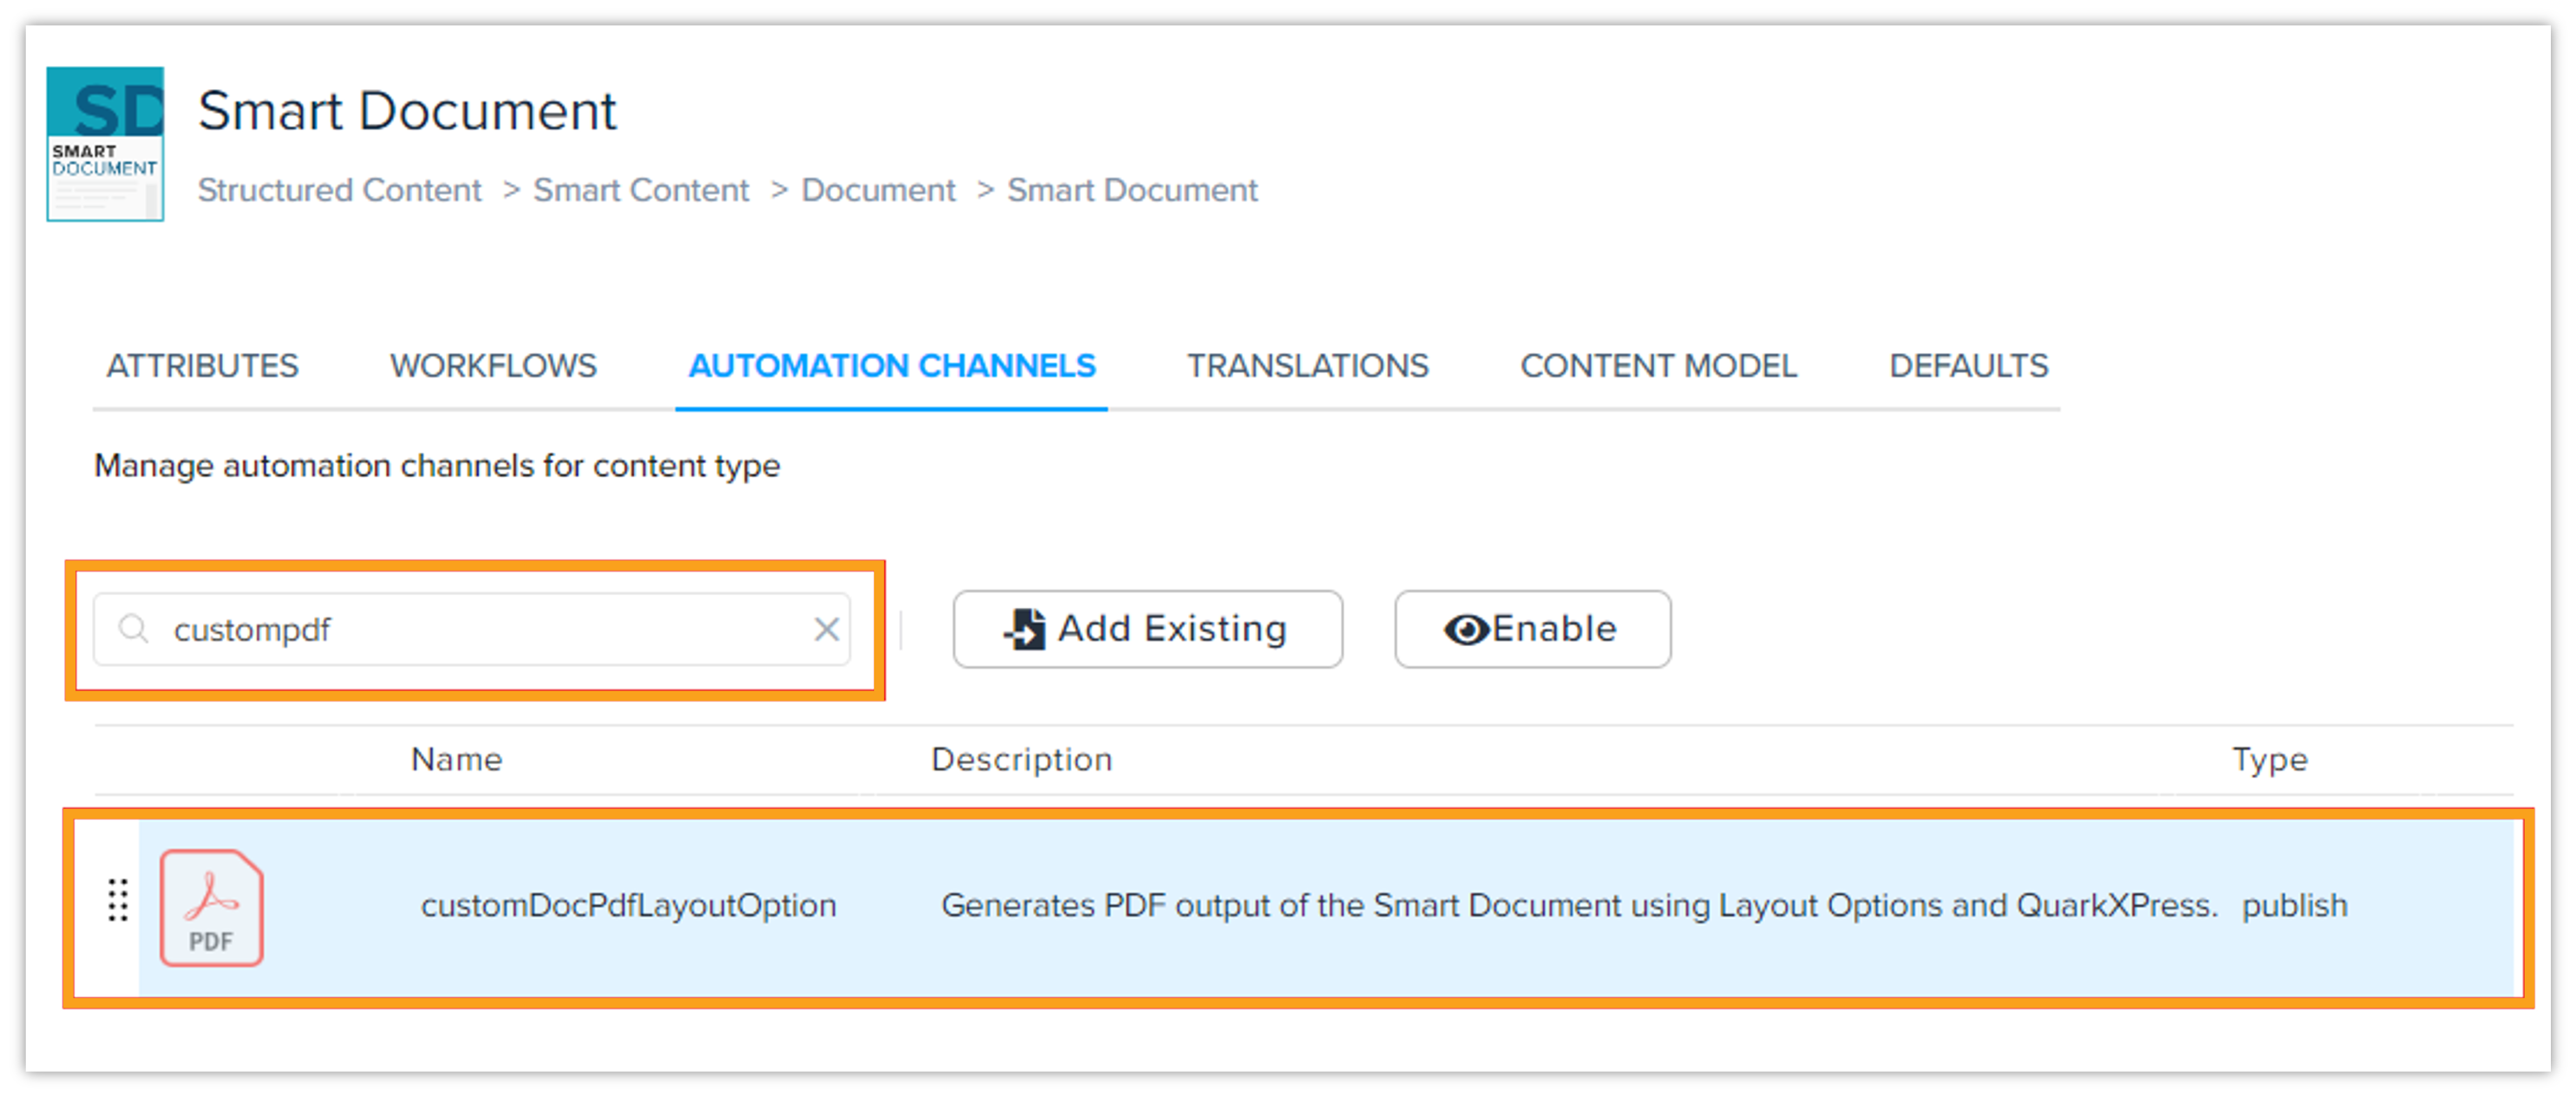
Use the search bar to locate the duplicated publishing channel by its name. Select the channel by clicking on it.
-
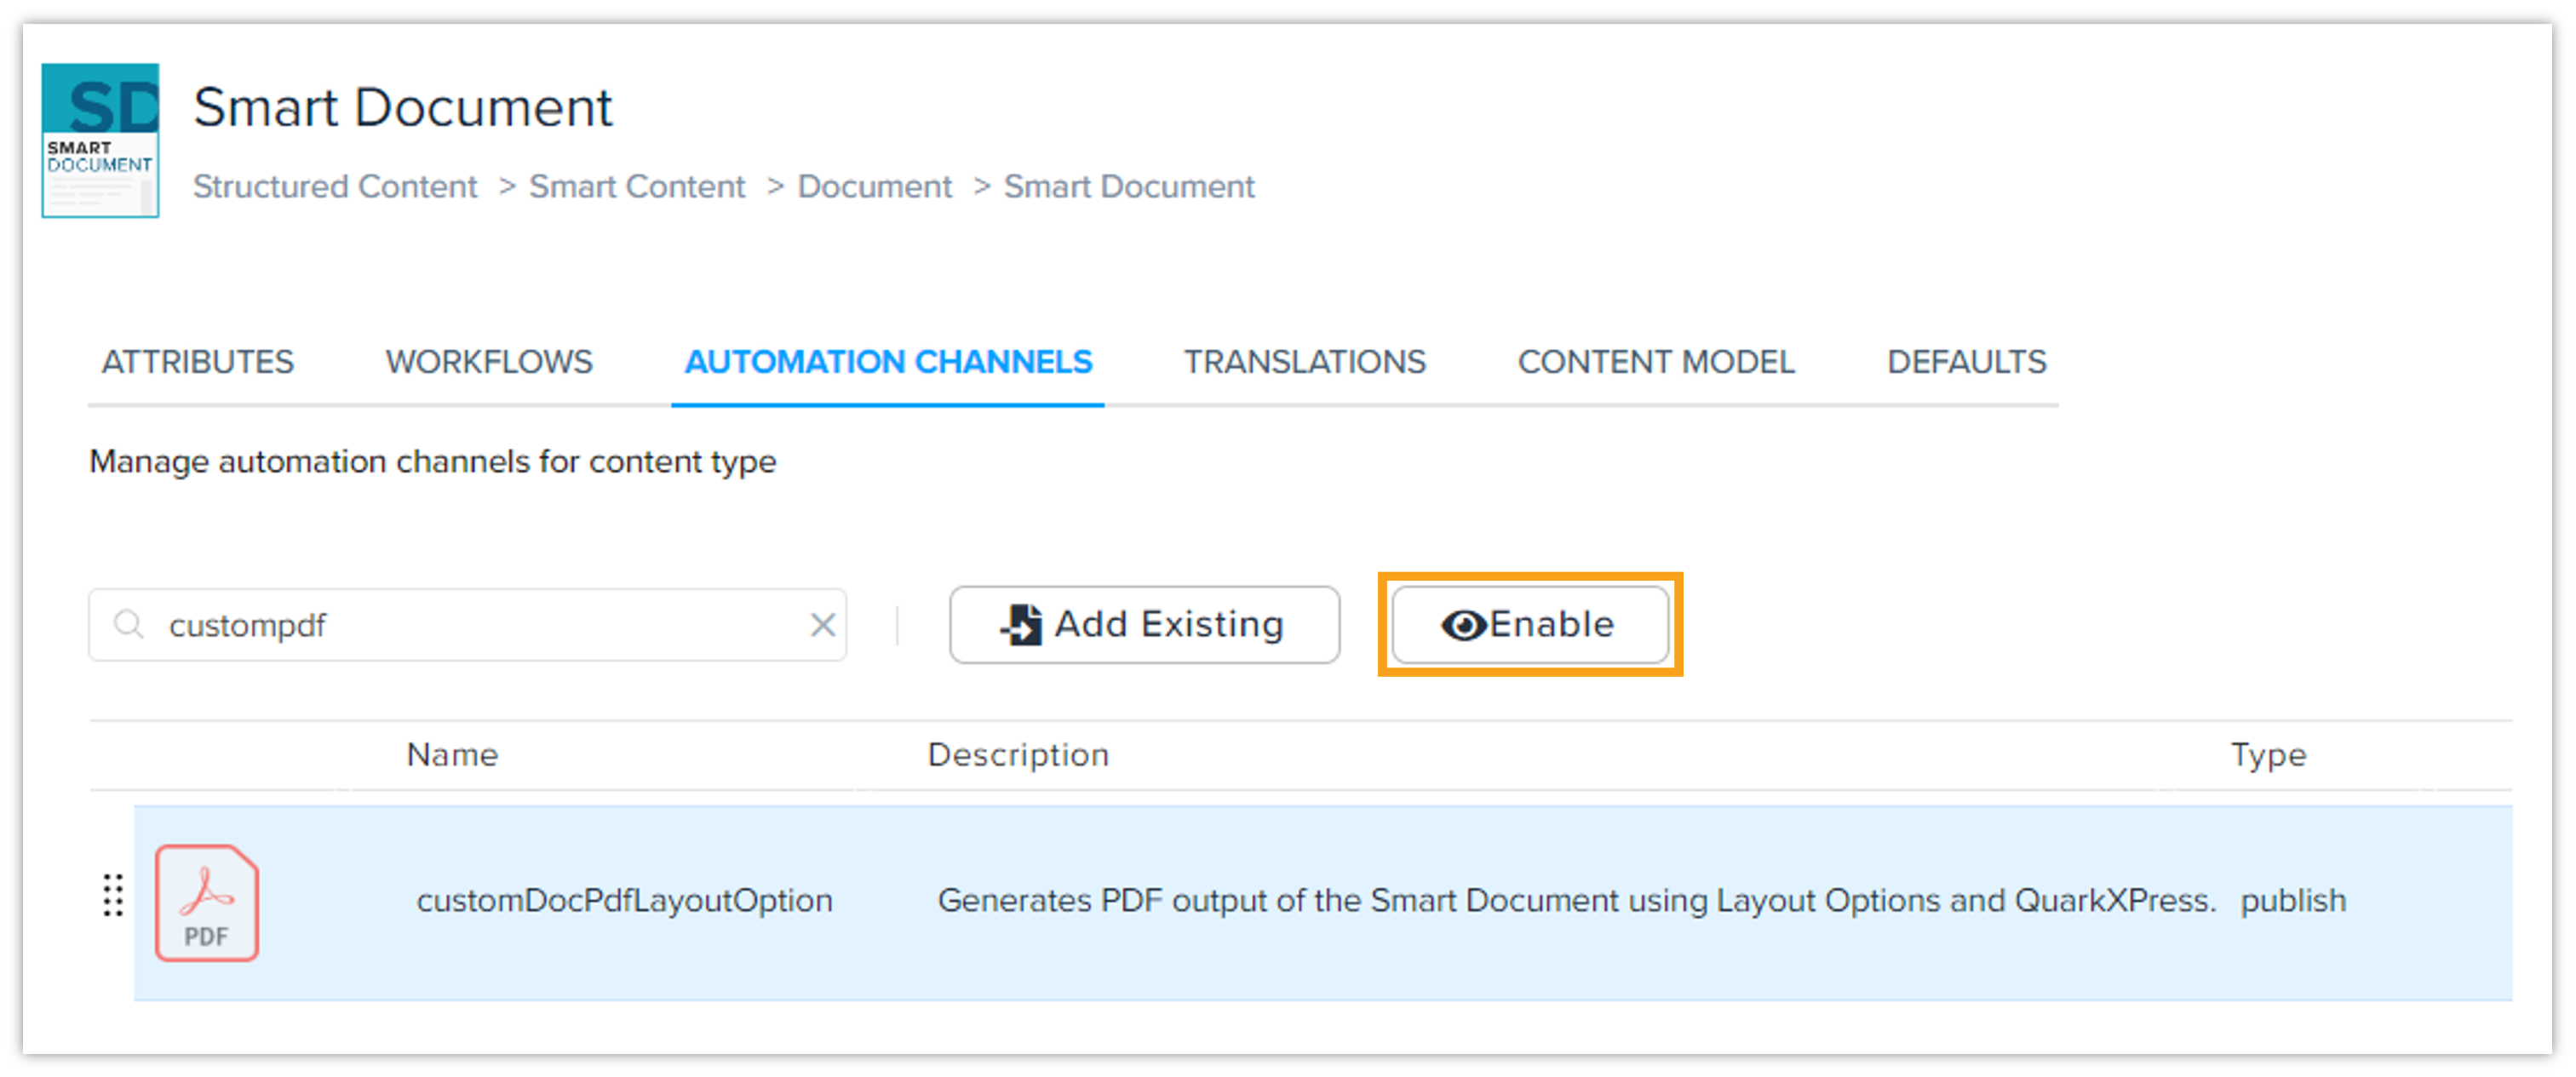
On the right side of the search bar, click the "Enable" button to activate the publishing channel for the selected content type.
-
The duplicated publishing channel is now successfully enabled for the Smart Document content type.
Publishing the Document
After linking the content type to the appropriate publishing channel, you can publish your document through the defined channel. The process is as follows:
-
Create a new document of content type "Smart Document":
-
You can create a new document using the content type "Smart Document".
-
-
Publish the content:
-
Navigate to the preview tab and select the desired publishing channel and preview the document.
-
You'll be able to preview the document successfully.